. Barracuda Backup - Overview . . . . . . . . . . . . . . . . . . . . . . . . . . . . . . . . . . . . . . . . . . . . . . . . . . . . . . . . . . . . . . . . . . . . . . . . . . . . . . . . . . 1.1 What's New in Barracuda Backup . . . . . . . . . . . . . . . . . . . . . . . . . . . . . . . . . . . . . . . . . . . . . . . . . . . . . . . . . . . . . . . . . . . . . . . . . . . 1.2 Deployment Options . . . . . . . . . . . . . . . . . . . . . . . . . . . . . . . . . . . . . . . . . . . . . . . . . . . . . . .
1.4.3.2.2 How to Restore a Microsoft Exchange 2010 Server by Overwriting an Existing Database . . . . . . . . . . . . . . . . . 1.4.3.2.3 How to Restore a Microsoft Exchange 2010 Server to a Recovery Database . . . . . . . . . . . . . . . . . . . . . . . . . . 1.4.3.2.4 How to Restore a Microsoft Exchange 2007 Database . . . . . . . . . . . . . . . . . . . . . . . . . . . . . . . . . . . . . . . . . . . . 1.4.3.2.5 How to Restore a Microsoft Exchange 2003 Database by Overwriting Existing Database . . . . .
1.4.6.5.1 How to Link a Barracuda Backup Server as a User or Reseller . . . . . . . . . . . . . . . . . . . . . . . . . . . . . . . . . . . . . 1.5 Security . . . . . . . . . . . . . . . . . . . . . . . . . . . . . . . . . . . . . . . . . . . . . . . . . . . . . . . . . . . . . . . . . . . . . . . . . . . . . . . . . . . . . . . . . . . . . . . 1.5.1 Backup Security and Site-to-Site Replication . . . . . . . . . . . . . . . . . . . . . . . . . . . . . . . . . . . . . . . . . . . . . . . . . . . . . . . . .
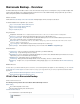
Barracuda Backup - Overview The Barracuda Backup is an affordable solution for onsite and remote data storage and access. Quickly and securely store data in multiple offsite locations. Barracuda Backup removes duplicate data inline at the block level to reduce traditional backup storage requirements up to 25 times, while reducing backup windows and bandwidth requirements. Where to Start Download the Barracuda Backup Service Quick Start Guide including English, German, and Japanese translations.
You must have an active Kroll Ontrack license.
Cloud UI Reports available in the Barracuda Backup web interface Size, Duration, Speed, and Type details are included in Reports Enhanced Backup and Restore reporting data organization Deployment Options In this Section Barracuda Backup Deployment Template Site-to-Site Deployment Site-to-Cloud Deployment Barracuda Cloud Storage Deployment Overview Related Articles Barracuda Backup Replacement and Data Migration Backing Up Data Sources Barracuda Backup Deployment Template This article refers to Barracuda
Click here to expand...
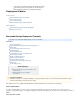
Other Backup Systems Note any servers with a backup agent or other backup product Note whether another backup solution will be running in parallel with the Barracuda Backup Server Physically Install and Configure the Barracuda Backup Server The following instructions apply to Barracuda Backup Server models 390 and above; model 190 is a desktop unit. Physically install the Barracuda Backup Server using the following steps: 1.
Standard Activation Use the following steps to link your Barracuda Backup Server: Click here to expand... 1. Go to http://login.barracudanetworks.com/, and log in. 2. Once logged in, click Backup Service in the left pane. If this is your first time linking a Barracuda Backup Server, click Start Backup Service Setup; otherwise, click Link a Barracuda Backup Server in the left pane. 3.
section Backing Up Data Sources. 1. Log into the web interface, go to BACKUPS > Sources, and click Add Computer. 2. Enter the backup source details: 3. 4. 5. 6. Enter an identifying label for the source device in the Computer Description field. In the Computer Name field, enter the FQDN or IP address of the source device; values must be resolvable on your local network. Select the device Computer Type. If appropriate for your data source, turn on Enable File Share Backups.
For additional information, refer to the Supported Data Types section. Create Backup Schedules Note that schedules are automatically created (with the default set to back up every day at 8:00PM) when a data source is created exce pt if a schedule specifying all data sources already exists. Now that you have configured your computers and data sources, you can create backup schedules, either individually or for all sources. If no schedule is created for a data source then it will not be backed up.
1. Go to the BACKUP > Exclusions page of the Barracuda Backup web interface. Click Add an Exclusion. 2. Fill in the information on the Add an Exclusion page: Exclusion Rule Name - Enter a descriptive label to identify the exclusion rule. Add Exclusions to Reports - Turn on to include exclusions in reports, and turn off if you do not want to include exclusions in the reports. Apply Recursively to Sub Directories - Specify whether to apply the exclusion rule recursively to sub directories.
Barracuda Backup Servers that are used to back up the data from one or more Barracuda Backup Servers are known as destinations. Data from one Barracuda Backup Server can be replicated to one or more destinations. To configure where data is replicated to from a Barracuda Backup Server, 1. Select the Barracuda Backup Server in the list to which you wish to add a replication destination, and go to the BACKUP > Replication page. 2. To add a replication destination, click Add a Target. 3.
Create Display Groups If you have multiple Barracuda Backup Servers, you can manage them through display groups. Go to the ADMIN > Display Groups page, and follow the on-screen instructions. Additional Information For additional information, refer to Display Groups Page. Site-to-Site Deployment This article assumes each Barracuda Backup Server in the deployment is physically installed and connected to the network.
Create a Barracuda Cloud Control Account You must have a Barracuda Cloud Control account to use Barracuda Backup. If you do not already have an account, follow these steps: 1. Go to the following URL: http://login.barracudanetworks.com/ 2. Complete the fields on the Create New Account page, and click Submit. Configure the IP Address and Network Settings By default, the Barracuda Backup Server is configured to obtain an IP address on your network using DHCP.
Backup Server Time Zone - The time zone where the currently selected Barracuda Backup Server is located Backup Server Location - The physical location of the Barracuda Backup Server including city, state, and country Backup Server Display Group - The display group in which the Barracuda Backup Server resides Manage your display groups - Click to add or remove a display group in the ADMIN > Display Groups page Create Display Groups This step is optional.
Exclude Files from a Backup This step is optional. You can create exclusion rules that use pattern matching to identify directory or file names that are not to be backed up. Files which are typically excluded from backups include temporary files, music, movies and other files which are not essential for business needs in the BACKUP > Exclusions page. Additional Information See the Exclusions Page for more information. Check Backup Reports View reports on an ongoing basis as needed.
This section describes how to configure replication. Important Only the Barracuda Backup Server 490 and higher can act as a backup to other Barracuda Backup Servers, although any Barracuda Backup Server can send data. Data can be backed up to both a second Barracuda Backup Server and to Barracuda Cloud Storage. Data that is backed up on a second Barracuda Backup Server cannot be backed up yet again onto another Barracuda Backup Server.
Additional Information See the Replication Page for more information. Restore Data from Replication Destinations Only the Barracuda Backup Server 490 and higher can act as a backup to other Barracuda Backup Servers, although any Barracuda Backup Server can send data. To restore from a replication destination, 1. Log into the Barracuda Backup web interface, and select the receiving Barracuda Backup Server from which to restore. 2.
3. Expand the sending Barracuda Backup Server to review its backup sources, and click on the server or computer from which to restore; the contents displays in the right pane: 4. In the Contents section, click Restore next to the file or directory for restore. The Restore window displays. In the Restore to field, enter the hostname or IP address of the restore to location. In the Path section, select the Original Path, or you can designate a new location: 5.
6. Click Start Restore. Once the restore is complete, go to REPORTS > Restore to verify the restore completed successfully. Configuring Replication Any Barracuda Backup Server can send data to another Barracuda Backup Server, however, only Barracuda Backup Servers 490 and higher can act as a backup to other Barracuda Backup Servers. For every Terabyte of data replicated, Barracuda Networks recommends a 1.5 Mbps or T1 connection.
Barracuda Backup Servers that are used to back up the data from one or more Barracuda Backup Servers are known as destinations. Data from one Barracuda Backup Server can be replicated to one or more destinations. Note: Before you can configure a destination, you must have the target Barracuda Backup Server serial number and replication code. To locate these values, select the target Barracuda Backup Server in the list, and go to the BACKUP > Replication page.
Configure the Barracuda Backup Server Use the following steps to configure your Barracuda Backup Server. Create a Barracuda Cloud Control Account You must have a Barracuda Cloud Control account to use Barracuda Backup. If you do not already have an account, follow these steps: 1. Go to the following URL: http://login.barracudanetworks.com/ 2. Complete the fields on the Create New Account page, and click Submit.
Link Your Barracuda Backup Server to an Account Your Barracuda Backup Server must be linked to your Barracuda Cloud Control Account before you can initiate data backups. To link your Barracuda Backup Server: 1. Go to this URL: http://login.barracudanetworks.com/ 2. Sign in with your Username and Password. 3. If Barracuda Backup is your default or only Barracuda Networks product, then the Barracuda Backup web interface appears. If not, click Backup Service at the top of the screen. 4.
Additional Information See the Schedules Page for more information. Create Data Retention Policies Data is retained based on a traditional grandfather-father-son (daily-weekly-monthly) rotation model. You can specify how long to keep daily, weekly, monthly, and yearly backups by creating data retention policies. Different retention policies can be created for different sets of data including files, data backed up by a Barracuda Backup Agent, and email messages.
before they are stored, and they remain encrypted until a restore is requested. Management Access Monitor Activity - You can check the user activity page periodically for authentication attempts, changes to settings, and updates to account information. Go to the ADMIN > User Activity Reports page to see all activity for an account, including logins and when a user has enabled or disabled replication. Restrict Logins by IP Address - You can restrict access to Barracuda Backup to one or more IP addresses.
See the Replication Page for more information. Barracuda Cloud Storage Deployment Overview You can deploy a Barracuda Backup Server with backups stored on Barracuda Cloud Storage. In the following image, a Barracuda Backup Server is located in a network and its backups are stored on Barracuda Cloud Storage: Storage Plans Barracuda Cloud Storage is available through either a subscription plan or by purchasing Unlimited Cloud Storage. In firmware release 5.
Create a Barracuda Cloud Control Account You must have a Barracuda Cloud Control account to use Barracuda Backup. If you do not already have an account, follow these steps: 1. Go to the following URL: http://login.barracudanetworks.com/ 2. Complete the fields on the Create New Account page, and click Submit.
If you want to assign it a static IP address instead, you can configure it using the console administration interface. If not, proceed to the section Configure Your Corporate Firewall: By default, the Barracuda Backup Server is configured to obtain an IP address on your network using DHCP. To configure the Barracuda Backup Server to use a static IP address: 1. Connect a monitor and keyboard to the Barracuda Backup Server. 2. Use your arrow keys to highlight the DHCP/Static field. 3.
5. Click Link a Barracuda Backup Server. 6. Enter your Serial Number and Linking Code from the sticker attached to the Quick Start Guide that shipped with your Barracuda Backup Server. These values are case sensitive. The Serial Number can also be found on a sticker on the back of the unit. Follow the on-screen prompts to complete linking and to supply your account information. 7. The linking process may take a few minutes to complete.
Microsoft Exchange Server Message-Level Backups Novell GroupWise Message-Level Backup Microsoft SQL Server Backup Microsoft Hyper-V Virtual Machines Windows System State Backup VMware Host Storage Linux File Systems using the Barracuda Backup Agent (Linux) Macintosh OS X, Linux/Unix, and Novelle NetWare Network Addressable Storage Related Articles Backing Up Data Sources Replicating Data Deployment Options Where Data is Backed Up You configure how and when your data is to be backed up.
the SYSTEM > Software Downloads page. Data sources that can be backed up using the Agent are automatically detected after the computer is identified on the BACKUP > Sources page The Agent searches the NTFS change journal to track modified, added, or deleted files rather than searching the entire volume to improve Agent backup speed. Microsoft Exchange Storage Group Backup The Barracuda Backup Agent (Windows) provides a full backup of the Exchange storage group for Exchange Server 2003 and 2007.
System State data might not include all of the information required to recover a system from a failure. Barracuda Networks recommends that all boot and system volumes be backed up in addition to System State. VMware Host Storage Add VMware® host storage, including host configuration and virtual machine images, as data sources for backup and restoration through Barracuda Backup. You must be running a licensed copy of ESX, ESXi, or vCenter version 4.
2. For Microsoft Windows and Novell Netware, you must enter both a username and password. For Mac OSX, Linux and UNIX (SSHFS), enter a username after you set up your SSH key. Alternately, you can download the Barracuda Backup Agent software from the SYSTEM > Software Downloads page (or in releases prior to 5.0, the SUPPORT > Software Downloads page), and install it on every computer to be backed up. For more information, refer to Barracuda Backup Agent (Windows) and Barracuda Backup Agent (Linux).
For GroupWise 8 and above, refer to GroupWise Message-Level Backups for detailed instructions for configuring message-level backups. Supported Data Types For additional information, refer to the Supported Data Types section. Create Backup Schedules Note that schedules are automatically created (with the default set to back up every day at 8:00PM) when a data source is created exce pt if a schedule specifying all data sources already exists.
Exclude Files from a Backup This step is optional. You can create exclusion rules that use pattern matching to identify directory or file names that are not to be backed up. Files which are typically excluded from backups include temporary files, music, movies and other files which are not essential for business needs. Use the following steps to create an exclusion rule: Click here to expand... 1. Go to the BACKUP > Exclusions page of the Barracuda Backup web interface. Click Add an Exclusion. 2.
STATUS Page BACKUP Page RESTORE Page REPORTS Page SYSTEM Page ADMIN Page STATUS Page This article refers to firmware version 5.0 and higher, except where noted. In this article: Backup Activity Section Storage Efficiency Statistics Local Storage Transfer History Status Indicators Related Articles Advanced Graphs (firmware version 5.3.00 and higher) Task Messages (Local UI login) The STATUS page provides an overview of the performance and health of your Barracuda Backup.
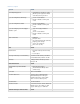
Storage Efficiency Statistics This section displays storage efficiency statistics: Table 1. Storage Efficiency Statistics. Table Value Description Raw Data Total amount of data sent to Barracuda Backup including revisions. Items Total items sent to Barracuda Backup. Messages Total messages sent to Barracuda Backup. Actual Storage The amount of actual storage space being used.
Table 2. Local Storage. Table Value Description For local storage, stored content displays in GB by: Raw Current Represents current content sent to the Barracuda Backup before deduplication processing. Raw Historic Represents all content up to the current date that has been sent to the Barracuda Backup. Actual Storage Represents the total content currently stored on Barracuda Backup.
Table 3. Transfer History. Table Value Description Cloud Transfer Remaining Displays any content waiting to transfer to the Barracuda Cloud Storage in bytes. Cloud Bandwidth Efficiency Represents all content up to the current date that has been sent to the Barracuda Backup based on the maximum data transfer rate of your connection. To limit Internet bandwidth consumption during peak usage times, set rate limits and schedule backups for non-peak hours.
been encountered as a result of your backup. Red indicators display when a local server is offline or when errors were generated during a backup. Mouse-over the indicators to see more details: How to Monitor Backup Status To check whether a Barracuda Backup Server is operating correctly, select it from the list of Barracuda Backup Servers in the left pane, and click STATUS.
If you need to link a Barracuda Backup Server to a different account, use the following steps to unlink the Barracuda Backup Server from the current account: 1. Enter the Barracuda Backup Server IP address to log in to the local web interface. 2. Go to the STATUS page, and in the Server Actions section, click Wipe Backup Server: 3. The message Wipe Started Successfully displays in the web interface. Once the unlinking process is in progress, a warning message displays: 4.
3. 4. Click Details to toggle additional information on or off. Processes and Services The following table describes the processes and services that display on the SYSTEM page: Backup Daemon responsible for performing backup functions. Restore Daemon responsible for performing restore functions. Netclient Process used to replicate data to another location. Netserver Process that receives data from netclient for box-to-box replication.
BACKUP > Sources Use this page to configure where data is backed up and in what manner: Identify systems to be backed up Select the type of data to be backed up Specify where data is backed up BACKUP > Replication Configure backup data replication to one or more other Barracuda Backup Servers.
BACKUP > Watched Files Use this page to add files to watch on a particular Barracuda Backup Server. File watch rules are used to monitor and send email alerts when specified files have not been changed often enough or appear smaller than expected. Setting Up Watched Files The seldomly used Watched Files feature has been deprecated in firmware versions 5.2, and will not be supported for new Barracuda Backup Servers. Note that existing Watched File Rules will continue to function as expected.
With source deduplication, organizations running Microsoft Hyper-V also benefit from Barracuda Backup. The Barracuda Backup Agent reduces the backup window by minimizing the amount of data sent to the Barracuda Backup Server by deduplicating the VHD files on the host server.
How to Back Up Microsoft Exchange Server 2013 How to Set Up Microsoft Exchange Server 2013 Message-Level Backup How to Set Up Microsoft Exchange Server 2003, 2007, 2010 Message-Level Backups This article refers to Barracuda Backup firmware version 4.3 and higher, and Microsoft® Exchange Server 2003, 2007, and 2010. For details on setting up Microsoft Exchange Server 2013 message-level backup, refer to the article How to Set Up Microsoft Exchange Server 2013 Message-Level Backup.
Server is running the minimum requirement for Exchange messagelevel backups.
3. Open the Microsoft knowledgebase article Build numbers and release dates for Exchange Server to determine the version and service pack level the Exchange Server is running; the minimum requirement for Exchange Server 2003 with Service Pack 1 is Version 6.5, Build 7226. 4. Go to Step 2. Exchange Server 2007 Version and Build Use the following steps to determine the version and service pack number on Exchange Server 2007. Click here to expand... 1.
If you are running Exchange Server 2010, use the following steps to determine the version number. Click here to expand... 1. Open the Exchange System Manager on the Exchange Server, expand Server Configuration, and click Mailbox; the Exchange Server version displays in the center pane: 2. Open the Microsoft knowledgebase article Build numbers and release dates for Exchange Server to determine the version the Exchange Server is running. 3. Go to Step 2. Step 2.
2. 3. 4. 5. Assign the service account permissions on the Storage Groups on your Exchange Server. Open the Exchange System Manager, click Servers, and then expand your server. Right-click First Storage Group, and click Properties on the Mailbox Store in the first storage group. Click on the Security tab, and add your backup service account to the Group or user names section of the Mailbox Store Properties; click on the backup service account name. 6.
7. Depending on replication policies and Exchange Server activity, it may be helpful to perform a group policy update on the Exchange Server to help replicate permissions. To do so, run the following command from the command line: gpupdate /force 8. Go to Step 3 to complete the set up. Set Up Exchange Server 2007 (Service Pack 1 or Above) Use the following steps to set up your Exchange Server 2007 to do message-level backups. Click here to expand... 1.
2. Assign the service account permissions to the Mailbox Databases on your Exchange server. 3. Open the Exchange Management Shell, and run the following command replacing with the Service Account username: Get-ClientAccessServer | Add-AdPermission -User -ExtendedRights ms-Exch-EPI-Impersonation Get-MailboxDatabase | Add-AdPermission -User -ExtendedRights ms-Exch-EPI-May-Impersonate 4.
4. 5. Go to Step 3 to complete the set up. Set Up Exchange Server 2010 Use the following steps to set up your Exchange Server 2010 to do message-level backups. Click here to expand... 1. Create an account to be used by Barracuda Backup to access emails in each mailbox: Service Type Account It is strongly recommended that you use a service type account and not your administrator account to prevent inherited deny permissions from causing issues.
2. To assign the service account impersonation rights for Exchange, open the Exchange Management Shell, and run the following command, replacing with the Service Account username: 3. Depending on replication policies and Exchange Serer activity, it may be helpful to perform a group policy update on the Exchange Server to help replicate permissions. To do so, run the following command from the command line: gpupdate /force 4. Go to Step 3 to complete the set up. Step 3.
Halted Operation 2. Back Up Database Files Operation 3. Transaction logs Operation 4. Log Files are Truncated Operation 5. Backup Operation Complete Related Articles Restore an Exchange 2007 Database Restore an Exchange 2003 Database by Overwriting Existing Database Restore an Exchange 2003 Database using a Recovery Storage Group Exchange Storage Group The Barracuda Backup Agent for Microsoft Exchange Server provides a full backup of the Exchange storage group.
Operation 4. Log Files are Truncated Once the log files are stored to the backup set, they are no longer needed on disk. During full and incremental backup operations, ESE truncates the log files on disk once transaction log back up is completed. The lower of either the checkpoint log generation or the log generation listed in the database header for the current full backup determines which log files ESE truncates. Operation 5.
You must complete both Step 1 and Step 2 to back up the passive database. Step 1. Configure the Barracuda Backup Agent Use this section to configure the Barracuda Backup Agent (Windows) to detect passive databases. 1. Log in to the Exchange Server where the passive database to be backed up resides. 2. Go to Start > Administrative Tools > Services to open the Services console. 3. Right-click the Barracuda Backup Agent service, and click Stop: 4.
enableReplicationService=true 7. 8. Save the file and close Notepad. In the Services Console, right-click the Barracuda Backup Agent service, and click Start to restart the service: Step 2. Configure the Data Source Use this section to configure data sources on the Barracuda Backup Server. 1. Log in to the Barracuda Backup web interface, and select the associated Barracuda Backup Server in the left pane. 2. 3. 4. Go to the BACKUP > Sources page, and locate the Exchange Server data sources.
database: 5. Click Save. The Exchange Server passive database is added as a data source. The Sources page now displays the Microsoft Exchange Replication item as a data source to be backed up: How to Back Up Microsoft Exchange Server 2013 This article refers to Barracuda Backup firmware 5.3 and higher, and Microsoft® Exchange Server 2013.
5. Barracuda Backup Server can communicate with the installed Agent. 6. In the Item Selection section, choose to back up all items or specified items (Exchange Databases): 7. Click Save. The Exchange Server is added as a data source: How to Set Up Microsoft Exchange Server 2013 Message-Level Backup This article refers to firmware version 5.3 and higher, and Microsoft® Exchange Server 2013.
2. In the new user mailbox window, enter the new user details, and click Save. 3. Double-click the new user mailbox to open the Properties: 4.
Assign Impersonation Rights to the Account To assign the account impersonation rights for Exchange: 1. Open the Exchange Management Shell and run the following command, replacing with the Service Account username created in the previous section: New-ManagementRoleAssignment -Name:BarracudaBackup -Role:ApplicationImpersonation -User: 2. Optional. It is good practice to perform a group policy update on the Exchange Server to replicate permissions.
Add the Exchange Server to Barracuda Backup 1. Log in to the Barracuda Backup web interface, go to the BACKUP > Sources page, and click Add Computer. 2. Enter the Exchange Server details: a. Computer Description - Enter a label to identify the system. b. Computer Name - Enter the Exchange Server IP Address or FQDN. c. From the Computer Type drop-down menu, select Microsoft Windows. d. Specify whether to enable file share backup: 3. Click Save. The Add Data Source page displays. 4.
8. Click Save. Microsoft Hyper-V In this Section How to Set Up Microsoft Hyper-V Virtual Machine Backups How to Set Up Hyper-V 2008 Clustering How to Exclude Individual Virtual Machines from a Hyper-V 2008 Cluster Backup How to Set Up Microsoft Hyper-V Virtual Machine Backups This article refers to Barracuda Backup Server firmware version 5.0 and higher, and Microsoft® Hyper-V 2008, 2008 R2, 2012, and 2012 R2.
2. On the SYSTEM > Software Downloads page, download Barracuda Backup Agent (Windows) to each Hyper-V Server you want to back up. 3. On the Hyper-V Server, double-click the Agent program to launch the installer. 4. In the Installation Manager, click the Install icon. 5. Click Next to install the software in the installation directory. 6. When installation is complete, click OK to close the window. Run the Barracuda Backup Agent as a Service Once installed, complete the following to run the service: 1.
In this article: Install the Barracuda Backup Agent Run the Barracuda Backup Agent as a Service Set Up Child Partition Snapshot Add the Hyper-V Server Related Articles How to Restore a Microsoft Hyper-V Virtual Machine How to Set Up Microsoft Hyper-V Virtual Machine Backups How to Exclude Individual Virtual Machines from a Hyper-V 2008 Cluster Backup The Barracuda Backup Agent provides application-aware backups for Microsoft Hyper-V hypervisor-based virtualization systems and provides s u pport for open fi
Computer Type - Select Microsoft Windows from the drop-down menu. 3. Click Save. The Add Data Source page displays. 4. Select Barracuda Agent Software as the Data Type, and click Test Software Connectivity to verify connection to the Backup Agent: 5.
This article refers to Barracuda Backup firmware version 5.3 and higher, and Microsoft ® Hyper-V 2008 and 2008 R2 hypervisor-based virtualization systems. This article assumes Hyper-V is installed and configured. Related Articles How to Set Up Hyper-V 2008 Clustering How to Set Up Microsoft Hyper-V Virtual Machine Backups In some instances it may be necessary to exclude certain virtual machines from backup when implementing a clustered Hyper-V environment.
Modify Your Backup Rate Limit (Optional) Exclude Files from a Backup (Optional) Create Data Retention Policies Check Backup Reports Related Articles Schedules Page Retention Policies Page Backing Up a SQL Server Database Using VSS Add the SQL Server as a Data Source Use the following steps to configure the SQL Server and data sources using the Barracuda Backup Agent (Windows): 1. 2. 3. 4. 5. Log in to Barracuda Backup, and select the associated Barracuda Backup Server in the left pane.
the transaction log backup until the maximum threshold level is met, or the queue size drops below 1 GB. Modify Your Backup Rate Limit (Optional) Rate limits control the data replication rate to Barracuda Cloud Storage or other offsite storage locations. You can limit Internet bandwidth consumption during peak usage times, and schedule backups for non-peak hours.
4. Select the desired Removed Files Rule setting, and click Save. When data is removed according to a retention policy, it is deleted from both the local Barracuda Backup Server and the offsite storage locations. Removed files that have been backed up using Network File Shares Protocol or SSHFS may be retained for a longer period of time, according to the configuration. Otherwise, once your data has been purged, it is gone forever.
For SQL Server 2008 or 2008 R2: [configuration] vssSqlVersion=10 For SQL Server 2005 SP1 or higher: [configuration] vssSqlVersion=9 5. 6. Save and close the file.
6. Open Services once again. 7. Right click on the Service Barracuda Backup Agent, and click Start. The Status field should display as Started. VSS is now enabled to implement full and differential SQL database backup and restore operations. VMware In this Section How to Set Up a VMware Server and Guests VMware Data Recovery Backup and Restore Permissions How to Set Up a VMware Server and Guests This article applies to Barracuda Backup firmware version 4.2 or higher, and VMware® 4.
Changed Block Tracking To avoid warning messages when setting up a VMware backup, you can enable Changed Block Tracking (CBT). When enabled, CBT displays in the data source list: Configure the Data Source Use the following steps to add a computer and configure the data source through Barracuda Backup: 1. Log in to Barracuda Backup as the administrator, and go to the BACKUPS > Sources page. 2.
This article refers to Barracuda Backup firmware version 5.0 or higher, and VMware® ESX/ESXi host machines, or vCenter Server version 4.0 or higher with vSphere except where noted.
The recovery operation requires privileges for operations on hosts, networks, and datastores. You must apply this new role to the Datacenter object or higher in the VMware vCenter Server hierarchy for the user specified in the VMcuser option and Propagate to Child Object must be turned on when adding the permission. To create a vCenter Server role for backup and recovery operations, log in to the vCenter Server using the vSphere Client, and add the permissions listed in Table 3: Table 3.
Virtual Machine(3) State(3) Create snapshot Remove snapshot Revert to snapshot Notes: (1) Guest Operations permissions are necessary only if you are using Data Protection for VMware to protect Microsoft Exchange Server or Microsoft SQL Server applications running inside a virtual machine guest. (2) vSphere 5.0 only. (3) (4) vSphere 4.0 only. vCenter Server 4.1 only.
Controllers, and is performed by backing up the System State on those servers. Barracuda Backup utilizes the Barracuda Backup Agent (Windows) to back up and restore the Microsoft Windows System State. Back up the System State to have a backup of critical system-related components. The System State backup contains the following: Local Registry COM+ Class Registration Database System Boot Files Active Directory Database File (NTDS.
Related Articles How to Create a Pre- or Post-Agent Backup Command Batch File or Script Configuring a Replication Destination Backing Up Using PowerShell and STSADM Additional Resource Back up a farm configuration (SharePoint Foundation 2010) SharePoint Governance and Manageability Backup: Stsadm operation (Office SharePoint Server) You can back up Microsoft SharePoint databases using Barracuda Backup for storage. The Barracuda Backup Agent provides a complete backup of Windows SharePoint Services (WSS).
6. Backup Schedules To replicate to another Barracuda Backup Server, refer to Configuring a Replication Destination. 7. Click Save.
Web Analytics Data Processing Service Web Analytics Web Service 3. At a command prompt, enter the following command, and then press Return: iisreset /stop 4. Use the Barracuda Backup Agent to back up the server farm Configuration, Central Administration, Service Applications and Search databases. 5. At a command prompt, enter the following command, and then press Return: iisreset /start 6. Start the following services: SharePoint 2010 SharePoint 2007 WSS 3.
For a full or differential back up of an individual database, web application, or the entire SharePoint farm, use the backupmethod param eter: stsadm.exe -o backup -directory -BackupMethod [Full | Differential] -Item 4. Allow the backup to complete. 5. Go to the location where you backed up your content; the backup file should display in the folder.
stsadm.exe -o backup -directory "F:\SharePointBackup" -backupmethod [Full | Differential] -overwrite -item databasename Site Collection Backup - PowerShell Command Site Lock For a site collection, you must manage the site lock to block updates or deletions to the site collection during a backup.
This article refers to Barracuda Backup firmware 3.0 and higher. The Barracuda Backup Agent does not support IBM® Domino ® or IBM Notes ®, however, the Barracuda Backup Agent (Windows) protects IBM Domino databases on a Microsoft ® Windows® 2003 or Windows 2008 platform using File System backup. Barracuda Backup does not support IBM Domino transaction logging.
This releases all open sessions and closes most open files. See How to Create a Pre- or Post-Agent Backup Command Batch File or Script if you wish to create a pre-backup command batch file. How to Create a Pre- or Post-Agent Backup Command Batch File or Script This article refers to firmware 5.3 and higher. This articles applies to the Barracuda Backup Agent (Windows) and BarracudaBackup Agent (Linux) .
This article refers to Barracuda Backup firmware 4.2 and higher, and Novell® NetWare® Server and GroupWise™. In this article: Requirements Configure the GroupWise Server Generate a GroupWise Trusted Key Add the GroupWise Server as a Data Source Retain Emails Related Articles How to Restore Exchange and GroupWise Messages Additional Resource GroupWise Administration Guide Set up your Novell NetWare Server to complete GroupWise message-level backups with a Barracuda Backup Server.
create a trusted application and its associated key in ConsoleOne for use with both Linux and Windows trusted applications. Use the following steps to generate a trusted key: 1. Open ConsoleOne. From the Tools menu, point to GroupWise System Operations, and click Trusted Applications: 2. The Configure Trusted Applications dialog box displays. Click Create: 3.
4. In the Name field, type BitLeap Backup, and enter a description for the trusted application in the Description field. 5. Leave the TCP/IP Address field blank to allow the trusted application from any server, or, to restrict the location from which the trusted application can run, click the Edit icon to the right of the field, and in the Edit Network Address dialog box, specify the IP address or DNS hostname of the trusted application server. Click OK to save your settings and close the dialog box. 6.
This article refers to Barracuda Backup firmware version 5.0 or higher, and Macintosh OS X. In this article: Create a Root Account Log in as the Root User Set up SSH Key for Mac Additional Resource Enabling and using the "root" user in Mac OS X By default, the root account on Macintosh OS X Servers is disabled. If a user uses the admin account to back up content to Barracuda Backup, they may encounter a warning message stating that some files cannot be backed up.
4. Enter the password again, and click Verify. 5. Click the lock to prevent changes. Log in as the Root User Log in using the root account based on your software release. Mac OS X v10.2 or Later 1. If you are logged in, choose Log Out from the Apple menu. 2. If you are logging in from a list of usernames with pictures, click Other. 3. In the Name field, type: root 4. In the Password field, type the password you defined earlier. Mac OS X v10.0 to v10.1.
Related Articles Barracuda Backup Agent (Linux) Additional Resource Ubuntu OpenSSH Server sshd Installation Backed Up Content This article describes how to back up Linux/UNIX-based file systems, such as Red Hat, Ubuntu, or SUSE, using SSHFS. Before backing up data, verify that you have adequate permissions to the folder you intend to back up. Note that SSHFS cannot back up open or locked files. Add the Linux Server Use the following steps to add the Linux Server to Barracuda Backup.
6. Enter the Username for the system account that is to have access to back up data. 7. In the To backup data on Linux or Unix based servers section, copy the commands to your clipboard. 8. On the Linux Server, determine the location of the ssh directory, including the authorized_keys file, in the user's home directory: If a username different than root is used, place the ssh directory, including the authorized_keys file , in the user's home directory.
. 12. Run the following command to restart sshd: /etc/init.d/sshd restart Depending on the Linux Server distro, it may be necessary to disable SELinux enforcement using the command: echo 0 > /selinux/enforce 13. In the Barracuda Backup web interface, click Save at the top of the page; the Add Data Source page displays. Add Linux Server Data Sources Use the following steps to select the Linux Server folders you wish to back up. 1.
Related Articles Enable Changed Block Tracking through the Barracuda Backup Web Interface Getting Started with Replication Restore a VM to Original Location Restore a VM to Alternate VMware Host not available through the Barracuda Backup Service Additional Resource Changed Block Tracking (CBT) on virtual machines Enabling Changed Block Tracking (CBT) on virtual machines Use Changed Block Tracking (CBT) to perform incremental backups on virtual machines running on VMware ESX/ESXi.
backup window times. In Virtual Machine File system (VMFS) partitions, CBT can identify all disk sectors that are in use. Additionally, subsequent replication efficiency and speed are improved. Barracuda Backup access CBT through the vSphere APIs for Data Protection (VADP) by requesting the changed VMkernel return blocks of data on the virtual disk since the last backup snapshot. Requirements To enable CBT, verify the following is true for your environment: The host must be ESX/ESXi 4.
4. 5. When Enable CBT is turned Off, then CBT does not display next to the virtual machine name. Click Enable CBT to turn enable Changed Block Tracking On: 6. Click Save to save your backup settings. Use Changed Block Tracking (CBT) to perform incremental backups on virtual machines running on VMware ESX/ESXi. CBT identifies and tracks block changes since the last backup, and stores these changes in log form, greatly reducing the number of backup windows and improving backup window times.
How to Back Up Network Addressable Storage - NAS This article refers to firmware version 4.3 and higher. In firmware version 5.0 and higher, with CIFS backups, Barracuda Backup is able to back up access control lists (ACLs).
13. To replicate to the cloud, turn on Replicate to Barracuda Cloud Storage; note that if you have globally selected to replicate to the cloud, you cannot change this setting. Replication If you wish to set up replication to another Barracuda Backup Server, turn on Replicate to Other Barracuda Backup Servers, and click Add a new Backup Server. For detailed steps, refer to Configuring a Replication Destination. 14. Click Save at the top of the page.
(Linux) on your local Linux system or server. Replicate Data If you are replicating data to another FirstClass Mail Server, you must disable mirroring when backups run. You can run pre- and post commands to stop and start this process. Permissions To run these commands you must have permissions to the FCP utility fcputility.
4. 5. Save and close the file. 6. Enter the following command to restart the Agent: # /etc/init.d/bbagent start How to Back Up NSS Mounts with the Barracuda Backup Agent (Linux) This article refers to Barracuda Backup firmware version 5.3 and higher, the Barracuda Backup Agent (Linux) , and the Novell Storage Services (NSS) file system. Back up NSS mounts using the Barracuda Backup Agent (Linux). Configure the Agent Use the following steps to configure the Barracuda Backup Agent (Linux): 1.
Related Articles Configuring a Replication Destination Temporarily Disabling a Destination How to Manage the Data Queue Why Data is not Replicating to an Offsite Location Barracuda Backup Servers that are used to back up data from one or more Barracuda Backup Servers are known as destinations. Data from one Barracuda Backup Server can be replicated to one or more destinations. Backup Data Replication Configuration Configure backup data replication to one or more other Barracuda Backup Servers.
Important Only the Barracuda Backup Server 490 and higher can act as a backup to other Barracuda Backup Servers, although any Barracuda Backup Server can send data. Data can be backed up to both a second Barracuda Backup Server and to Barracuda Cloud Storage. Data that is backed up on a second Barracuda Backup Server cannot be backed up yet again onto another Barracuda Backup Server. For every Terabyte of data replicated, Barracuda Networks recommends a 1.5 Mbps or T1 connection.
How to Temporarily Disable a Destination You can temporarily disable the site-to-site replication feature for one or more destinations. If it is disabled, nothing is sent from the Barracuda Backup Server to the destination until the feature is enabled or until 24 hours have passed. This allows you to move the destination system to a remote location, say, without getting backup errors.
Schedules Page This article refers to Barracuda Backup firmware version 5.0 and higher. In this article: Data Backup Adding a Schedule Schedule Options Once you configure computers and data sources, create backup schedules, either individually or for all sources. If no schedule is created for a data source then it will not be backed up. Data sources that do not have a schedule applied display at the top of the page in a yellow note box.
Field Description Schedule Name Enter a label to identify the backup schedule.
Items to Back Up Schedule Timeline Turn on Apply to All Computers and Data Sources for this Barracuda Backup Server to apply this schedule to all content Turn off Apply to All Computers and Data Sources for this Barracuda Backup Server and expand and select specific items to apply this schedule to a specific data source or group of data sources: Turn on the days on which to run the backup:
Daily Backup Timeline Enter the start time; turn on Repeat if you wish to specify a time period and end date to repeat the backup: Multiple Daily Backups If you turn on Repeat, you can run multiple backups daily.
Once you are satisfied with your new schedule, click Save. The new schedule displays on the BACKUP > Schedules page: Schedule Options Once you create a backup schedule, you can edit, delete, or immediately run a backup: Edit Schedule ( ) icon - Click to access the Edit Backup Schedule page. Make the desired modifications to the schedule, and then click Save at the top of the page.
Edit Rate Limit ( ) icon - Click to edit the rate limit. Select from the options listed in the following table: Option Settings Details Default Rate Limit Full Speed - Uses 100% of available bandwidth Smart Mode - Drag the Percent of Bandwidth bar to specify the rate limit; click Test bandwidth to verify your setting Kb/s or Mb/s - Specify the rate limit in Kilobits or Megabits per second Specify the default rate limit.
To edit an existing exclusion rule, go to the BACKUP > Exclusions page of the Barracuda Backup web interface, and click the Edit Exclusion ( ) icon following the exclusion rule you want to edit. Make the desired changes, then click Save. To delete an exclusion rule, go to the BACKUP > Exclusions page of the Barracuda Backup web interface, and click the Remove Exclusion ( ) icon following the exclusion rule you want to remove. Click OK to confirm you want to remove the rule.
Backup retention policies can be created for different sets of data including virtual machines, data backed up by the Barracuda Backup Agent (Exchange, SQL, Hyper-V, System State), and email messages. You can create one policy for all of the computers and data sources on Barracuda Backup or create multiple policies for each data source.
Retention Calendar - Display the timeline based on the values in the Revisions Timeline. Click Show previous years to view prior year retention timelines. Removed Files Rule (only applies to data backed up using file-based protocol (CIFS) or SSHFS) - The last revision of a removed file that was backed up from a network file system (using CIFS, SSHFS) is kept for the longest revision timeline specified.
Related Articles Understanding Retention Policies How to Create Retention Policies Creating Effective Retention Policies Offsite vaulting leverages Barracuda's replication technology to offload up to twelve monthly and seven yearly revisions to an offsite location, freeing up disk space on your local Barracuda Backup Server. This feature maintains your organization's compliance with long retention policies, allowing you to save more daily and weekly revisions.
Related Articles Understanding Retention Policies How to Create Retention Policies Retention Policy Example Understanding Barracuda Offsite Vaulting (firmware version 5.4 and higher only) Important Before defining data retention policies, make sure you have a clear understanding of data and email message compliance rules as well as your organization's record retention policies.
SQL Server Database Never 1 month Never Never Never Removed Files Rule If you would prefer not to keep removed files for the entire retention period, you specify when removed files should be purged using the Removed Files Rule: Follow the revisions timeline above (default) - Directs Barracuda Backup to follow the rules set in the Revisions Timeline Manually set when removed files are purged - When selected, you specify the additional amount of times to keep removed files.
Changing Retention Policies If you make changes to your retention policy, the updates take effect within 24 hours, at which time, any excess data based on your new policy settings is removed from your device. Note that the removal process can take some time depending on the amount of data. View progress in the STATUS page. Watched Files Page This article applies to Barracuda Backup firmware 5.1 and earlier only. The seldomly used Watched Files feature has been deprecated in firmware versions 5.
Barracuda LiveBoot in the Cloud Barracuda copy.
3. Click Restore to the right of the revision to restore. 4. In the Restore dialog box, select the following options: Restore to - Select Original Location Overwrite - Turn On to overwrite existing data for this virtual machine at the source 5. Click Start Restoring. How to Restore a Virtual Machine to a Different Host Protected by Barracuda Backup This article applies to the Barracuda Backup Server firmware version 4.2, and VMware® 4.0 and above, and the vSphere® Data Recovery API.
Use the following steps to restore a virtual machine to an alternate location: 1. 2. 3. 4. Log into the Barracuda Backup web interface, and go to the RESTORE > Restore Browser page. Expand the VMware data source on the left, and click on the virtual machine you want to restore; all available revisions display. Click Restore to the right of the revision you want to restore.
Use Barracuda LiveBoot to recover and traverse the file structure of VMware virtual guest system data, and to download files and directories within a VMware snapshot. In the event of a failure with your primary storage system, the Barracuda Backup Server can act as the datastore for your VMware ESX/ESXi server. You can recover any revision of a VMware virtual guest server within your retention policy, and serve up deduplicated content as needed by the virtual server.
5. In the Boot to section, select whether to boot the Virtual Machine to the Original Location or enter an alternate Hostname or IP address. 6. 7. Enter name of the Virtual Machine in the VM Name field, for example, LiveBootRestore, and click Boot VM. The progress dialog box displays. Once the process is complete, a green check mark displays next to Bootin g Virtual Machine: 8. Once the process is complete the server boots up. 9.
10. In the Barracuda Backup web interface, click Dismiss in the LiveBoot Progress dialog box: 11. Once the LiveBoot is complete, in the Barracuda Backup web interface click Destroy to terminate the process: Move the Virtual Machine to a Datastore Use the following steps to move the "LiveBooted" Virtual Machine to your own datastore. 1. On your VMware Server, open the VCenter VSphere Client. 2. Right-click on the Virtual Machine and click Migrate. The Migrate Virtual Machine wizard displays. 3.
4. Click Next.
5. Click Next. In the Ready to Complete page, click Finish to start the migration process using vMotion. 6. You can check the progress of vMotion in the Recent Tasks log: 7. Select the active environment to which to move the restored system, click Next, and then click Finish. Remove the Virtual Machine from vCenter Use the following steps to remove the "LiveBooted" Virtual Machine from vCenter: 1. 2. 3. 4. On your VMware Server, open the VCenter VSphere Client.
5. Right-click on the LiveBooted Virtual Machine datastore, and click Unmount.
5. Click Start Restore. Once the restore is complete, go to REPORTS > Restore to verify the restore completed successfully. Recover a Mailbox from the Exchange 2013 Recovery Storage Group When running the commands in this section, substitute DatabaseName with the name of your original database. 1. 2. 3. 4. Log in to the Exchange 2013 Mailbox Server, and open the Exchange Management Shell.
4. To view the globally unique identifier (GUID), run the following command: Get-MailboxStatistics -Database 'DatabaseName - Recovery' | Format-List DisplayName, MailboxGUID 5. To restore a mailbox using the GUID, run the following command: New-MailboxRestoreRequest -SourceDatabase 'DatabaseName - Recovery' -SourceStoreMailbox MailboxGUID -TargetMailbox TargetMailboxAlias -AllowLegacyDN Mismatch 6.
Warning This option overwrites all existing data. If you do not want to overwrite the database, see Restore to a Recovery Storage Group. Take caution when overwriting an existing database; Barracuda Networks highly recommends restoring to a separate recovery database except in cases of extreme data loss or when performing disaster recovery.
5. 6. Click Apply, and then click OK to close the dialog box. Right-click the database, and click Unmount. Step 2. Specify Barracuda Backup Restore Settings 1. Log in to Barracuda Backup web interface, and select the associated Barracuda Backup Server in the left pane. 2. Go to RESTORE 3. 4. > Restore Browser. Locate the Exchange 2010 Server, and click Restore.
5. Go to the REPORTS > Restore page to monitor the restore progress. Step 3. Mount the Database Once the restore is complete, use the following steps to mount the database. 1. Log in to the target Exchange 2010 Server as the Administrator, and open the EMC. 2. 3. 4. In the left pane, expand Microsoft Exchange > Microsoft Exchange On-Premises > Organization Configuration, and click Mailbox. In the center pane, click the Mailbox Database that was restored, and in the right pane, click Mount Database.
Additional Resource How do I set up my Barracuda Backup Service to restore Exchange 2010? Recovery Storage Group If you do not create a recovery storage group, Barracuda Backup creates one and places it in the default Exchange install location.
Step 2. Microsoft Exchange 2010 Server 1. 2. 3. Log into the Exchange 2010 Server as the administrator, and open the Exchange Management Console (EMC) from Start > All Programs > Microsoft Exchange Server > Exchange Management Console. In the left pane, expand Microsoft Exchange > Microsoft Exchange On-Premises > Organization Configuration, and click Mailbox: In the center pane, click the restored recovery database, and in the right pane, click Mount Database. You can now restore individual mailboxes.
5. right pane, click Dismount Database. Option 2. Restore All Exchange 2010 Mailboxes Use the steps in this option to restore all email to all mailboxes that exist in the restored recovery database. Note that you must complete Step 1 a nd Step 2 above before you can restore a single Exchange mailbox. You must have the name of the restored recovery database to complete these steps. The recovery database usually has the same name as the mailbox database appended with -Recovery. 1.
2. Expand Server Configuration, and click Mailbox: 3. Right-click Mailbox Database, and click Properties. Select This database can be overwritten by a restore: 4. Click Apply, and OK to close the dialog box.
Step 2. Specify Barracuda Backup Restore Settings 1. Log in to the Barracuda Backup Service as the administrator, and go to RESTORE > Restore Browser. 2. Locate the Exchange Server 2007, and navigate to the First Storage Group. Click Restore. In the Resto re dialog box, choose the Restore to location: Original Location Select an IP Address from available servers Enter an IP Address or FQDN 3. Choose the Restore method Step 3. Remount the First Storage Group as Restore normally, and click Start Restore.
Once the restore is complete, mount the database. Option 2. Restore to a Recovery Storage Group Use this option to restore to a recovery storage group (RSG). Click here to expand... Step 1. Exchange Server 2007 1. In the EMC on the Exchange Server 2007, click Toolbox: 2.
3. In the Troubleshooting Assistant, enter an identifying label, the Exchange server name, the Domain controller name, and click Next: 4.
4. 5. The Create the Recovery Storage Group Result screen displays: 6. Click Go back to task center.
6. overwritten by restore' flag: 7. The Databases page displays. Verify the Mailbox Database displays, and click Previous: Step 2.
1. In Barracuda Backup, go to RESTORE > Restore Browser. Locate the restored Exchange Server 2007, and navigate to the First Storage Group. 2. Click Restore, select the Restore to location, and specify the Method as Restore to an Exchange Recovery Storage Group / Database: 3. Click Start Restore. Once the restore is complete, go to RESTORE > Restore Reports to verify the restore completed successfully: Step 3. Exchange Server 2007 1.
2. Turn on Mailbox Database, and click Mount selected database: 3.
3. 4. 5. Click Go back to task center. Click Merge or copy mailbox contents.
5. Click Perform pre-merge tasks: 6.
The restore is now complete. How to Restore a Microsoft Exchange 2003 Database by Overwriting Existing Database article assumes you have Microsoft® Exchange 2003 installed and set up. This article describes how to restore Microsoft Exchange 2003 by either overwriting the existing database or restoring to the original location. This article refers to all Barracuda Backup firmware versions.
4. 5. Click Apply, and then click OK. 6. In the System Manager, right-click Public Folder Store, and click Properties; in the dialog box click the Database tab, and turn on This database can be overwritten by a restore. 7. Click Apply, and then click OK. Dismount the Databases 1.
2. Click Yes in the Warning dialog box to dismount the Mailbox Store. 3. In the System Manager, right-click the Public Folder Store, and click Dismount Store; click Yes in the Warning dialog box to dismount the Public Folder Store. Restore the Database 1. Log into the Barracuda Backup web interface, and go to the Restore > Restore Browser page. 2. Expand the Microsoft Exchange 2003 Server down to the database instance to restore, and click Restore. 3.
Remount the Databases 1. 2. 3. 4. On the Exchange 2003 Server, open the System Manager, right-click the Mailbox Store, and click Mount Store. Click Yes in the Warning dialog box to remount the Mailbox Store. In the System Manager, right-click the Public Folder Store, and click Mount Store. Click Yes in the Warning dialog box to remount the Public Folder Store. How to Restore a Microsoft Exchange 2003 Database using a Recovery Storage Group Microsoft® Exchange 2003.
1e. Click Start Restore. To view the restore status, go to the REPORTS > Restore page, and click on a report to view individually restored items. Step 2. System Manager 2a. Log in to the Exchange Server as the administrator, and go to Start > Programs > Microsoft Exchange > System Manager: 2b. Expand Administrative Groups > First Administrative Group > Servers, and click on your Server name.
2c. The Recovery Storage Group displays in the System Manager; r ight-click the Recovery Storage Group, and then click Add Database to Recover: 2d.
2e.
2f. In the System Manager, expand Recovery storage Group, right-click on the mailbox store priv1 from Step 2e, and click Mount Store: 2g. Click Yes in the Warning dialog box. Right-click on the mailbox store priv1 once again, and click Dismount Store: Step 3. Recovery Store Group 3a. On the Exchange Server in Explorer, navigate to C:\Program Files\Exchsrvr\Recovery Storage Group, and delete the contents of this folder. 3b.
3e. At a command prompt, enter the following command to check the database state using the Exchange tool eseutil: eseutil /mh "C:\Program Files\Exchsrvr\Recovery Storage Group\priv1.edb" In this command, replace 'priv1' with the mailstore name you entered in Step 2e. 3f. If the database is in a 'Dirty Shutdown' state, at a command prompt, enter the following command: eseutil /p "C:\Program Files\Exchsrvr\Recovery Storage Group\priv1.
4b. Click Apply, and then click OK. 4c. Right-click on the database priv1, and click Mount Store; click Yes in the Warning dialog box. Step 5. Microsoft Exchange Server Mailbox Merge Wizard (ExMerge) Go to the Microsoft download page, and download ExMerge.exe to the C:\Program Files\Exchsrvr\bin directory on your Exchange 2003 Server. Once downloaded, double-click ExMerge.exe to start the Wizard. Step 5a. Extract Data from the Exchange Server Mailbox 1. Click Next on the Welcome page.
2. On the Two Step Procedure page, select Step 1: Extract data from an Exchange Server Mailbox, and then click Next: 3.
4. On the Database Select page, select RECOVERY STORAGE GROUP/ PRIV1 where PRIV1 represents the mailstore name you entered in Step 2e, and then click Next: 5.
6. On the Locale Selection page, select the Default locale, and then click Next. 7. On the Target Directory page, click Change Folder and choose a target directory for the PST files from which to merge data into the Exchange Server, and then click Next: 8.
Step 5b. Import Data into the Exchange Server Mailbox 1. Double-click ExMerge.exe to start the Wizard, and click Next on the Welcome page. 2. On the Procedure Selection page, select Extract or Import (Two Step Procedure), and click Next. 3. On the Two Step Procedure page, select Step 2: Import data into an Exchange Server Mailbox, and then click Next: 4.
4. 5. On the Mailbox Selection page, select all of the mailboxes using Ctrl-click, and click Next: 6. On the Locale Selection page, select the desired locale, and click Next. On the Target Directory page, click Change Folder and select the target folder containing the PST files. 7. On the Save Settings page, click Next, and on the Process Status page, click Finish.
In this Section How to Restore a Microsoft SQL Database How to Restore a SQL Server 2008 Master Database How to Restore a Microsoft SQL Database to a Point-in-Time How to Restore a Microsoft SQL Server Database to a Flat File Related Articles How to Change the SQL Recovery Model How to Restore a Microsoft SQL Database This article refers to Barracuda Backup firmware version 5.0 or higher.
5. sqlservr -s %% (SQL 8) 6. If login IDs or devices have been added to or dropped from the master database since the last backup, those changes must be reapplied. Restart the server and reapply the changes manually or from saved batch files. 7. If any databases have been created, expanded, or shrunk since the last dump of the master, those databases must be dropped and then restored. Refer to http://msdn.microsoft.com for detailed procedures for your version of SQL. 8.
5. Click Start in the General tab to place the server in single user mode, and then click OK to close the dialog box. Stop Services 1. In the Services window, right-click on the service SQL Server Agent (MSSQLSERVER), and click Stop. 2.
Restore the Database 1. Log in to Barracuda Backup, go to the Restore > Restore Browser page. 2. Click Restore next to the Microsoft SQL Server instance to restore. 3. In the Restore dialog box, select to restore to the original instance or a new instance, and click Start Restore. Set Microsoft SQL Server to Multi-User Mode 1. Log in to the SQL server as the administrator. 2.
Flat File This article describes how to restore a SQL database to a point-in-time, and then restore the database to working condition using SQL Management Studio. Before completing this solution, you must first Restore the Microsoft Database to a Flat File. Restoring the Database Use the following steps to restore the database: 1. Open Microsoft SQL Server Management Studio, and navigate to Databases: 2. Right-click Databases, and click Restore Database.
4.
5. Click OK. In the Destination for restore section, select the database to which you wish to restore, and in the Select the backup sets to restore section, select the backup file you selected above in step 3: 6. In the left pane, click Options, and select the following: In the Restore options section, select Overwrite the existing database (WITH REPLACE), and leave the other options unselected.
7. Click OK to perform the restore. 8. If the restore is successful, complete steps 1 through 7 for each incremental backup file, which includes the .tm file extension, until you reach the incremental file containing the point-in-time file to which you wish to restore. Restoring to a Point-in-Time Use the following steps to restore the last incremental file containing the point-in-time: 1. In Microsoft SQL Server Management Studio, right-click Databases, 2.
6. In the Destination 7. for restore section, click the browse button following To a point in time; the Point in time restore window displays. Select a specific date and time, and choose the date and time to which to restore: 8. Click OK. In the left pane, click Options, and make the following selections: In the Restore options section, select Overwrite the existing database, and leave the other options unselected.
9. Click OK to perform the restore. the restored database should display with only the changes up to the specified point-in-time. How to Restore a Microsoft SQL Server Database to a Flat File This article refers to Barracuda Backup firmware 5.1 and lower, and Microsoft SQL Server 2005 and 2008 Windows Agent. In this article: Step 1. Modify the bbconfig.ini File Step 2. Restore the Database Step 3. Restoring a Flat File into SQL Management Studio Related Articles Restore to a Point-in-Time Step 1.
6. 7. 8. Save and close the file. Open Services once again. Right-click on the Service Barracuda Backup Agent, and click Start. The Status field should display as Started. Step 2. Restore the Database Use the following steps to restore the database normally through the Barracuda Restore Browser to the path specified in Step 1: 1. Log in to Barracuda Backup, and go to RESTORE > Restore 2. Drill down to and select the database revision to restore, and click Restore. Browser. 3.
How to Restore a Microsoft Hyper-V 2012 to its Original Location How to Restore a Microsoft Hyper-V Virtual Machine How to Restore a Microsoft Hyper-V 2012 to its Original Location This article refers to Barracuda Backup Server firmware version 5.3 and higher, and Microsoft® Hyper-V 2012 and 2012 R2. This article assumes Hyper-V is installed and configured. Use the following steps to restore a Hyper-V virtual machine (VM) back to its original location. 5.
keep the following in mind: Message-level data must be restored to the computer from which it originally came; File share data cannot be restored to its original location.
1. Open the Hyper-V Manager, and click Import Virtual Machine in the Actions pane: 2.
3. Browse to the folder where the virtual machine was restored, and locate the .vhd file: 4. Click Select Folder. Select the virtual machine to import, and click Next. 5. Select the type of import to perform, and click Next. 6.
7. Click Next. Click Finish, and start your virtual machine.
3. Deleted Objects Container If the Deleted Objects container does not display, right-click on the Server name in the left pane to enable the container. 4. Double-click the Deleted Objects container to view a list of deleted items which can be restored. 5.
6. Verify the user has been restored. How to Enable Active Directory Recycle Bin on Windows Server 2012 This article refers to firmware version 5.0 and higher, and Microsoft ® Windows Server ® 2012. In this article: Requirements Step 1. Raise the Forest Functional Level Step 2.
Before enabling AD Recycle Bin, you must first raise the forest functional level of your AD domain services (DS): 1. Log in to the Windows Server, and open Windows PowerShell. 2. At the PowerShell command prompt, enter the following cmdlet on a single line: Set-ADForestMode -Identity contoso.com -ForestMode Windows2008R2Forest -Confirm:$false Where -Identity represents the fully qualified DNS name: Step 2.
Additional Resources Restore a Deleted Active Directory Object Use the following steps to restore an AD Object from the AD Recycle Bin: 1. Log in to the Windows Server 2008 R2 as the administrator. 2. Go to Start > Administrative Tools, right-click Active Directory Module for WIndows PowerShell, and click Run as administrator. 3.
At a minimum, you must have membership in Enterprise Admins, or equivalent access privileges. For additional information, refer to the Microsoft TechNet article Local and Domain Default Groups. Enable Active Directory Recycle Bin Important You must use Active Directory Module for Windows PowerShell to run the commands described in this set of steps or an error will occur.
5. AD Recycle Bin is now enabled. Barracuda LiveBoot in the Cloud Use Barracuda LiveBoot to boot VMware virtual guest systems in the Barracuda Cloud. LiveBoot in the cloud is useful as a sandbox for testing purposes.
Recover any revision of a VMware virtual guest server within your retention policy. Boot virtual servers in the cloud to recover and traverse the file structure of VMware virtual guest system data. Retrieve an individual Active Directory (AD) object. Recovery Exporting AD Files For details on exporting an AD object, refer to the Microsoft TechNet article Import or Export Directory Objects Using Ldifde. Serve up deduplicated content as needed by the virtual server.
1. Log in to the Barracuda Backup web interface, and go to the RESTORE page. 2. Navigate to and expand the VMware Server, click on the guest system you wish to LiveBoot, and click on LiveBoot to the right of the system: 3. The dialog box displays the Barracuda LiveBoot page; click the Cloud icon, and enter a name for the virtual machine in the VM Name fi eld: 4. Click Boot VM. 5.
You can use a Virtual Network Computing (VNC) client to connect directly to a virtual machine LiveBooted to the cloud: 1. To manage your LiveBooted virtual machine, in the RESTORE page, click LiveBoot Management: 2. The VNC Information details display in the table: 3. Open a VNC client, for example, TightVNC, and enter the VNC Information from the RESTORE page in the Remote Host field: 4. Click Connect.
Manage LiveBooted Virtual Machines Use the options in the Actions column of the LiveBoot Management table to manage your LiveBooted virtual machines: Pause ( Play ( ) icon - Click to pause the virtual machine ) icon - Click to restart the virtual machine Shutdown ( Destroy ( ) icon - Click to shut down the virtual machine ) icon - Once you shut down a virtual machine, click this icon to destroy the virtual machine Change the Virtual Machine IP Address By default the virtual machine uses a private IP a
3. 4. Click LiveBoot Management at the top of the page, and then click the Play ( 5. Open the VNC client again, and connect to the virtual machine: 6.
7. Enter the Public IP address values from Step 3 in to the associated fields; You can use public DNS server values such as 8.8.8.8 and 4.4.4.2: You may need a subnet calculator to calculate the subnet mask.
8. Click OK to apply your settings. Open a web browser and confirm that you can connect to the Internet. Two virtual machines LiveBooted in the cloud can communicate with each other provided they are both on the same account. Note that each account is assigned a VLAN. The same is true if the virtual machines have a public IP address. Download the VMDK File Use the following steps to download the VMDK file: 1. Log in to VMware and stop the virtual guest machine. 2.
4. Click LiveBoot to the right of the virtual machine. 5.
6.
7. Once the process is complete, log in to vCenter with your vSphere client. 8.
9.
10. Click Next.
11. Click Next, and then click Finish in the Ready to Complete page. 12. In vCenter, the Relocate virtual machine task displays under Recent Tasks, and the status displays as Completed: Barracuda copy.com In this Section How to Restore to a copy.com Account How to Share and View Files Using copy.com How to Restore to a copy.com Account This article refers to Barracuda Backup firmware version 5.1 and higher, and both privately and publicly shared copy.com accounts .
Related Articles How to Share and View Files Using copy.com Use the following steps to restore your copy.com account, 1. 2. 3. 4. Log in to the Barracuda Backup web interface, and click RESTORE. In the Restore Browser pane, navigate to and select the Copy content you want to restore. In the right pane, drill into the content and select the file or folder for restore, and click Restore. The Restore dialog displays. 5.
How to Share and View Files Using copy.com This article refers to Barracuda Backup firmware version 5.1 and higher. In this article: Share Files View Files Related Articles How to Restore to a copy.com Account Share Files Use copy.com to easily share files and directories with remote or traveling employees. Use the following steps to share files using copy.com: 1. Log in to login.barracuda.com, and select the associated Barracuda Backup Server in the left pane. 2.
5. 6. Click Share, and then click OK. An email is sent to the specified user(s) with a link to the shared data on copy.com. View Files To view the shared file or directory: 1. 2. Log in to copy.com. A folder titled __Devices displays in your Copy Folder. Click through the folder path to view your shared file or directory.
How to Search for Items Using the Restore Browser This article applies to Barracuda Backup Server firmware version 5.3.00 and higher. Use the following steps to search for items using the restore browser: 1. Log in to the Barracuda Backup web interface using https://login.barracudanetworks.com/, and select the associated Barracuda Backup Server in the left pane. 2. 3. Go to the RESTORE > Restore Browser page, and select the target data source.
6. In the Restore tab, select the Restore to location and Path, and then click Start Restore. 7. Once the restore is complete, the Success dialog displays: 8. Restore details are available on the REPORTS > Restore page. How to Restore Data Using the Restore Browser Use the Barracuda Backup web interface to restore data that was stored either using the Barracuda Backup Agent or file share data, or to download a file, a file system directory, an email mailbox, or mailbox folders.
Data can be restored back to its original location, or to another computer on your network. If restoring to another location, the Barracuda Backup Agent must be installed on that system. A functioning Barracuda Backup Server must be in place in order to restore a SQL Server and Microsoft® Exchange databases. File Share Data When restoring file share data through the web interface, you can restore one file at a time, a single directory, or an entire share.
Download Files and Directories You can select to download files and directories directly to your system. Click Download in the right pane to: Download a single file Download file system directories as ZIP files Download email mailboxes and folders as ZIP files How to Restore from Local and Offsite Backups Data can be restored from the local Barracuda Backup Server, from a remote Barracuda Backup Server that has been used to replicate that system, or from the Barracuda Cloud Storage.
You can recover backed up content either from the local web interface or from the cloud. Local Device Web Interface - To download from the local device at LAN speeds, use the Download feature in the Barracuda Backup local web interface. Cloud Web Interface - To verify and download data from the cloud, use the hosted Barracuda Backup web interface login credentials.
4. The Restore Browser section displays the latest backup date. Older Revision To restore an older revision of the file or directory, click Change Date to display all available revisions: 5. Click Download to the right of the file or folder you want to download: 6. The selected file is downloaded to a zip file.
4. The Restore Browser section displays the latest backup date. Older Revision To restore an older revision of the file or directory, click Change Date to display all available revisions: 5. Click Download to the right of the file or folder you want to download, or click Download entire folder to download all content within the folder selected in the Restore Browser section: 6. The content is downloaded as a .zip file.
3. Click the RESTORE tab, and select the server from which to restore data. In the following example, a Microsoft Exchange Database is selected: 4. Click the Restore link to the right of the data you wish to restore; the Restore window displays.
5. Click Start Restore; the Restoration in progress window displays: 6. Click OK. In the web interface, go to REPORTS > Restore to view the restoration status: 7. Once the restore is complete, the left column displays a green indicator ( ) next to the restored data source. How to Restore from a Replication Destination This article refers to Barracuda Backup firmware 4.0 and higher, and assumes that replication has been successfully set up on both devices and that backups are running successfully.
Related Articles Getting Started with Replication How to Restore a Microsoft SQL Database Microsoft SQL Server Database Recovery and Restoration How to Restore a Microsoft Exchange 2007 Database To restore from a replication destination, 1. Log into the Barracuda Backup web interface, and select the receiving Barracuda Backup Server from which to restore. 2. Go to the Restore> Restore Browser page, and in the left pane select the sending Barracuda Backup Server that you are receiving data from: 3.
4. 5. 6. In the Contents section, click Restore next to the file or directory for restore. The Restore window displays. In the Restore to field, enter the hostname or IP address of the restore to location. In the Path section, select the Original Path, or you can designate a new location: Click Start Restore. Once the restore is complete, go to REPORTS > Restore to verify the restore completed successfully. How to Restore SharePoint Objects Using Kroll Ontrack This article refers to firmware version 5.
Once you restore the content database using the instructions in the article How to Restore a Microsoft SQL Server Database to a Flat File, use the following steps to extract the .bak and .trn files, and then convert these files to .mdf and .ldf files. 1. Go to Start > Programs > Kroll Ontrack > Ontrack PowerControls > PowerControls ExtractWizard. On the introduction page of Extr actWizard, click Next. 2. In the Method of Extraction page, select Direct Method: 3. Click Next.
4. Click Next. On the Catalog Performance Options page, select Catalog SharePoint backup datasets only: 5. Click Next.
6. Click Next. On the Destination Folder page, browse to and select the destination folder where you want to copy the .mdf and .ldf files: 7. Click Next. Once the extraction is complete, click Finish to close ExtractWizard. Restore the SharePoint Objects Once you extract the .mdf and .ldf files from the restore, use the following steps to browse to and restore the SharePoint objects. 1. Go to Start > Programs > Kroll Ontrack > Ontrack PowerControls > PowerControls for SharePoint.
1. : 2. Click Next. In the Source Path Selection page, click Add, and navigate to and select the files created using the ExtractWizard in the previous section: 3. Click Open to add the files. Verify the Temporary File Path is valid, and then click Next. 4. The database content displays in the Source list. 5.
5. In the Target Server Selection page, from the SharePoint Server Site URL drop-down menu, select the target site URL: 6. Select an authentication option, and then click Next. 7. The source and target selections display. Expand the Source list, right click the item to restore, and then click Copy: 8.
9. Once the restore process is complete, the Copy Progress status log generates: 10. Click Print to print a copy of the report, Save to save a copy to your 11. Log in to SharePoint and verify the object has been restored to the desired location: local system, or click Close.
How to Restore a Microsoft Windows Server 2003 Domain Controller Additional Resource Restart the domain controller in Directory Services Restore Mode Remotely Use the following steps to restore a Windows Server: 1. Log in to the Windows Server, and reboot the server into directory services restore mode. Remotely Reboot Note that you can reboot the server remotely; for more information, refer to the Microsoft TechNet article Restart the domain controller in Directory Services Restore Mode Remotely. 2.
Best Practice Test replication after a restore if you have more than one domain controller. How to Restore Windows System State Restoring Windows System State should only be performed in a disaster recovery situation. Typically, this is if a server goes down and will not boot or if the configuration is severely corrupted.
32- or 64-bit For example, if the source server is 64-bit Windows 2003 R2, Enterprise Edition, the target server should also be 64-bit Windows 2003 R2, Enterprise Edition. 1. Power on the target server, or if it is already running, reboot the target server. 2. Once the target server boots up, hold down the F8 key until the Windows Advanced Options menu displays: 3. Use the Arrow keys on the keyboard to select the Directory Services Restore Mode: 4. Press Enter.
2. 3. Click View all revisions up to: ; a list of revisions displays. 4. Click Restore next to the revision you wish to restore: 5. The Restore window displays. Authoritative Restore An authoritative restore returns the source server to the state it was in at the time of the backup, overwriting all changes made since that backup was performed. Changes made subsequent to that backup will be lost.
7. The restore job completion is dependent upon the size of the original server. 8. Once the restore is complete, a dialog displays. Click OK to close the dialog box. 9. Once the restore job is complete, restart the server. Restore System State Use the procedure described in this section only if you wish to restore System State to the target server without restoring the rest of the file system as it was on the source server. This procedure restores System files including those in the C:\Windows folder.
If the target server has a different IP address, select the third option and enter the IP address of the new location: 6. Click Start Restore. 7. Go to REPORTS > Restore to view restore job details. Restore Job The restore job completion is dependent upon the size of the original server. 8. Once the restore is complete, a dialog displays. Click OK to close the dialog box. 9. Once the restore job is complete, restart the server.
Requirements Active Directory Domain Controllers Prepare the Target Restore File System and System State Restore System State Restore Normal Boot Mode Related Articles Barracuda Backup Agent Restore Windows Server 2003 Domain Controller System State Additional Resources Active Directory Backup and Restore Disaster Recovery Restoring Windows System State should only be performed in a disaster recovery situation.
5. 6. 7. 8. Press Enter to restart the server. The server restarts, and Windows boots into Directory Services Repair Mode. Press Ctrl-Alt-Delete and log into the system using the same credentials you entered above in Step 2. Click Start > Run , enter services.msc , and click OK to open Services .
If the target server has a different IP address, select the third option and enter the IP address of the new location: 6. Click Start Restore. 7. Go to REPORTS > Restore to view restore job details. Restore Job The restore job completion time is dependent upon the size of the original server. 8. Once the restore is complete, a dialog displays. Click OK to close the dialog box. 9. Once the restore job is complete, use the steps in the section Restoring Normal Boot Mode to restore the server to normal mode.
1. Log in to the Barracuda Backup web interface, and go to RESTORE > Restore Browser. 2. Expand the Windows Server that represents the source server, and select System State: 3. Click View all revisions up to: ; a list of revisions displays. 4. Click Restore next to the revision you wish to restore: 5. The Restore window displays.
If the target server has a different IP address, select the third option and enter the IP address of the new location: 6. 7. Click Start Restore . Go to REPORTS > Restore to view restore job details. Restore Job The restore job completion is dependent upon the size of the original server. 8. 9. Once the restore is complete, a dialog displays. Click OK to close the dialog box. Once the restore job is complete, use the steps in the section Restoring Normal Boot Mode to restore the server to normal mode.
4. 5. Press Enter to restart the server in normal boot mode. How to Restore Exchange and GroupWise Messages Related Articles Set Up GroupWise Message-Level Backups Use the Barracuda Backup web interface to view, search, and restore Microsoft® Exchange and Novell® GroupWise messages. You can view all of the messages within a single mailbox, or select multiple mailboxes in which to search for a text string. Use the following steps to restore messages using the Restore Browser: 1.
Microsoft Windows Server 2008 R2 Windows 2008 Server Windows Small Business Server (SBS) 2011 Windows SBS 2008 Windows Vista Windows 8 Windows 7 Additionally, you must have all of the following: Barracuda Backup Server firmware version 5.3 or higher; Barracuda Backup Bare Metal Live CD 5.3 or higher (available from the SYSTEM > Software Downloads page); and Administrator rights to the Microsoft Exchange Server.
2. Burn the Bare Metal Live ISO file to a CD. 3. Boot the system you want to restore using the Bare Metal Live CD you created in step 2. 4. Read the onscreen warning: 5. 6. To continue with the Bare Metal restore, click Next.
If you have DHCP enabled on your network, an assigned IP address displays in the IP Address field. If DHCP is not enabled, uncheck DHCP, and enter the IP Address, Subnet Mask, and Default Gateway: 7. Click Next.
8. In the Barracuda Backup web interface, go to the RESTORE > Restore Browser page and select the system you want to recover. 9. Click View all revisions up to: to view the selected system's revisions available for restore: 10. In the Revisions list, click Restore for the revision you want to recover.
11. In the Restore dialog box, click the Restore tab, and enter the IP address of the system you are recovering in the Restore to section: 12. Click Start Restore. 13. For the system booted using the Bare Metal Live CD, a list of volumes that are recoverable displays: 14. Select the volumes you want to recover. Boot and System Volumes You cannot deselect boot and system volumes as these are required for the Bare Metal restore. 15.
15. Click Next to begin the restore: 16.
17. Remove the bare Metal Live CD, and reboot the system. SQL and Exchange Server If SQL and/or Exchange are installed on the system, you are required to restore those items separately once the bare metal restore is complete. How to Restore a Linux Server Using Bare Metal Restore This article refers to firmware version 5.3 and higher, and the Barracuda Linux Backup Agent 5.3 and higher. In this article: Step 1. Install the Barracuda Linux Backup Agent Step 2.
Step 1. Install the Barracuda Linux Backup Agent 1. Boot into a live CD environment that supports your hardware, for example, Ubuntu 12.04 x64. 2. Configure an IP address, and verify network connectivity to the Barracuda Backup Server containing the data source files you want to restore. 3. In the Barracuda Backup web interface, go to the SYSTEM > Software Downloads page. 4. Download and unzip the Barracuda Linux Backup Agent to your live booted environment. 5.
6. 7. Enter fdisk -l and press Return to view the partitions: 8. Enter mkfs.
9. Enter the mount point, and press Return. For example: Step 3. Restore the File System Using the Barracuda Linux Backup Agent 1. 2. 3. Log in to the Barracuda Backup Server, and go to RESTORE > Restore Browser page. Select and expand the Linux Server you wish to restore; select File Systems.
4. Click Restore selected items at the top of the screen. 5. In the Restore dialog, enter the target IP address of the live booted machine, and enter the mount point to which to restore, for example, /mnt/data/: 6. Click Start Restore.
6. Step 4. Mount the Linux System Directories and Install a Bootloader Complete the following steps when the restore is 100% complete and successful. 1. Open a terminal window, and enter the following commands to mount the Linux system directories and install a bootloader using your mount points: 2. Enter update-grub2 and press Return to update the grub bootloader: 3. Reboot the system. How to Restore Data with FTPES This article refers to Barracuda Backup firmware 4.2 and earlier only.
1. Download, install, and launch an FTPES client. 2. Connect to the server/host restore.barracuda.com. 3. Your account must have administrator rights to restore files. The username and password are the same as those used to access the Barracuda Backup web interface. 4. Select the FTPES protocol and standard port 21. 5. Upon connection, a listing of directories displays. Follow the directory structure to the date when you would like to restore your data. Past those directories, the backed up servers display.
Programs such as FileZilla for Windows and Linux, and Transmit for Mac OS X, work well. To use FTP to restore data, 1. Download, install, and launch an FTP client. 2. Your account must have administrator rights to restore files. The username and password are the same as those used to access the Barracuda Backup web interface. 3. Enter the IP address of the local Barracuda Backup Server. Use FTP protocol, and standard port 21. 4. Upon connection, a listing of directories displays.
To set up the restore connection, 1. In the User Name field, enter your Barracuda Backup user name, and enter the associated password in the Password field. 2. Select the manner in which to connect: Connect using Barracuda Cloud-Connect to your backed up data stored on the Cloud Connect Directly to a Barracuda Backup Server-Restore from a local or offsite Barracuda Backup Server; for improved restoration performance, it is recommended that you restore from a local Barracuda Backup Server. 3.
View New Features List New features and changes in the application are listed by release in the "What's New" page available from Help > What's New:
Modify Backup Server Location In general, do not modify your backup server location unless directed to do so by Barracuda Networks Technical Support. If directed to do so, you can specify a different source location from which to restore data by going to Options > Backup Servers: Cloud - Click to replace the current hostname/IP address with a cloud connection name and associated port number.
Use the Destination page to specify the default restore destination and to select restore options: Restore Destination - Click on the Restore Destination icon to navigate to and select (or create) the default restore location Put restored files into a "Restores" directory at the destination (turned on by default) - When turned on, restored files are automatically added to a Restores folder int he default restore location Restore empty directories - Turn on to restore empty directories during file restorati
Backup Server - Drag the slide bar to adjust the decompression load between the Barracuda Backup Server/Cloud to your local system For improved restoration performance, you may wish to adjust the decompression from the Barracuda Backup Server/Cloud to your local system. This allows the parts being restored to come across compressed, and therefore, faster as the source does not have to perform decompression. The local system can then decompress the parts and assemble the files.
Use Gradients - Turn on to customize gradient display settings; note that adding gradients to the application settings does not affect restoration speed. Type display-When Use Gradients is turned on, the application detects whether the selected luminosity works best with white or black text, and adjusts the label text color accordingly. If your color selection is "too middle of the road", the application adjusts to the closest acceptable luminosity.
4. original location, file attributes are retained. If the data is restored to an alternate location, the file attributes are removed. How to Restore Data Using Barracuda Restore for Windows This article refers to Barracuda Backup firmware version 4.3 and earlier only.
File Restore You can restore a single file from the Folder View. 1. Navigate to the file(s) you wish to view. 2. To view revisions on a single file by date including file size, navigate to and doubleclick the desired file name to open the Revisions wind ow. 3. In the Revisions window, select the desired revision, and click Restore to restore the selected file.
Double-click on a file to view all revisions by date, and optionally select to restore a revision directly from the window. Restore Files Once you select the desired files for restoration, 1. Click Start to bring up the Restore Configuration dialog box where you specify Agent Directory and Agent Revision restore locations: 2.
folder, in the main Barracuda Restore window, click Open Default Destination. Restore agent file system data to alternate location (retain ACLs) - Select to specify an alternate location to which to restore the data; note that the user permissions on files and folders are retained. Restore agent file system data like CIFS (loss of ACLs) - Select to restore the agent file system data, including windows file sharing-related data.
User Activity Reports Backup Reports Barracuda Backup provides a detailed report for each backup that is run. Backup reports can be accessed from the REPORTS > Backup page of the Barracuda Backup web interface. In addition, any back up process that is currently running is also displayed from this page. Backup reports include details about the backup such as when the backup started, duration, size, if there were any errors or warnings, and any new, changed, or removed items.
Date range of logs to display Select a specific user or display logs for all users Specify whether to include log on authentication in the logs Once you make changes, click Update to display user activity based on your new settings. SYSTEM Page This article refers to firmware version 5.0 and higher, except where noted. Use the SYSTEM page to manage the Barracuda Backup firmware version and settings, and access software downloads.
SYSTEM > Barracuda Backup Server Settings Specify the Barracuda Backup Settings including: How to Configure Barracuda Backup Display Groups page Backup Server Name - Enter a name to identify the Barracuda Backup Server in the web interface. Backup Server Time Zone - From the drop-down menu, select the time zone where the Barracuda Backup Server is located.
the page. Click Upgrade Now to immediately begin the firmware upgrade, or click Dismiss to hide the banner until the next time you log in to the web interface. If a backup job is running and you select to upgrade the firmware, the firmware upgrade is queued until the existing job is completed. BBS Settings Page This article refers to Barracuda Backup version 4.2 or higher.
Local Ethernet Traffic The Local Ethernet Traffic graph presents inbound and outbound network traffic for the selected Barracuda Backup Server: Barracuda Central Bandwidth The Barracuda Central Bandwidth graph represents the bandwidth utilization from the Barracuda Backup Server to the Barracuda Networks Cloud Servers: Transfer Efficiency The Transfer Efficiency graph provides a detailed look at data replication from the Barracuda Backup Server to the replication target (Barracuda Cloud or another Barr
utilized. The orange, TX (Compressed), represents the actual bandwidth utilized, after compression, to send data offsite.
Queue Count The Queue Count - Barracuda Cloud graph represents the number of parts replicated over time: Processor Utilization The processor utilization graph represents the following: System - Percentage of CPU utilization that occurred while executing at the system level (kernel). User - Percentage of CPU utilization that occurred while executing at the user level (application). Nice - Percentage of CPU utilization that occurred while executing at the user level with nice priority.
Load Average The Load Average graph details the history of running processes over time: ADMIN Page This article refers to firmware version 5.0 and higher. Use the ADMIN page to configure users, set up email notifications, manage display groups, access documentation, and link a Barracuda Backup Server.
ADMIN > Users Use this page to administer users that have access to the Barracuda Backup Service web interface. Click the Edit icon to modify email notifications, authentication, and permissions for the selected user, or click Ad d & Remove Users to add a new user, edit details for an existing user, or delete a user. Managing Users Managing Your Account If you are an administrator, you can modify your profile in the following manner: 1. Go to ADMIN > Users, and click Add & Remove Users. 2.
Managing Your Account Your account with Barracuda Networks gives you access to Barracuda Backup, Barracuda Networks services to which you have a subscription, and any devices added through Barracuda Appliance Control. As long as you are logged in as an administrator, you can add users that can perform administrative tasks. Each user uses their own user name to log in.
have a sufficient amount of offsite storage space at Barracuda Networks, it is important for you to verify that the plan size is the one you selected. View your Cloud Storage service plan size on the STATUS tab of the Barracuda Backup web interface. Managing User Access Use the ADMIN > Users page to administer users that have access to the Barracuda Backup web interface. This page has a link that takes you to Account/Support to add or remove users.
6. Click Add at the top of the page to add the user to Barracuda Backup; an email is then sent to the user prompting them to set their password. 7. Click on the username in the Users list; the user details display in the right pane. Under Product Entitlements, click Configure Permissions: 8. In the configuration page, you can set the following options: Turn on the Barracuda Email Notifications for this user: Reports - When turned on, a report is sent to this user for each backup job.
edit or view user accounts access. When selected, the Backup Server Permissions section displays: Select All Backup Servers - When turned On, user has full access to all Barracuda Backup Servers within the account, when turned Off, a list of all connected devices display. Turn on the Barracuda Backup Servers to which this user is to have access. Operator - User access is limited to viewing statistics and modifying backup configuration for selected Barracuda Backup SErvers.
Once you create display groups, you can add a Barracuda Backup Server to the group using the following steps: 1. 2. 3. 4. In the left pane, select the appropriate Barracuda Backup, and go to the SYSTEM > BBS Settings page. In the Backup Server Display Group section, choose from the Current Display Group drop-down list, select the display group name. To add or remove display groups, click Manage your display groups to go to the ADMIN > Display Groups page. Click Save.
2. Click Continue. In the next page, enter the physical location and time zone details, and choose a Cloud Storage subscription plan if you intend to replicate data to Barracuda Cloud Storage; no Cloud Storage subscription is required for site-to-site replication. 3. Click Continue. In the next page, enter the billing information: 4.
5. Once the unit is linked, the firmware is updated and the appliance reboots. When the unit comes back online you must log out and then log back in to the user interface to clear any cached pages. 6. Data sources can now be set up on the Barracuda Backup Server. Link a Barracuda Backup Server as a Reseller Once you complete the steps in the Initial Set Up section, you can link the client appliance as a reseller: 1. In the Identity section, select I am a reseller and this backup server is for a client: 2.
4. 5. Click Continue. In the Client Information page, specify whether you want to have access to the unit after it has been linked, and enter the name of the client organization: If you turn Grant me (the reseller) administrative access to this Barracuda Backup Server off, the only way to manage the linked unit is through the end-user (client) credentials. 6. Enter the client contact details: 7. Click Link Barracuda Backup Server: 8.
Security In this Section Backup Security and Site-to-Site Replication Barracuda Cloud Storage Standards and Protection Policy-Based Security How to Secure Your Barracuda Backup Server Backup Security and Site-to-Site Replication When using a site-to-site deployment, you need to ensure the physical security of the remote Barracuda Backup Servers. Typically the Barracuda Backup Servers are kept behind corporate firewalls and communicate with each other using a VPN tunnel.
After you have successfully linked your Barracuda Backup Server, your Barracuda Cloud Storage service plan is activated. To ensure that you have a sufficient amount of offsite storage space at Barracuda Networks, it is important for you to verify that the plan size is the one you selected. View your Barracuda Cloud Storage service plan size on the STATUS tab of the Barracuda Backup web interface.
format that nobody but you can access. The United States government recently approved 192-bit AES encryption as the preferred method for protecting top-secret information. The Barracuda Backup solution starts with even higher 256-bit AES encryption. In addition, Barracuda Networks has developed a proprietary advanced digital cataloging system that breaks down your data into small pieces and tracks the changes of these parts over time, and strips the original meta identifiers from your files.
1. 2. Once the new unit is linked, Barracuda Networks connects to the new device and begins wiping the metadata in the database ensuring the unit is completely clean of any data. Barracuda Networks then pulls the metadata associated with all binary data (your backed-up data). The metadata is a description of the data, whereas the binary data is comprised of your actual files. 3. 4. As the metadata is downloaded, it is inserted into the database tables on the new device.
the Getting Started section. Replacing a Failed Barracuda Backup Server Related Articles How Barracuda Networks Manages Returned Device Drives Barracuda Networks Technical Support Before you replace your Barracuda Backup Server, contact Barracuda Networks Technical Support to try to resolve the problem. Troubleshooting Use the articles in the Troubleshooting and Error Messages section of this TechLibrary to help resolve issues encountered on your system.
1. Enter the Barracuda Backup Server IP address to log in to the local web interface. 2. Go to the STATUS page, and in the Server Actions section, click Wipe Backup Server: 3. The message Wipe Started Successfully displays in the web interface. Once the unlinking process is in progress, a warning message displays: 4. Click OK to complete the unlinking process.
Related Articles Barracuda Backup Server Hardware Specifications How to Physically Install the Barracuda Backup Server Barracuda Backup Server Model 190 and 390 The following figure illustrates the Barracuda Backup power and disk activity indicator lights for models 190 and 390. Model 190 and 390 Front Panel The following table describes the Barracuda Backup front panel power and disk activity indicator lights for models 190 and 390.
Model 190 Rear Panel Port and Connector Description Port/Connector Name Details Dual Link DVI-D Port Optional. Digital monitor connection. Printer Port Optional. Printer connection. VGA Port Recommended. Video graphics array (VGA) monitor connection. Keyboard Port Optional. PS2 keyboard connection. Network Port Network port. USB Ports (4) Optional. USB device connection. Microphone Optional. Microphone line-in connection. Line In/Line Out Jack Optional. Audio input/output connections.
Network Activity (2) Blinks green to indicate network activity. Disk Light Displays a solid green light and blinks during disk activity. Power Light Displays a solid green light when the system is powered on. Reset Button Push for 5 seconds to reset the Barracuda Backup Server. Power Button Push to power on the Barracuda Backup Server, tap to safely reset the Barracuda Backup Server. The following figure illustrates the Barracuda Backup rear panel ports and connectors for model 490.
Serial Port Optional. Serial device connection. VGA Port Recommended. Video graphics array (VGA) monitor connection. Network Ports (2) Network ports. Barracuda Backup Server 890, 891, 892, 990, and 991 The following figure illustrates the Barracuda Backup power and disk activity indicator lights for models 890 through 991. Model890, 891, 892, 990, and 991 Front Panel The following table describes the Barracuda Backup front panel indicator lights for models 890, 891, 892, 990, and 991.
The following table describes the Barracuda Backup rear panel ports and connectors for models 890 and 891. Model 890 and 891 Rear Panel Port and Connector Description Port/Connector Name Description Power Supply (2) Redundant power supply input. Mouse Port Optional. Mouse port. Keyboard Port Optional. PS2 keyboard connection. USB Ports (2) Optional. USB device connection. Serial Port Optional. Serial device connection. VGA Port Recommended. Video graphics array (VGA) monitor connection.
Serial Port Optional . Serial device connection. VGA Port Recommended . Video graphics array (VGA) monitor connection. Network Ports (2) Network ports. Barracuda Backup Server 1090 and 1091 The following table describes the front panel indicator lights for models 1090 and 1091. Model 1090 and 1091 Front Panel Component Description Component Name Description Reserved (2) Reserved for future use. Network Activity (2) Blinks green to indicate network activity.
Serial Port Optional. Serial device connection. VGA Port Recommended. Video graphics array (VGA) monitor connection. Network Ports (2) Network ports. Barracuda Backup Server Hardware Specifications This article refers to Barracuda Backup firmware version 5.0 and higher.
Barracuda Backup Server Network Interface Card Use network interface card (NIC) bonding to increase available bandwidth: Model Throughput Number of Interfaces 190 1Gb 1 390 1Gb 1 490 1Gb 1 690 1Gb 2 890 1Gb 2 891/892 10Gb 3 990/991 10Gb 3 1090/1091 10Gb 3 10 Gigabit Ethernet Card Option (Models 892, 990, and 1090 Only) Models 892, 990, and 1090 include a 10 Gigabit Ethernet card.
AC Input Voltage Range Model Power AC Input Range BTU/hr 190 Single 60W 12V 205 390 Single 220W 100V 751 490 Single 350W 100-240V 1194 690 Single 350W 100-240V 1194 890/891/892 720W Redundant Power 100-240V 2457 990/991 800W Redundant Power 100-240V 2730 1090/1091 1400W Redundant Power 100-140V 180-240V 120-230V 4777 How to Physically Install the Barracuda Backup Server This article refers to Barracuda Backup firmware version 5.0 and higher.
Rack Mount Barracuda Backup Server Models 390 through 1091 For Barracuda Appliances 390 and above, these rack mounting Instructions provide information on installing the SC825 chassis into a rack unit with the rail kit provided. Refer to the installation instructions that comes with the rack unit for detailed instructions. Model 190 The Model 190 is a desktop unit and does not require rack mounting.
Locking Tabs - Both chassis rails have a locking tab. The tabs lock the server into place when it is installed and pushed fully into the rack. These tabs also lock the server into place when fully extended from the rack so as to prevent the server from coming completely out of the rack when pulled out for servicing.
The SC825 chassis includes a set of inner rails in two sections: inner rails and inner rail extensions. Inner Rack Rails - The inner rails are pre-attached and do not interfere with normal use of the chassis if you decide not to use a server rack. Attach the inner rail extension to stabilize the chassis within the rack. Place the inner rack extensions on the side of the chassis, aligning the hooks of the chassis with the rail extension holes.
Set Up the Barracuda Backup Server Physically install the Barracuda Backup Server using the following steps: 1. 2. 3. 4. For models 390-1091, fasten the Barracuda Backup Server to a 19-inch rack. For model 190, place it in a stable location. Connect an Ethernet cable from the network switch to the Ethernet port on the back of the Barracuda Backup Server. Connect a standard VGA monitor, PS2/USB keyboard, and an AC power cord to the Barracuda Backup Server. Press the Power button to turn the unit on.
Understanding Why Data is not Replicating to an Offsite Barracuda Backup Location How to Troubleshoot Using the Barracuda Backup Agent (Windows) Log File How to Resolve Low Disk Space How to Change the Barracuda Backup Agent Port Number How to Change the Barracuda Linux Backup Agent Port Number How to Change the SQL Recovery Model How to Resolve Microsoft Exchange 2010 Large Message Restore Errors How to Resolve Snapshot Backup Errors Resolving "Agent database moved to different location" Warning Resolving
non-peak hours. You can further refine the rate limit by enabling an alternate rate limit and specifying a specific time period to which it applies. However, if a large backup is scheduled during the alternate rate limit time interval, replication to the offsite location may not complete within the specified time period. In this case, the yellow status indicator ( offsite syncing queue.
This article refers to Barracuda Backup firmware version 5.2 and higher, and the Barracuda Backup Agent (Windows) version 5.2 and higher. Use the Backup Agent bbtrace.txt log files to understand and resolve any errors that may occur with the Backup Agent such as an Agent backup initialization error. Each time the Backup Agent Service is restarted, a number is appended to the current bbtrace.txt file, and a new file is generated. To review the log file: 1.
If you determine that all of the above suggestions are in place and all settings are correct, and you are continuing to run low on space, it may be time to look at upgrading to the next model with increased disk capacity. If you are unable to determine what is causing your server to run low on space, contact Barracuda Networks Technical Support and a technician can assist with troubleshooting. How to Change the Barracuda Backup Agent Port Number This article refers to Barracuda Backup firmware version 5.
How to Change the Barracuda Linux Backup Agent Port Number This article refers to Barracuda Backup firmware version 5.3 and higher, and the Barracuda Backup Agent (Linux). By default the Barracuda Backup Agent (Linux) utilizes port 5120 to communicate with the Barracuda Backup Server. If there is a port conflict with another service, assign the Linux Agent a different port. Assign a New Port default file location: /usr/local/barracuda/bbs/config/bbconfig.
How to Change the SQL Recovery Model This article refers to all Barracuda Backup firmware, and Microsoft® SQL Server® 2005, 2008, 2008 R2, or 2012. In this article: Warning Message Set the SQL Recovery Model Additional Resource SQL Server 2012 SQL Server 2008 R2 SQL Server 2008 SQL Server 2005 The Barracuda Backup Server is designed to initially complete a full backup of the SQL Server database(s).
All SQL databases need to be set to Full Recovery Model in order to produce Incremental backups. Otherwise, Full backups are performed on every run. Use the following steps to set the Recovery Model on your SQL databases to Full: 1. Connect to the appropriate instance of the Microsoft SQL Server Database Engine. 2. In Object Explorer, click the server name to expand the server tree. 3.
1. Log into your Microsoft Exchange 2010 Server as the administrator, and navigate to the Program Files > Microsoft > Exchange Server > V14 > Client Access > exchweb > ews folder, and create a copy of the file web.config: Creating a copy of the web.config file allows you to revert to your original settings in case you encounter issues during resolution of the restore error. 2. Open the original web.config file using Notepad running as the administrator. 3.
6. Click Find Next until you locate the following line of code: 7. Replace 13600000 with the same value you entered in step 5 above, for example, 53600000 . 8. Click Find Next once again until you locate the following line of code: 9. Replace 13600000 with the same value you entered in step 5 above, for example, 53600000 .
3. Close the command prompt. 4.
Barracuda Backup Restore 1. Log in to your Barracuda Backup web interface, and restore the messages that originally failed. 2. Messages should now restore without any errors. However, if you continue to encounter errors when restoring large messages, continue to the next section, Configuration Settings. Configuration Settings Microsoft Exchange 2010 Configuration Settings Use the steps in the following sections only if you continue to encounter errors when restoring large messages.
3.
4. Verify the Transport Limits settings are large enough and listed correctly, then click OK. 5.
6.
7. Verify the value in the Maximum message size (KB) is large enough to accommodate message restore. 8. Right-click the Default Receive Connector, click Properties, and verify the Maximum message size (KB) is large enough to accommodate message restore. 9. If you modified any settings in the preceding steps, go to Services and restart both IIS Admin Service and Microsoft Exchange Transport services. Exchange Management Shell 1.
2. Verify that the following settings are large enough and listed correctly: ExternalDsnMaxMessageAttachSize InternalDsnMaxMessageAttachSize MaxReceiveSize MaxRecipientEnvelopeLimit (shown in KB) MaxSendSize 3. If any of the values need modification, run the following command: Set-transportconfig - For example: set-transportconfig -MaxSendSize 50MB 4.
Windows Server 2003 This step applies to Windows Server 2003 only. Determine the source of the issue is to identify the partition causing the problem. To do so, complete the following steps: 1. Go to the system even log on the server in question. 2. Look for an event with the source volsnap and an id of 25/35 containing the following message: The shadow copies of volume volume name were aborted because the diff area file could not grow in time.
4. In the Settings dialog box, from the Located on this volume drop-down menu select a partition with available space, and then click OK. Verify the maximum size is adequate to back up the partition. Defragmentation This step applies to Windows 2003, Windows Vista, Windows 7, and Windows 2008. Analyze the partition in question for a Defrag.
Windows Server 2003 This step applies to Windows 2003 only. Verify that both the server and snapshot instance have all service packs and patches installed, and then use the following steps to adjust the page file to 1.5 of the amount of RAM: 1. Log into the server as the administrator, and open System in the Control Panel. 2. On the Advanced tab, in the Performance section, click Settings. 3. In the Virtual Memory section, click Change. 4.
vss writer error. Additional Information For more information, refer to the following VMware knowledgebase articles: VMware Data Recovery backup fails with the error: Failed to create snapshot. Error -3941 (1028924) Cannot create a quiesced snapshot because the snapshot operation exceeded the time limit for holding off I/O in the frozen virtual machine (1018194) Resolving "Error Reading Object" Error During ESX or ESXi Virtual Machine Backup This article refers to all Barracuda Backup firmware 5.
Verifying VMware Disk I/O Issues If you continue to encounter an error, you may wish to confirm whether there are I/O issues on the virtual machine causing high CPU usage. 1. Log into and restart the virtual machine to commit the Consolidated Helper-0 snapshot. 2. Log into the vCenter/vSphere Snapshot Manager and create a quiesce snapshot file. 3. Once the quiesce snapshot is created, click on the quiesce snapshot file name, and click Delete. 4.
2. Ping the IP address of the Barracuda Backup Server. For additional information and ping command options, refer to the Microsoft TechNet article Using the ping command. Step 4. Test and Reinstall Barracuda Backup Agent 1. 2. 3. 4. Log in to Barracuda Backup and download and install the latest Barracuda Agent from the SYSTEM > Software Downloads page. Once the Agent is installed, go to the BACKUP > Data Sources page.
3.
4. In the Settings dialog box, from the Located on this volume drop-down menu select a partition with available space, and then click OK. Verify the maximum size is adequate to back up the partition. Second, analyze the partition in question for a Defrag.
http://support.microsoft.com/kb/940349 http://support.microsoft.com/kb/979457 http://support.microsoft.com/kb/943669 http://support.microsoft.com/kb/981166 Resolving "Incremental backups cannot be performed while circular logging is enabled" Error This article refers to all Barracuda Backup firmware, and Microsoft® Exchange Server 2003, 2007, 2010, or 2013; note that circular logging is disabled by default in Microsoft Exchange 2010 and 2013.
Use the following steps to disable circular logging for the Exchange Storage Groups on the Exchange Server 2010: 1. 2. 3. 4. 5. Log into the Exchange Server as the administrator, and open the Exchange Management Console (EMC). In the console tree, expand Organization Configuration, and click Mailbox. In the result pane, click the Database Management tab and click Properties below the storage group database. Click the Maintenance tab, and turn Off Enable circular logging.
1. Log in to Barracuda Backup, and go to the BACKUP > Sources page. 2. To the right of the source, a red status indicator ( ) displays if an error is generated during backup. Mouse-over the status indicator to view a pop-up message describing the cause of the error: 3. If the error "An error occurred during agent backup initialization" displays, then something during the beginning of the Agent backup failed.
If the Backup Agent log files indicate an error on the source, use the following steps to review the Application and System log files: 1. 2. 3. 4. Log in to the source server, and locate the Application and System log files for further troubleshooting. In the Application and System log files, locate the time the errors occurred on the Backup Agent based on the Report details page. Critical errors should display for the time in the log files.
Use the steps in this article to resolve the error "VMDK is larger than the maximum size supported by datastore" encountered when creating an ESX/ESXi virtual machine snapshot. In this article: Step 1. Determine Maximum File Size ESXi 5.0 and 5.1 with VMFS5 ESX/ESXi 4.1 and ESXi 5.1 with VMFS3 ESX/ESXi 4.0 with VMFS3 Step 2. Move Files to Accommodate Space Requirements Step 3.
A virtual machine on NFS or VMFS has a maximum virtual disk size of 2TB - 512Bytes, the same as the maximum in each of these tables. ESXi 5.0 and 5.1 with VMFS5 On ESXi 5.0 and 5.1 and newly formatted VMFS5, a standard 1MB block size is available. The maximum file size is 2TB - 512Bytes. Block Size 1MB / Maximum File Size 2TB - 512 Bytes On ESXi 5 hosts using VMFS5 upgraded from VMFS3, upgraded volumes inherit the VMFS3 block size. The default block size for new volumes is 1MB.
Hot clone The virtual machine may have snapshots, but the snapshot hierarchy must be less than 31 snapshots deep. Hot cloning a virtual machine creates a snapshot on the source at the beginning of the process, and then deletes the snapshot at the end of the process. Cold clone The virtual machine may have snapshots. Cloning the virtual machine creates a new virtual machine with the same content as the original virtual machine, but without snapshots. vMotion to ESX/ESXi 3.
4. Uncheck the removed folder, and click Save to save your settings. Important Deselecting folders and/or files purges the associated data from the Barracuda Backup Server. Resolving "An unknown OS error occurred" Error This article refers to Barracuda Backup firmware version 4.0 or higher. This article describes how to resolve the error "Error occurred during backup initialization".
Last error: No error Writer name: 'MSDEWriter' Writer Id: {f8544ac1-0611-4fa5-b04b-f7ee00b03277} Writer Instance Id: {9036fdfa-05ef-4f7d-9c2f-84fa2f06560a} State: [1] Stable Last error: No error Writer name: 'WMI Writer' Writer Id: {a6ad56c2-b509-4e6c-bb19-49d8f43532f0} Writer Instance Id: {f9f92826-a3d4-486c-ade3-a4201deb8ad2} State: [7] Failed Last error: No error If the output of this command contains writers with a state that is not 'Stable', you must restart the VSS service Volume Shadow Copy Servic
Error occurred during backup initialization Resolve the "Failure while using USN journal" Error This article refers to Barracuda Backup firmware version 5.0 and higher, the Barracuda Backup Agent (Windows), and Microsoft Windows Server 2003 and higher.
1. 2. 3. 4. 5. 6. Log in to your Windows Server, launch cmd, and run as admin. Enter the following command: fsutil usn queryjournal C: Where "C" represents the backup or partition drive. The USN change Journal settings display including its size in hex bytes. If the value is approximately 30MB, the backup can fail due to snapshot creation failure from lack of space. Run the following command: fsutil usn deletejournal /D C: The USN Journal is deleted and the size reset. You can proceed with your backup.
For additional information, refer to the following Microsoft TechNet articles: Windows Performance Monitor Using Performance Monitor Creating Data Collector Sets CPU Usage If backups consume too much CPU processing, system performance is affected. To determine whether a system is consuming too much CPU processing during backup, monitor the % Processor Time counter for the Processor object.
Barracuda has encountered issues with several server network cards which were resolved by upgrading the network driver.
How to Install and Use the Barracuda Backup Agent (Windows) This article refers to Barracuda Backup firmware version 5.2 and higher and Barracuda Backup Agent (Windows) 5.2 or higher.
3. 4. Select whether to Enable File Share Backups. 5. Click Save at the top of the page. In the Add Data Source page, verify the Data Type displays as Barracuda Agent Software. 6. Click Test Software Connectivity; if the connection is successful, continue to the next step; however, if the connection is not successful, return to the Add Computer page and verify the IP address is correct before continuing. Click Save to return to the Add Data Source pa ge. 7.
3. enter the following command: version number-win.exe -sp"-silent=Yes -upgrade=Yes" Where version number represents the name of the downloaded .exe installer file. For example: 5.2.00-80572-win.exe -sp"-silent=Yes -upgrade=Yes" Understanding the Barracuda Backup Agent (Windows) File Structure This article refers to Barracuda Backup firmware version 5.0 and higher, and the Barracuda Backup Agent (Windows) version 5.0 and higher.
config This folder contains the Barracuda Backup Agent configuration files including: bbconfig.ini - Contains the Barracuda Backup Agent build number and installation version. Additionally, you can modify the file to take advantage of additional features, for example, change or leverage the Microsoft Volume Shadow Copy Service (VSS) to implement a full and differential SQL database backup operation. the Backup Agent port number, bbdetect.ini - Initializes various Backup Agent features.
Location This article refers to firmware version 5.4 and higher, and the Barracuda Backup Agent (Windows). In cases where the partition has limited space, use the following steps to move the Windows Backup Agent database. 1. Log in to the system where the Agent is installed. 2. Open the Agent database folder: C:\Program Files\Barracuda\Barracuda Backup Agent\database\ 3. Copy the database named bbs400000 - File Systems.db and paste it into an alternate location. 4. 5. 6. 7. 8.
8. 9. Type services.msc in the Start Search box, and press Enter. In the Services window, right-click Barracuda Backup Agent, and click Restart: Barracuda Backup Agent (Linux) In this Section How to Install and Use the Barracuda Backup Agent (Linux) How to Manually Move the Barracuda Backup Agent (Linux) Database to an Alternate Location How to Install and Use the Barracuda Backup Agent (Linux) This article refers to Barracuda Backup firmware version 5.
Backed Up Content Use the Barracuda Backup Agent (Linux) to back up Linux file systems such as Red Hat, Ubuntu, or SUSE. The Linux Agent can back up open files, permissions, soft and hard links, and supports multiple data streams. Installing the Barracuda Backup Agent (Linux) Use the following steps to install the Backup Agent: 1. Log in to Barracuda Backup, and go to the SYSTEM > Software Downloads page. 2. Download and unzip the Barracuda Backup Agent (Linux) on your local Linux system or server. 3.
5. return to the Add Computer page and verify the IP address is correct before continuing. Click Save to return to the Edit page. 6. In the Item Selection section, select the items you wish to back up: 7. Click Save at the top of the page. Backup Schedules and Retention Once you have your Linux data source items set up for backup, you can set up schedules and retention policies.
3. [fileStores] bbs400000 - File Systems=/mnt/harddrive2/Barracuda Backup Agent Database/bbs400000 - File Systems.db Where 400000 represents the serial number of your Barracuda Backup Server. 4. Save the file. 5. Enter the following command to restart the Backup Agent: /etc/init.d/bbagent restart 6. View the bbconfig.ini file; it should look similar to: [installControl] buildNumber=84642 installedVersion=5.3.
Out-of-the-Box Making network setting changes using the Barracuda Console is easy. A Barracuda Backup Server is considered fully online when all three boxes, LAN, Internet, and Barracuda, are green. It is possible to have connectivity to the LAN and Internet but not to Barracuda Networks. This can occur if the system is not linked or if a LAN firewall is blocking the necessary outbound port 1194. Encrypted traffic is sent out across port 1194 to the Barracuda Networks management network.
Notice for the USA Compliance Information Statement (Declaration of Conformity Procedure) DoC FCC Part 15: This device complies with part 15 of the FCC Rules. Operation is subject to the following conditions: This device may not cause harmful interference, and This device must accept any interference received including interference that may cause undesired operation.
SHALL BARRACUDA NETWORKS LIABILITY EXCEED THE PRICE PAID FOR THE PRODUCT FROM DIRECT, INDIRECT, SPECIAL, INCIDENTAL, OR CONSEQUENTIAL DAMAGES RESULTING FROM THE USE OF THE PRODUCT, ITS ACCOMPANYING SOFTWARE, OR ITS DOCUMENTATION.
the source code of all or any portion of the Software; (v) utilize or run the Software on more computers than you have purchased license to; (vi) operate the Software in a fashion that exceeds the capacity or capabilities that were purchased by you. 4.
11. Export Restrictions. You may not export or re-export the Software without: (a) the prior written consent of Barracuda Networks, (b) complying with applicable export control laws, including, but not limited to, restrictions and regulations of the Department of Commerce or other United States agency or authority and the applicable EU directives, and (c) obtaining any necessary permits and licenses.
constitute an edited version or further development of the operating system. These programs are copyrighted by their authors or other parties, and the authors and copyright holders disclaim any warranty for such programs. Other programs are copyright by Barracuda Networks. Further details may be provided in an appendix to this agreement where the licenses are re-printed. Barracuda Networks makes available the source code used to build Barracuda products available at source.barracuda.com.
a) You must cause the modified files to carry prominent notices stating that you changed the files and the date of any change. b) You must cause any work that you distribute or publish, that in whole or in part contains or is derived from the Program or any part thereof, to be licensed as a whole at no charge to all third parties under the terms of this License.
obligations, then as a consequence you may not distribute the Program at all. For example, if a patent license would not permit royalty-free redistribution of the Program by all those who receive copies directly or indirectly through you, then the only way you could satisfy both it and this License would be to refrain entirely from distribution of the Program.
THIS SOFTWARE IS PROVIDED ''AS IS'' AND WITHOUT ANY EXPRESS OR IMPLIED WARRANTIES, INCLUDING, WITHOUT LIMITATION, THE IMPLIED WARRANTIES OF MERCHANTABILITY AND FITNESS FOR A PARTICULAR PURPOSE." Barracuda Networks Products may include the libspf library which is Copyright (c) 2004 James Couzens & Sean Comeau, All rights reserved.
revisions, annotations, elaborations, or other modifications represent, as a whole, an original work of authorship. For the purposes of this License, Derivative Works shall not include works that remain separable from, or merely link (or bind by name) to the interfaces of, the Work and Derivative Works thereof.
any direct, indirect, special, incidental, or consequential damages of any character arising as a result of this License or out of the use or inability to use the Work (including but not limited to damages for loss of goodwill, work stoppage, computer failure or malfunction, or any and all other commercial damages or losses), even if such Contributor has been advised of the possibility of such damages. 9. Accepting Warranty or Additional Liability.