
User manual


Table Of Contents
- 1. SAFETY
- 2. GENERAL
- 3. PHYSICAL INSTALLATION
- 4. PROJECTOR PARTS AND FUNCTIONS
- 5. GETTING STARTED
- 5.1 RCU & Local keypad
- 5.2 Remote Control and OSD Lite on Screen
- 5.3 Power on projector
- 5.4 Switching to standby
- 5.5 Power off projector
- 5.6 Range of effective remote control signal reception
- 5.7 Source selection
- 5.8 Changing OSD language
- 5.9 Adjusting the lens by horizontal and vertical lens shift
- 5.10 Introduction the OSD Lite on screen
- 6. ADVANCED OSD MENU
- 7. INPUT
- 8. IMAGE
- 9. LAYOUT
- 10. LAMP
- 11. ALIGNMENT
- 12. CONTROL
- 13. SERVICE
- 14. MAINTENANCE
- 15. PROJECTOR SPECIFICATION
- 16. ENVIRONMENTAL INFORMATION
PJWU-101B 17/10/2014
19
3.Physical Installation
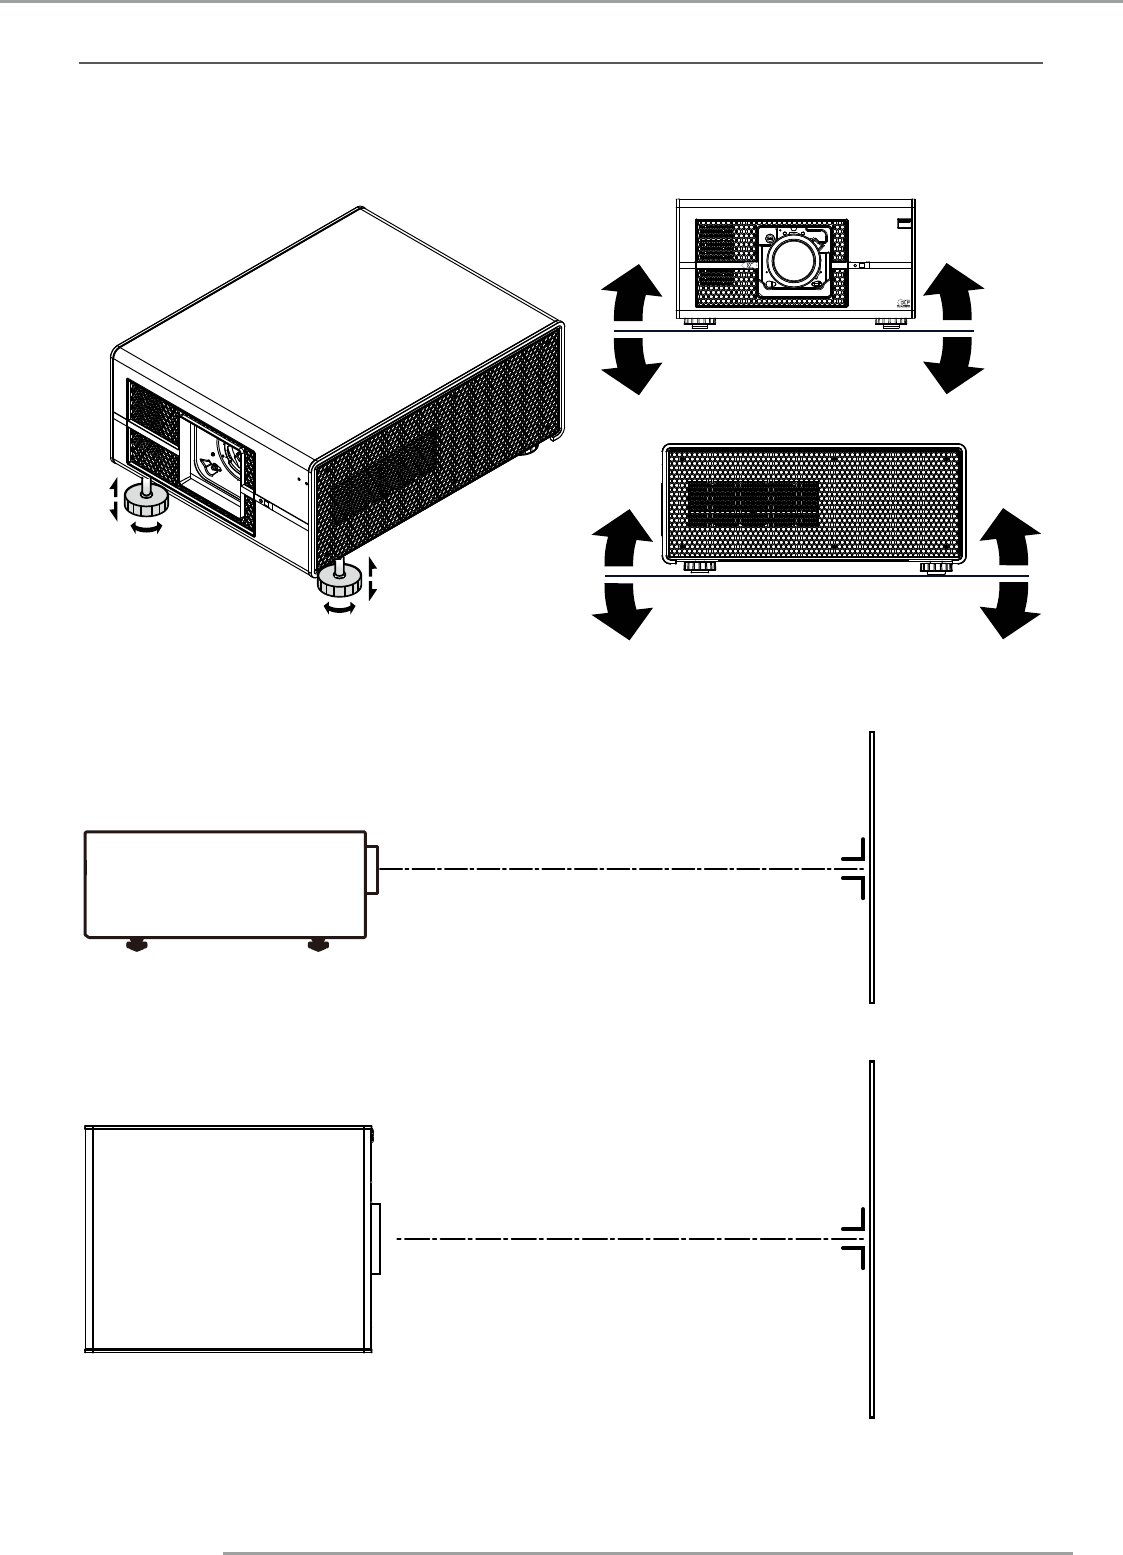
3.4 Alignment of a table mounted projector
How to align the projector
1.
Place the projector in the desired location. Take into account the zoom range of the used lens and the size of the screen.
2.
Project one of the internal hatch patterns on the screen.
3.
Turn the adjustable feet in or out until the projected hatch pattern has a perfect rectangle shape and is leveled.
When this is achieved, the projector is set horizontal and vertical at right angles to the screen.
SCREEN
Angle adjustment
SCREEN
Angle adjustment