
User manual


Table Of Contents
- 1. SAFETY
- 2. GENERAL
- 3. PHYSICAL INSTALLATION
- 4. PROJECTOR PARTS AND FUNCTIONS
- 5. GETTING STARTED
- 5.1 RCU & Local keypad
- 5.2 Remote Control and OSD Lite on Screen
- 5.3 Power on projector
- 5.4 Switching to standby
- 5.5 Power off projector
- 5.6 Range of effective remote control signal reception
- 5.7 Source selection
- 5.8 Changing OSD language
- 5.9 Adjusting the lens by horizontal and vertical lens shift
- 5.10 Introduction the OSD Lite on screen
- 6. ADVANCED OSD MENU
- 7. INPUT
- 8. IMAGE
- 9. LAYOUT
- 10. LAMP
- 11. ALIGNMENT
- 12. CONTROL
- 13. SERVICE
- 14. MAINTENANCE
- 15. PROJECTOR SPECIFICATION
- 16. ENVIRONMENTAL INFORMATION
PJWU-101B 17/10/2014
17
3.Physical Installation
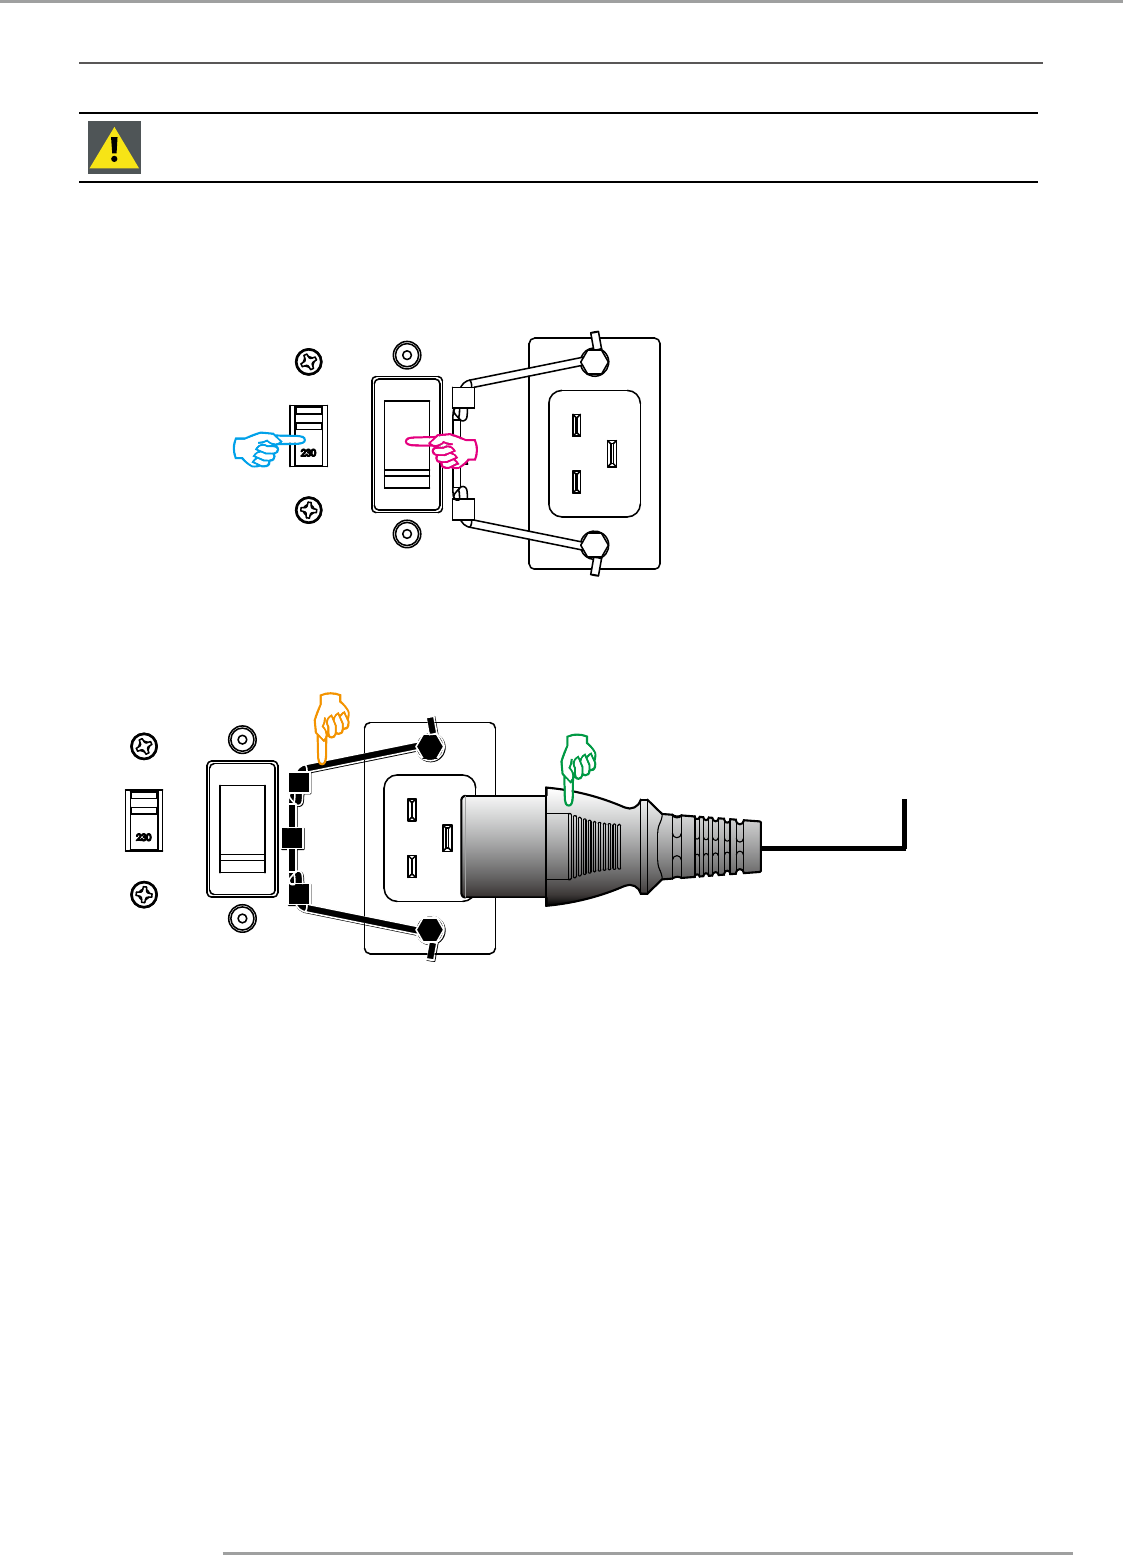
3.3 Connecting the projector with the power net
CAUTION: Use only the power cord provided with the projector.
1.
Select correct voltage
2.
Ensure that the power switch stands in the ’0’ (OFF) position .
3.
Connect the female side of the power cord with the power input socket of the projector .
4.
Secure the power plug by locking the plug holder clamp.
Connect to Wall plug
VOLTAGE
交流電源選擇
AC POWER SWITCH
交流電源開關
AC MAINS
交流電源輸入
VOLTAGE
交流電源選擇
AC POWER SWITCH
交流電源開關
AC MAINS
交流電源輸入