
User guide


Table Of Contents
- Introduction
- Overview of ReadCenter Analytics and Analytics Mobile
- Program Startup
- Main Screen
- System Outline
- Fixed and Mobile Reading Cycles
- Save/Clear Reads
- Read Input File
- Apply Gateway Readings to the Customer Account Records
- Load Collectors
- Unload Collectors
- Route Reading Reports / Run Reports
- Write Output File
- Gateway Reading Reports
- Custom Reports
- Analytics
- Accounts and System Settings
- System Requirements
- Software Function Detailed Description
- Codes
- Using the Tool Bars
- Radix Handheld File Transfer
- ReadAll Handheld File Transfer
- Mini Mobile Interrogator (MMI) File Transfer
- Backup Operation
- Troubleshooting
- Technical Support
Handheld and Laptop Settings
ReadCenter Analytics
Route Reading> Handheld and Laptop Settings
ReadCenter Analytics Mobile
Maintenance & Settings> Handheld and Laptop Settings
Mobile Only: This section is intended for customers with a mobile network. Customers using ReadCenter Analytics
exclusively for a fixed network may skip this section.
Use this function to define system settings and configurations for the collection devices used to perform the mobile route
reading process.
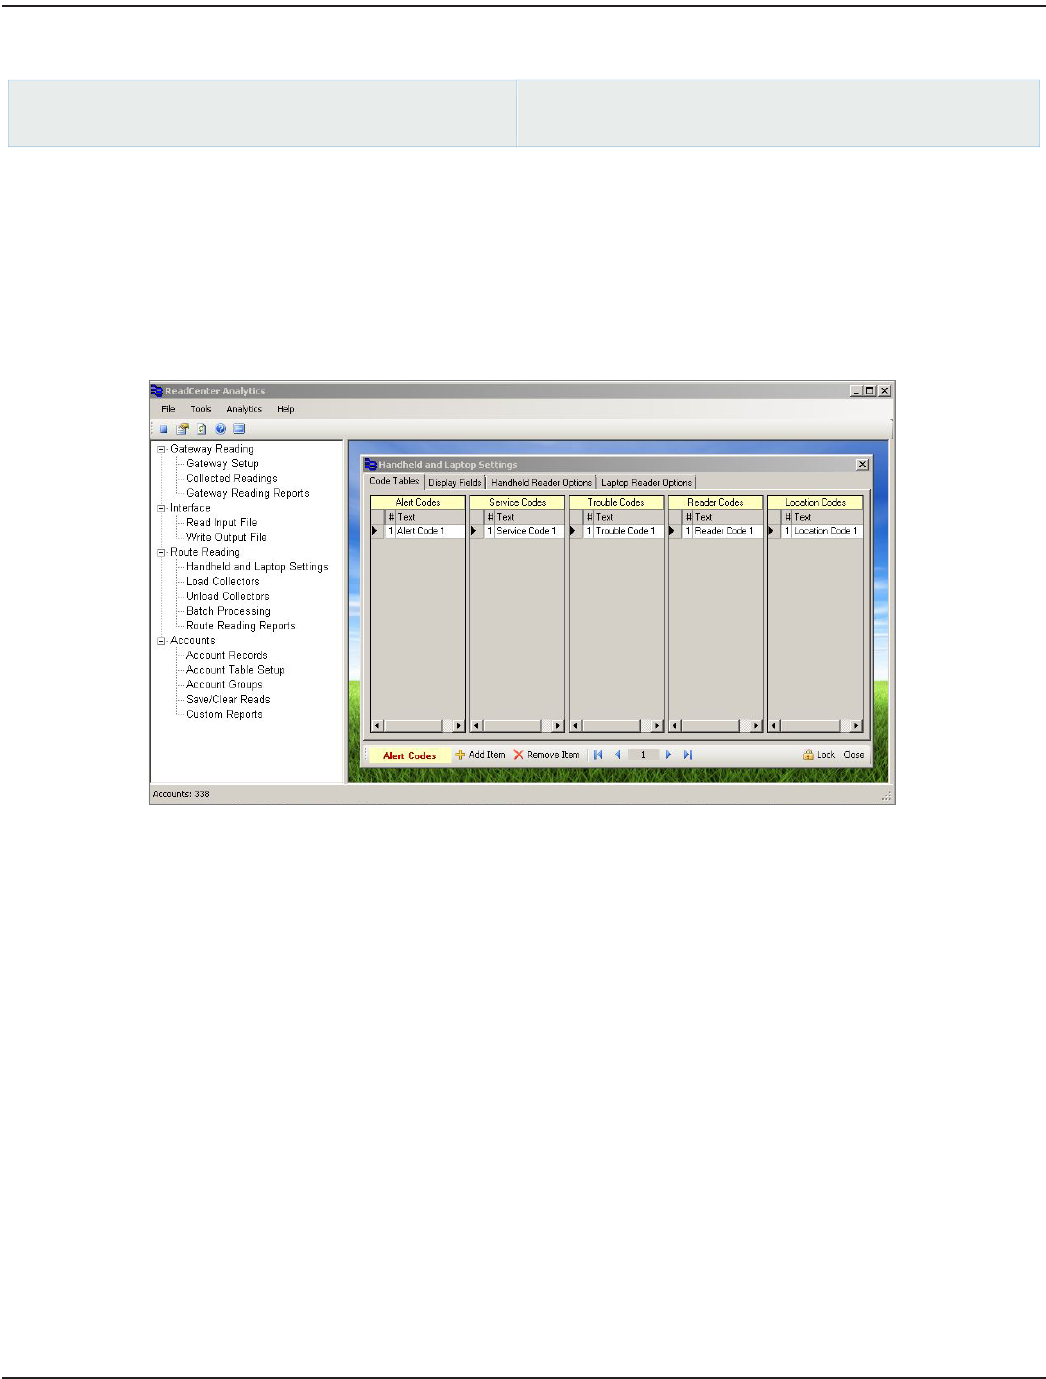
Code Tables
Use the tables to define a code and the text message associated with the number. Code numbers range from 1 to 99. Text can
have up to 50 characters, however, the display limit of the mobile collection device (handheld or laptop) may vary.
Alert Codes Sent to the collection device in a table to communicate information to the meter reader.
Service Codes Describe the service types for meters being read.
Trouble Codes Sent to the collection device in a table for the meter reader to enter.
Reader Codes Sent to the collection device in a table for the meter reader to enter.
Location Codes Describe location information. The text is passed to the collection device from account records.
1. Click on the table to select it. The active table name displays in yellow in the bottom tool bar. In the screen example
above, Alert Codes is the active table and displays in the bottom tool bar.
2. To add a table entry, click Add Item in the bottom tool bar. A new blank line will appear. Type the number and text
for the entry on this line.
3. To delete a table entry, move the cursor to the line you wish to delete, click on it, and then click Remove Item in the
bottom tool bar.
4. To edit an entry, insert the cursor and type directly on the line. The navigation arrow buttons in the bottom tool bar
provide another way to move from one table entry to another.
ReadCenter® Analytics & Analytics Mobile
Page 68 June 2014