
User guide

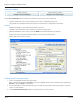


Table Of Contents
- Introduction
- Overview of ReadCenter Analytics and Analytics Mobile
- Program Startup
- Main Screen
- System Outline
- Fixed and Mobile Reading Cycles
- Save/Clear Reads
- Read Input File
- Apply Gateway Readings to the Customer Account Records
- Load Collectors
- Unload Collectors
- Route Reading Reports / Run Reports
- Write Output File
- Gateway Reading Reports
- Custom Reports
- Analytics
- Accounts and System Settings
- System Requirements
- Software Function Detailed Description
- Codes
- Using the Tool Bars
- Radix Handheld File Transfer
- ReadAll Handheld File Transfer
- Mini Mobile Interrogator (MMI) File Transfer
- Backup Operation
- Troubleshooting
- Technical Support
4. Click OK.
Result: The Email Notication Create screen
opens as shown in the example here.
5. Enter a description of the Notication (up to 50
characters) in the Description eld.
6. The user name automatically lls in the Created
By eld. This eld can be changed to a dierent
name or initials.
7. Enter one or more email addresses for the
Notications in the Recipient Email Address(s)
eld. If you enter more than one email address,
separate the addresses with a semi-colon ( ; ).
8. Click Save Notication.
Result: The Email Notication conrmation
window opens as shown here.
9. Click OK.
Result: The Email Notication is saved and
active. The rst email will be sent the next day.
Viewing and Deleting Email Notifications
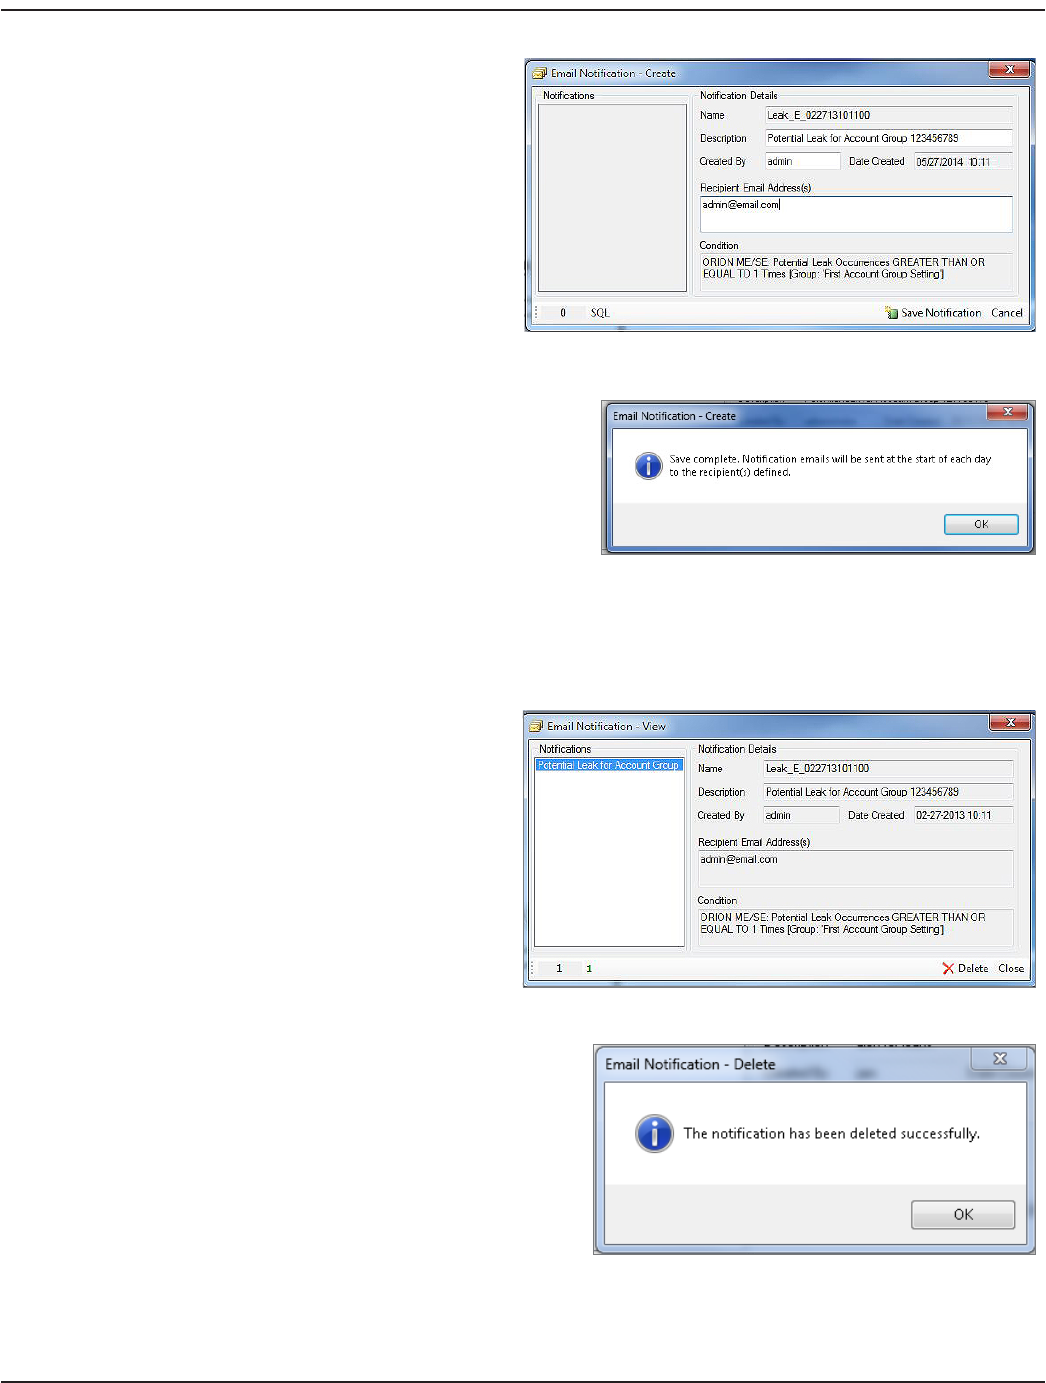
1. Click Email Notication> View Existing Notications in the lower tool bar of the Account Analytics screen.
Result: The Email Notication View window opens with any email notications that have been created.
2. Click the Notication in the list on the left side
of the screen to view the details.
3. To delete the notication, make sure the
notication you want to delete is selected in
the list.
Then click the Delete button.
Result: A conrmation window pops up.
4. Click Yes to delete the notication.
Result: A window pops up to conrm the deletion.
5. Click OK.
Result: The Email Notication is deleted.
6. Click Close to close the Email Notication View
window.
User Manual
Page 45 June 2014