
User guide


Table Of Contents
- Introduction
- Overview of ReadCenter Analytics and Analytics Mobile
- Program Startup
- Main Screen
- System Outline
- Fixed and Mobile Reading Cycles
- Save/Clear Reads
- Read Input File
- Apply Gateway Readings to the Customer Account Records
- Load Collectors
- Unload Collectors
- Route Reading Reports / Run Reports
- Write Output File
- Gateway Reading Reports
- Custom Reports
- Analytics
- Accounts and System Settings
- System Requirements
- Software Function Detailed Description
- Codes
- Using the Tool Bars
- Radix Handheld File Transfer
- ReadAll Handheld File Transfer
- Mini Mobile Interrogator (MMI) File Transfer
- Backup Operation
- Troubleshooting
- Technical Support
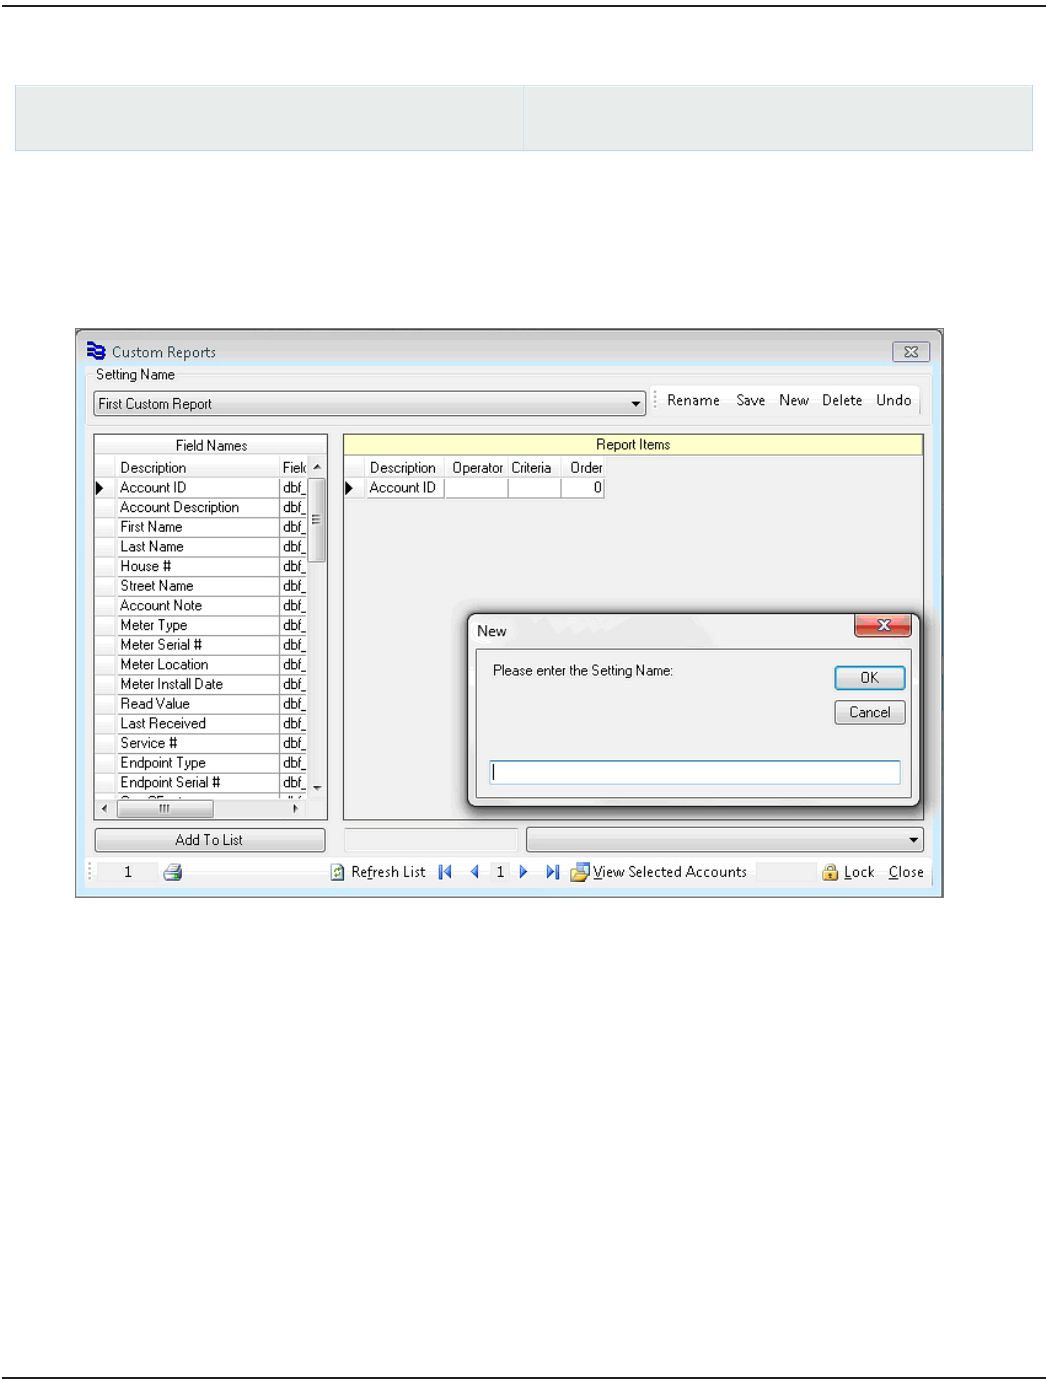
CUSTOM REPORTS
ReadCenter Analytics
Accounts> Custom Reports
ReadCenter Analytics Mobile
Maintenance & Settings> Custom Reports
Use this function to create reports with field names you select.
OTE:N An account record must be associated with the endpoint to create a Custom Report.
Creating a Report
1. Click New on the upper right side of the screen.
2. Enter the name of the new report in the window that opens and click OK.
3. Select a Field Name from the column on the left.
4. Click Add To List to add an item to the report. (Double clicking on the eld name description will also add the item.)
Result: The selected eld name appears as a new line in the Report Items window.
5. Repeat steps 3 and 4 until all the desired eld names have been added.
OTE:N To remove an item from the report, highlight the item by clicking to the left of the description. Then press
the Delete key on the keyboard.
6. To change the order of the elds, enter the desired order numbers into the Order eld (see #5 above).
7. Click Refresh List to place the elds in the desired order and save the changes.
1
2
3
4
5
ReadCenter® Analytics & Analytics Mobile
Page 34 June 2014