
Hardware Solutions for Gas Utilities User guide

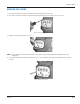
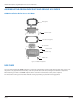
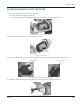
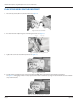
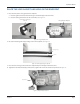
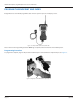
Table Of Contents
- Disclaimer
- Questions Or Service Assistance
- Product Identification
- Scope Of Manual
- Product Unpacking And Inspection
- License Requirements
- Installation Tools And Materials
- Label Information
- Sensus 415 Gas Meters
- Remove Old Index
- Assemble The Orion Endpoint And Sensus 415 Index
- Use Care
- Place The Endpoint Onto The Meter
- Place The Index On The Endpoint
- Place The Lens Gasket And Lens On The Endpoint
- Program The Endpoint And Index
- Insert Tamper Plugs
- Installation Is Complete
Installation Manual
PLACE THE ENDPOINT ONTO THE METER
1. Place the endpoint gasket on the rear of the endpoint.
a. Place the two slots through the guide pins.
b. Place the gasket so that the rounded part goes under the endpoint rear drive shaft. See Figure 6.
Figure 6: Placement of gasket on rear of endpoint
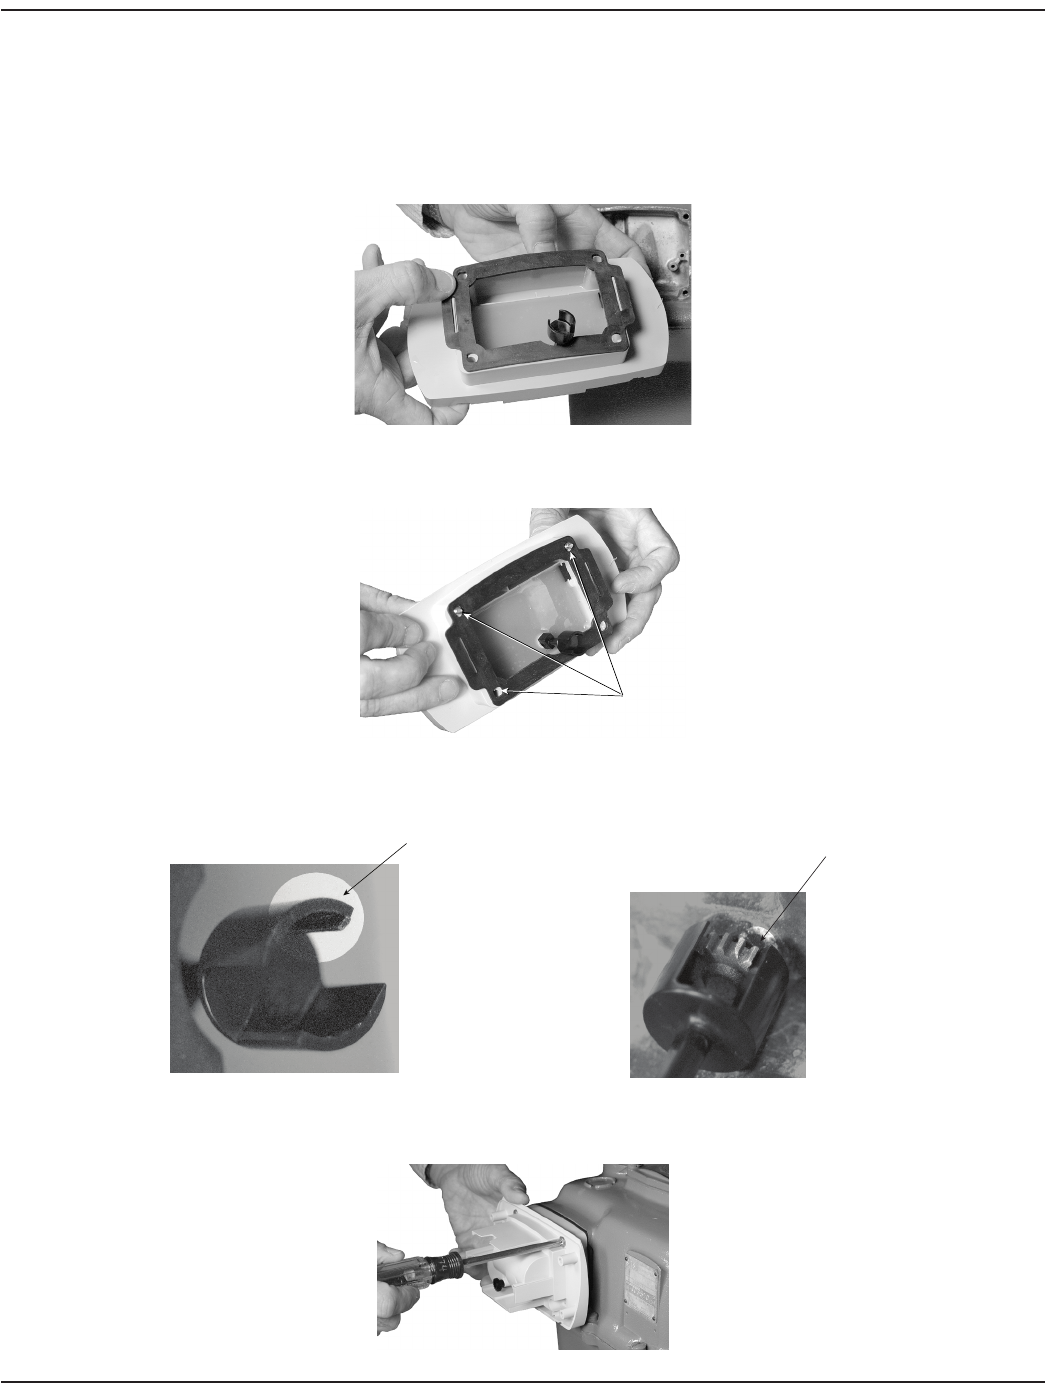
2. Place three (3) screws (10-24 X 1") into the endpoint. See Figure 7.
Screws
Figure 7: Screw placement
3. Place the endpoint on the gas meter so that the endpoint drive tab connects with the gas meter gear. See Figure 8.
Endpoint drive tab
Endpoint drive tab connects
with gas meter gear
Figure 8: Endpoint drive tab connect with gas meter gear
4. Screw the endpoint onto the gas meter. Tighten the screws to about 4 inch-pounds. See Figure 9.
Figure 9: Screw endpoint onto gas meter
Page 7 July 2014