Data Industrial® Series 3000 Flow Monitor IMPORTANT: This manual contains important information. READ AND KEEP FOR REFERENCE. 941700-0022-EN (2-12) Rev.
Series 3000 Flow Monitor Page ii 2-12
Installation & Operation Manual CONTENTS INTRODUCTION...........................................................................................................................................5 Product Unpacking and Inspection...........................................................................................................................................5 Product Description.............................................................................................................................
Series 3000 Flow Monitor Page iv 2-12
Installation & Operation Manual INTRODUCTION This manual provides installation and operation instructions for the Badger Meter Data Industrial® Series 3000 Flow Monitor. Product Unpacking and Inspection Upon receipt of the product, perform the following unpacking and inspection procedures: NOTE: If damage to the shipping container is evident upon receipt, request the carrier to be present when the product is unpacked.
Series 3000 Flow Monitor Programming the Series 3000 Flow Monitor Programming is menu driven. All data is entered using the LCD/keypad interface. A password gate is included to prevent unauthorized access to programming parameters. Programming flexibility is extended to units of measure. In addition to several factory units of measure, the Series 3000 software permits the custom units for rate and total to be created by the installer.
Installation & Operation Manual INSTALLATION Mechanical Installation The Series 3000 Flow Monitor can be either panel mounted or wall mounted. Location In any mounting arrangement the primary concern is easy viewing and convenient operation of the keypad. The unit generates very little heat, so no consideration need be given to cooling or ventilation. However, prolonged direct sunlight can damage the front panel so some level of shading is recommended, especially if installed in a tropical climate.
Series 3000 Flow Monitor Wall Mount Installation The Series 3000 wall mount is designed to mount onto a wall with four bolts or screws. The mounting hole pattern and box dimensions for the Series 3000 NEMA4 waII mount are shown in Figure 2.
Installation & Operation Manual Electrical Installation Power Supply Wiring The Series 3000 Flow Monitor requires 12-24 VDC/VAC to operate. Check the Specifications on page 23 for DC current draw and AC Volt-Amp requirements. A fused circuit is always recommended. Connect the positive of the power supply to the Series 3000 terminal marked (ACL/DC+), and connect the negative of the power supply to the Series 3000 terminal marked (ACC/DC-).
Series 3000 Flow Monitor 1 2 3 4 5 6 7 ANALOG IN+ ANALOG INSHIELD SENSOR IN GND SHIELD SENSOR PWR Figure 4: Data Industrial Flow Sensor Wiring Examples (Two- and Three-Wire Pulse Types) Analog Input As an alternative to the pulse inputs, the Series 3000 can accept an Analog input. The input is non-isolated, but can accept 0-1VDC, 0-5VDC, 0-10VDC, 0-20mA and 4-20mA with both factory-defined and custom units of measure.
Installation & Operation Manual Solid State Switch and Form “C” Output Wiring The Series 3000 Flow Monitor has one Normally Open (N.O.) solid state switch, and one solid state form “C” relay. Check the Specifications on page 23 for maximum voltage and current ratings for each type output. These outputs are completely independent, electrically isolated, and can be programmed as either Pulse or Set Point outputs.
Series 3000 Flow Monitor 1 2 3 4 5 RELAY 1 NO RELAY 1 NC RELAY 1 COM PULSE 1 OUT PULSE 2 OUT Figure 8: Relay and Switch Wiring Examples (continued) High Flow Shut Down and Normally Open Master Valve with Indication 1 2 3 4 5 RELAY 1 NO RELAY 1 NC RELAY 1 COM PULSE 1 OUT PULSE 2 OUT Figure 9: Relay and Switch Wiring Examples (continued) High Flow Shut Down and Irrigation Clock Normally Closed Master Valve with Indication Program as High Flow with Latch Page 12 2-12
Installation & Operation Manual OUTPUT OPTION CARD If the Series 3000 Flow Monitor was ordered with the Output Option card, it will have several additional outputs. 1. Analog Output ( 0-20mA; or 4-20mA ) which can be converted externally to 0-5VDC, 1-5VDC with a 250 Ohm resistor; or 0-10VDC or 2-10VDC with a500 Ohm resistor. A 15VDC power supply is provided to permit current sinking or sourcing. The Series 3000 has special software that permits the Analog output. 2.
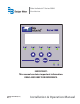
Series 3000 Flow Monitor DISPLAY AND KEY PAD The Series 3000 Flow Monitor has a two line by 16-character display with two modes of operation and 5 keys on the front panel for programming.
Installation & Operation Manual PROGRAMMING With the normal mode display showing, pressing the Menu key will enter the programming mode. In this mode, the three arrow keys () are used on the selection screens to select the option displayed above the key, and on the option list screens to scroll up or down a list of choices, like a pull-down menu. It should be noted that most screens presenting choices show three choices, one for each arrow key.
Series 3000 Flow Monitor Page 16 2-12
Installation & Operation Manual 2-12 Page 17
Series 3000 Flow Monitor Page 18 2-12
Installation & Operation Manual USB Communication If the Series 3000 Flow Monitor is ordered with an Analog Output Option card, a five-pin USB connector is also included. As much as possible the commands mimic the use of the Front Panel controls. To use this feature the following are required. 1. PC with USB ports and Windows HyperTerminal or other communications software 2. FTDI Virtual COM port drivers http://www.ftdichip.com/FTDrivers.htm 3. USB 2.
Series 3000 Flow Monitor 5. Configure this port with 38400 baud, 8 data bits, 1 stop bit, no parity and no flow control. 6. When connected, a ">" symbol will appear in the upper left corner of the main HyperTerminal display screen. Press the “Enter Key”. Both the Rx and Tx LEDs on the front of the Series 3000 should flash once, and the “Badger Meter DIC … Software Version…” text message should appear. The Series 3000 Flow Monitor is now communicating, ready to take commands from the list below.
Installation & Operation Manual USB COMMAND LIST INPUT CHANNEL CONFIGURATION In the list below, brackets indicate an argument, specifying its type and value range. For instance [0-18] stands for any number between 0 and 18 (inclusive).
Series 3000 Flow Monitor RELAY OUTPUT CONFIGURATION RS485 COMM PORT CONFIGURATION relay [1-5] func = [0-9] – relay function; relay 5 is the pulse output 0: Totalizer 1: Alarm 2: Manual Control relay [1-5] input = [0-8] – relay input; depends on source for totalizer: 0: Flow 1 Total for alarms: 0: Flow 1 Rate relay [1-5] units = [0-19] – units on setpoints/rates; depends on src/input flow units: same as 'flow [1-2] rate units' above volume units: same as 'flow [1-2] total units' relay [1-5] manual = [on/of
Installation & Operation Manual FLOW SENSOR INPUTS Type Threshold Signal Limit Frequency Pull-up Impedance Aux. Power Calibration Pulse-Di 2.5 VDC 30VDC 0.4 Hz to 10kHz 1K to12VDC — 12VDC@30mA K + Offset Pulse-K Factor 2.5 VDC 30VDC 0.4 Hz to 10kHz — — 12VDC@30mA Pulse/Gal Pull-up-K Factor 2.5 VDC 30VDC 0.
Data Industrial is a registered trademark of Badger Meter, Inc. Other trademarks appearing in this document are the property of their respective entities. Please see our website at www.badgermeter.com for specific contacts. © 2012 Badger Meter, Inc. All rights reserved. Due to continuous research, product improvements and enhancements, Badger Meter reserves the right to change product or system specifications without notice, except to the extent an outstanding contractual obligation exists.