
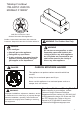
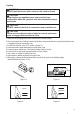
Assembly Instructions


8
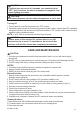
OPERATING INSTRUCTIONS
WARNING:
Before using this outdoor firepit, make sure you have read,
understand and are following all information provided in the
“Safety Information” section beginning on page 2 and 3.
Failure to follow those instructions can cause death, serious
injury or property damage.
WARNING:
Failure to inspect this connection or follow these instructions
could cause a fire or an explosion which can cause death,
serious bodily injury or damage to property.
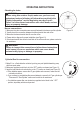
1. Make sure the valve connections are securely fastened to the burner and the cylinder.
2. Visually check the connection between the burner/venturi tube and orifice.
3. Make sure the burner/venturi tube fits over the orifice.
4. Please refer to diagram for proper installation (see Figure 10).
5. If the burner/venturi tube does not rest flush to the orifice as shown, please contact us
for assistance.
1. Make 2-3 oz. of leak detection solution by mixing one part liquid dishwashing soap
with three parts water.
2. Make sure regulator/control knob is in the “OFF” position as shown (see Figure 11).
3. Apply the leak detection check solution on the “X” location as shown (see Figure 10).
a. If any bubbles appear, remove the LP gas cylinder and reconnect, make sure the
connection is secure.
b. If you continue to see bubbles after several attempts, remove the LP gas cylinder per
“Disconnect LP Gas Cylinder” section and contact us for assistance.
c. If no bubbles appear after one minute,turn regulator/control knob to the “ OFF”
position, wipe away solution and proceed.
Checking for leaks
Burner connections
Cylinder/Gas line connection
Figure 10
Figure 11