
User`s guide


Disk
Storing Images to Disk
12-26 Revision D.0
Using Disk Store with Auto Display
Use Disk Store in conjunction with Auto Display to acquire a loop, to review it,
and to decide whether you want to store it to disk or reacquire it. This
configuration provides you with a quality check and can be helpful if you want to
review the images during the exam so you can easily reacquire them, if
necessary.
1. Touch Loop.
2. To automatically display each loop after you acquire it:
a. Press
.
b. Touch Display Options.
c. Select Auto Display after each acquire.
d. With the trackball highlight Okay and press
.
e. Press .
3. Press and enter the patient information. (See “Setting up the Exam”
on page 6-2 for more information.)
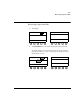
4. Acquire the desired loops, frames, or report pages.
Each image is acquired to a page in loop memory and the system
automatically displays the image.
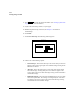
5. If the image is acceptable, touch Disk Store.
The image is stored to disk, and a disk icon appears in the screen’s upper right
portion while the image is being stored. The system returns to live imaging,
and you can continue acquiring images during the disk storage process. But
cannot perform any disk storage or retrieval operations until the storage
process is complete.
6. If the image is unacceptable, press
or touch Delete Page.
The image is deleted from loop memory and is not stored to disk. The system
returns to live imaging.
Setup
Enter
Setup
Patient ID
Acquire