
User`s guide


Annotation
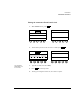
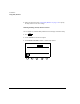
Using Body Markers
Revision D.0 8-15
ssn February 10, 1999 C:\WINNT\Profiles\dapowell\Desktop\D.0 Books\CD FILES SONOS
D.0\System Basics D.0\Frame Files\8CH.FM add.2
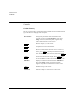
Using Body Markers
1. Touch Annotate on the left touch panel.
2. Touch Body Marker.
3. Turn the marker-category rotary control (the second from left rotary control
below the left touch panel) to choose the body marker category.
4. Turn the marker-selection rotary control (the far-left rotary control below the
left touch panel) to select the body marker.
5. Turn the Probe Size rotary control to select the probe graphic you want to use.
6. Use the trackball to position the probe graphic on the body marker.
7. Use the Rotate Probe rotary control to angle the probe graphic as desired.
8. Do one of the following:
•Touch Erase Marker to remove the current Body Marker icons from the
screen.
•Touch Body Marker or Annotate to exit Body Marker Annotation
mode, while continuing to display the body markers.
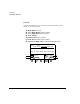
In Dual Mode
Using the Body Marker function in Dual mode displays two body markers, one
associated with each image. You can use the trackball and body marker controls
to make only one body marker active at a time.
To display body markers in Dual mode:
1. Touch Annotate in Dual imaging mode.
2. Touch Body Marker. Both body markers are displayed, but only one is
active. The active image for annotation is indicated on the touch panel as Left
Active or Right Active.
3. Touch the Left Active/Right Active control to select the image you want to
make active and annotate.