
User manual

Pro-Stcher User Manual Design Menu | 5.15
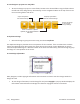
Crop Menu
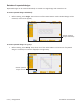
Use Crop menu funcons in conjuncon with areas. Aer modifying a design as needed, mark an area that
represents the region to be cropped.
• Select Design and then Crop.
NOTE: If the Crop panel buons at the boom of the screen are grayed out, an area hasn’t yet been
dened. Dene the area to be cropped before using any of the Crop funcons.
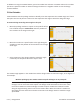
Treatment of loose ends
Pro-Stcher has two ways of handling loose ends, or jump points, that are created from a crop: Open or
Closed.
To perform a eo at jump points
• Choose Open to perform a eo at the jump points in a cropped design. Select Tie O Start and Tie
O Finish in Sengs. For more informaon about the eo sengs, see Control how Pro-Stcher
performs e-os in chapter 8, Sengs Menu.
To stch between jump points
• Choose Closed to stch along the border of the cropped area between jump points in a cropped
design.
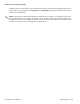
Machine Quilting Tip: To stitch around the cropped area
The Closed opon may not stch the enre area outline. Consider using Trace Outline to
stch around the perimeter of the area.
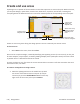
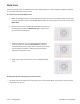
Purple lines show the
star-shaped mul-
point area.
!