
Troubleshooting guide

Page 49
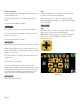
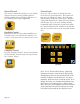
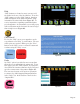
1. Tapping the “Optimize” button opens a pop-up
window with four optimizing options – Low, Med,
High and Very High (Figure 54). Low will have the
least effect on speed and Very High will have the
greatest. Very High also has the greatest potential to
alter the look of the pattern.
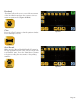
2. Be sure to zoom in on the pattern after optimizing
a fi le to make sure the optimize routine has not al-
tered the look of the pattern. If there are noticeable
changes that will affect the way the pattern stitches
out, press the “Load Orig” (load original) button and
try a lower optimization.
3. Press the “Done” button to return to the “Library”
screen.
Figure 54
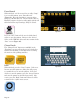
Figure 55
When to Optimize First
If the loaded pattern is already roughly the
desired size for the quilt, it is easiest to
perform the “Optimize” function prior to any
repeats. It will take less time to optimize the
fi le this way and if the level of optimization
needs to be changed, then all the other opera-
tions that would have already been performed
will not be lost when the “Load Original” but-
ton is pressed.
When to Optimize After Resizing
If it is known in advance that the pattern
will be shrunk signifi cantly, it is best to fi rst
re-size the pattern to roughly the size desired
and then perform the “Optimize” function
(remember that when a pattern is shrunk,
the line segments shrink with it). Any other
alterations (repeats, rotations, etc.) can then
be done after the optimization.
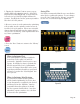
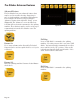
Saving Files
It is highly recommended that the user save all alter-
ations prior to quilting the pattern. To save changes,
press the “Save” button in the “Library” screen and
use the new screen that will appear (Figure 55).