User guide
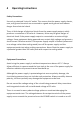
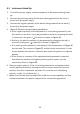
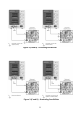
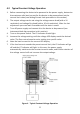
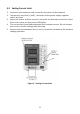
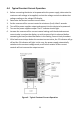
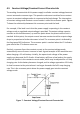
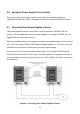
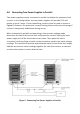
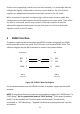
Table Of Contents
- 1 Safety Summary
- 2 Introduction
- 3 Quick Reference
- 4 Operating Instructions
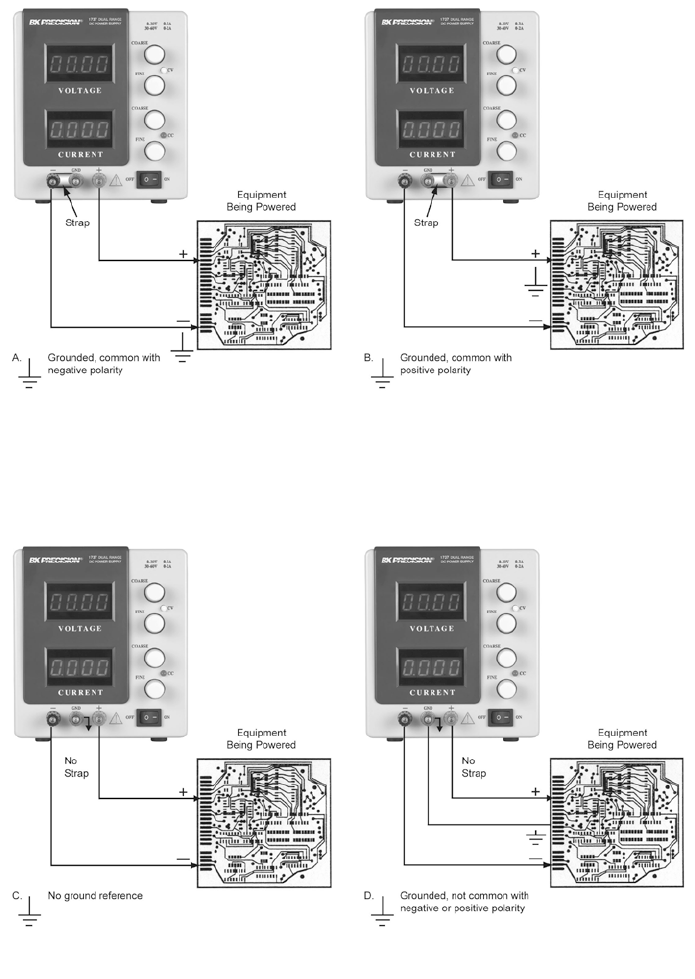
- 4.1 Instrument Hook-Up
- 4.2 Typical Constant Voltage Operation
- 4.3 Setting Current Limit
- 4.4 Typical Constant Current Operation
- 4.5 Constant Voltage/Constant Current Characteristic
- 4.6 Saving the Power Supply’s Current State
- 4.7 Connecting Two Power Supplies in Series
- 4.8 Connecting Two Power Supplies in Parallel
- 5 RS232 Interface
- 6 Maintenance
- 7 Error Messages
- 8 Specifications
- 9 Service Information
- 10 Limited Three-Year Warranty