
Specifications


17
5. Verify the dropdown box between the “Cut” and “Properties” button is set to the nisher, either via
USB or Ethernet.
6. Verify your Properties are set correctly for your job. (Review of properties in section 1.2.5)
7. Now hit the “Cut” button to send the cutting path to the Axxis HS Digital Label Finisher.
1.2.5 Allen DirectCut Properties
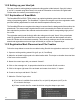
Find Origin
1. Click on the properties button
2. Select Find Origin.
3. Select the type of origin you want to use.
a) “Origin Only” is for normal use or when using a single SmartMark™.
b) “Origin Skew”, “Origin Skew Scale”, and “Origin Scale” are used for cutting
artwork with more complex shapes per frame.
c) “Edge” is used for cutting blank label
stock. Edge offset is used only when
cutting blank labels on unprinted
material. The SmartMark™ sensor will
detect the edge of the media instead
of a registration mark, then offset into
the media by the amount chosen by
the user in the Direct Cut properties
and cuts the blank labels.
Sort Method
This setting changes how the cutter moves from
the end of one cut to the beginning of the next. It is
recommended to use the sort method “Increasing X”
for optimum output path. Depending on the job, other
options may create more efcient cut paths.
Rotation
In the preview window, select DFS origin. This moves
the Registration Mark (origin) to the upper right on the screen. This matches the view you see when
you look at the printed roll from the front of the Axxis HS. Use the rotate selection in the properties
until the origin registration cut or L cut is in the upper right corner of the preview screen. Select
rotation (none, 90°, 180°, or 270°).