
Specifications


16
1.2.4 Creating the “Cut” File for the Finisher
1.2.4.1 Creating Plot File with Adobe Illustrator
1.2.4.2 Creating Plot File with CorelDraw
In “Registration Mark Placement and File Creation”, a le was created to add a registration mark
and a dened cutting path to the label graphics le. The next step is to export or “send” this le to
the nisher using the Allen DirectCut program.
1. Open your label-cutting le (as created above) using Adobe Illustrator.
2. Open the layer window. If the layer window is not visible, you can make it visible by clicking on
Window -> Layers.
3. Select the die-lines layer on the layer menu.
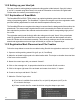
4. Click on File -> Allen DirectCut to open the DirectCut program for Illustrator.
5. Verify the dropdown box between the “Cut” and “Properties” button is set to the nisher, either via
USB or Ethernet.
6. Verify your Properties are set correctly for your job. (Review of properties in section 1.2.5)
7. Now hit the “Cut” button to send the cutting path to the Axxis HS Digital Label Finisher.
1. Open the label-cutting le (as created above) using CorelDraw.
2. Open the object manager. If the object manager is not visible, you can make it visible by clicking
on Window -> Dockers -> Object Manger.
3. Select the die-lines layer on the object manager tab.
If the Allen DirectCut tool does not appear near the view button, select Tools -> Options ->
WorkSpace. Then check Allen Datagraph.
4. Click on the Allen DirectCut button to open the DirectCut for CorelDraw preview window.