
Specifications


12
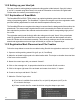
1.2.0 Setting up your label job
1.2.1 Explanation of SmartMark
1.2.2 Registration Mark Placement and File Creation
Files are created to add registration marks and cutting paths to label artwork. Once this is done,
a “cut le” is created using Allen DirectCut to send the information to the Axxis HS Digital Label
Finisher when the media is processed through it.
The SmartMarkTM for ADSI i-TECH cutters is an optical registration system that ensures accurate
cutting of pre-printed graphics. The SmartMark™ system can recognize up to three registration marks
per frame allowing adjustments for scale and skew discrepancies that may occur.
The SmartMarkTM sensor recognizes the change in contrast from the background of the media to the
printed mark. The sensor sends a signal when the mark is scanned by the nisher to have the soft-
ware calculate the position of the scanned mark and matches it with its corresponding origin point of
the cut le.
The registration mark(s) and die-line(s) dene the cutting area for each “frame” of the printed label
media. A registration mark and a die-line must be created to use with the label artwork so that the
Axxis HS Finisher can cut the labels accurately. This is done by creating a new le that contains the
artwork and registration mark on one layer and the die (or cut) line on a separate layer.
Follow the steps below to create the new label-cutting le with the registration mark set to “origin”.
1. Open an existing working artwork le (pdf, eps, Ai, CorelDraw)
2. Make the art board height equal to the label media width. This helps to visualize the actual size
of the frame on the material.
3. Name the current layer with your artwork “Artwork”.
4. Click on the rectangle tool; its properties should be set to black ll with no stroke.
5. Click in the upper right area of the art board and create a box that is ¼” square.
6. Create a new layer and label it “Die-line”.
7. Make the “Die-line” layer active.
a) If you have it available from another le, cut (ctrl+X) and paste (ctrl+F) a die
line to the die-line layer.
b) If there is no die-line le, create the die-line using the shape or pen tools.