
Installation Manual Part 2

Company Proprietary
Adaptive Broadband
U-NII Product Installation Manual 05/29/2001
7-6
7.3 Installing the Outdoor Subscriber Unit
Now that you have installed the mounting pole, you are now ready to install the outdoor
Subscriber Unit (SU) to the mounting pole. Table 7-4 describes the tools and equipment needed
to install the SU.
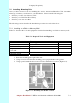
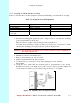
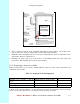
Table 7-4 Required Tools and Equipment
Tools Equipment Quantity
Phillips-head screwdriver Pole clamp 2
3/16” hex wrench Washers 2
Mounting screws 2
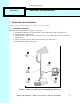
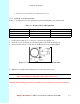
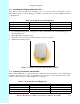
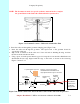
1. Loosen the mounting screws and place the outdoor Subscriber Unit on the mounting pole, as
shown in Figure 6-6.
2. Hand tighten the mounting screws.
3. Rotate the outdoor transceiver in the direction of the Access Point.
4. Tighten the mounting screws.
Figure 7-6 Outdoor Subscriber Unit Mounted on Wall
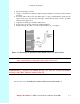
7.4 Preparing The Indoor Junction Box
This section explains how to prepare the indoor junction box for installation. You will drill the
mounting holes, but leave the box uninstalled, as it is easier to route the interconnect cable.
Table 7-5 describes the tools and equipment you will need.
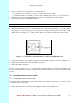
Table 7-5 Required Tools and Equipment
Tools Required Equipment Required Quantity
Phillips-head screwdriver Screws 2
Flat head screwdriver Wallboard inserts 2
Power drill 1
1/8 inch drill bit 1