
Installation Manual Part 2

Company Proprietary
Adaptive Broadband
U-NII Product Installation Manual 05/29/2001
7-3
4. Set the mounting pole aside.
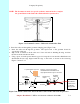
5. Using a ¼ inch masonry drill bit, drill holes approximately ½ inch deep at the marked
locations.
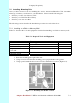
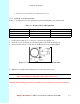
6. Insert the anchor sleeves into the drilled holes. Using a small hammer, gently tap the
anchor sleeves into the masonry until tight. Check that the anchor sleeves are flush
with the wall. (Figure 6-3)
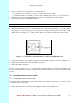
7. Align the mounting pole with the drilled holes.
8. Insert a lag bolt in each of the holes and hand tighten.
9. Tighten all lag bolts with a wrench, being careful not to over tighten.
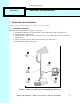
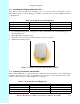
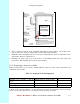
Figure 7-3 Mounting Pole Installation Using Expansion Sleeves and Lag Bolts
Attention! The mounting pole must be mounted in a vertical position. Failure to do so
may result in improper alignment of the outdoor transceiver
.
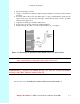
IMPORTANT – Before you install the SU, be sure to record, for future
reference, the MAC address found on the SU.
10. Now proceed to
Installing the Outdoor Subscriber Unit
in Section 6.3.