
Install Manual

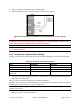
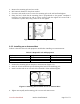
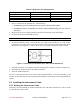
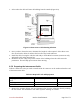
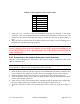
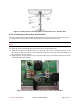
Table Of Contents
- Preface
- PLEASE READ THESE SAFETY PRECAUTIONS!
- Table of Contents
- List of Figures
- List of Tables
- AB-Access Product Overview
- Getting Started
- Base Station Installation
- Access Point Installation
- AB-Extender Installation
- Subscriber Unit Installation
- Indoor Junction Box
- Glossary
- Acronyms/Abbreviations

Axxcelera Broadband Product Install Manual Page 52 of 71
8. Insert a lag bolt in each of the holes and hand tighten.
9. Tighten all lag bolts with a wrench, being careful not to over tighten.
Figure 6-3 Mounting Pole Installation Using Expansion Sleeves and Lag Bolts
Attention! The mounting pole must be mounted in a vertical position. Failure to do so
may result in improper alignment of the outdoor transceiver.
IMPORTANT – Before you install the SU, be sure to record the MAC address found on the
SU for future reference.
6.2.2 Installing on a Wall with Wood Siding
Table 6-2 describes the tools and equipment needed when installing on a wall with wood siding.
Table 6-2 Required Tools and Equipment
Tools Equipment Quantity
Power Drill Mounting pole 1
1/8 inch drill bit #6 wood screws 4
Bubble level or plumb line Spacers 1
Phillips head screwdriver or
power drill
1
1. Place the mounting plate against the wall. Using a level, be sure that the mounting pole is
perpendicular to the ground.
This procedure is similar to that shown previously in Figure 6-2.
Note that when mounting on clapboard siding, you may need to use spacers to make sure that the
mounting pole is perpendicular, as shown in Figure 6-4.
Attention! The mounting pole must be in a vertical position for proper alignment of the
outdoor transceiver.
2. Mark the locations for the drilled holes.