User manual

246
CHAPTER 15 – Reanalyzing Data with WinLTP Reanalysis Program
Although this version of WinLTP does a reasonably good job of doing accurate on-line amplitude and
slope analysis, experience in our group has indicated that subsequent off-line analysis can often improve
the analysis accuracy. Doing Reanalysis with WinLTP is like reliving the experiment in ‘fast forward’ mode
without any interruptions between ADsweeps.
15.1 Start WinLTP Reanalysis
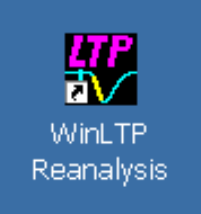
To start the WinLTP Reanalysis program, click on the ‘WinLTP Reanalysis’ icon (Fig 15.1).
Fig 15.1.
When the WinLTP Reanalysis program starts up, the initial ‘splash screen’ comes up almost immediately
indicating that the program in “Loading…”, which takes at least 15 seconds. After this period the
“Loading…” message goes away and the initial Reanalyzing Data dialog box is active (top of Fig. 15.2.1).
NOTE: There may be a video related BUG with early versions of Windows XP. If WinLTP hangs up
during start-up (start-up can take at least 15 seconds!), try changing your video to Classic (Windows
2000) mode, or (believe it or not) change the Windows XP font size to Normal if it is Large or Extra Large.
15.2 Reanalyze files from a CD-ROM
After the WinLTP Reanalysis program has started, the Reanalyzing Data dialog box appears (Fig.15.2.1,
top) which allows you to either Use Same Read/Write Data Folder if reanalyzing ADsweep files from the
hard drive, or Use Separate Read (CD-ROM) & Write Data Folders if reanalyzing ADsweep files that
have been previously saved on a read-only CD-ROM. Because you cannot write the analysis (*.AMP)
and LaserJet (*.LJ) files to the read-only data folder on the CD-ROM, a different Data Write folder on your
hard disk must be chosen.
If you choose the Use Same Read/Write Data Folder selection, the Reanalyzing Data – Using Same
Read/Write Data Folder dialog box appears (Fig. 15.2.1, left middle panel). Change the Data
Read/Write Folder by clicking on the ‘Change’ button to call up a Change Read/Write Data Folder dialog
box (similar to the one shown in Fig. 2.7.2) and select a new folder, and then press the ‘Accept’ button to
set that as your Data Read/Write Folder (see panel below left in Fig. 15.2.1).


