
Specifications
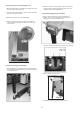
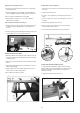
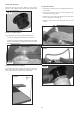
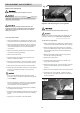
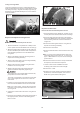
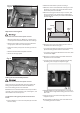
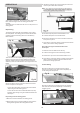
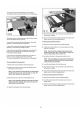
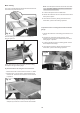
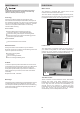

Fig 37
3. Install the crosscut fence in the guide pin holes and
OPERATIONS
lock it in place with the knurled nut.
Note First, drop the crosscut fence into the forward
guide pin hole, turn the "Z"lock plate to align the
fence, then tighten the knurled nut.
Your safety is important. To preventing work-piece kick-
back, slide the edge shoe into sliding panel when
needed.
The edge shoe can slide into the front or rear portion of
sliding panel.
Rip Cutting
The sliding panel saw has the capability of rip cutting
4. Set either flip stop to the desired width-of-cut.
full size panels. The sliding panel removes the burden
of sliding a large and heavy panel over a stationary
5. Load the workpiece onto the table saw.
table surface.
6. Mount the hold down arm onto the stud and lock the
work-piece in place.
7. Once all the necessary safety precautions have been
taken, perform the cutting operation.
Rip cutting using the traditional table saw
technique:
1. Slide the crosscut table out of the way.
2. Lock the sliding panel into a stationary position.
3. Position the rip fence to the desired width-of-cut.
This saw also has the capability of rip cutting smaller
4. Once all the necessary safety precautions have been
boards, using the machine as a traditional table saw.
taken, load the workpiece onto the table saw and
Smaller, lighter boards are easier to slide across the
perform the cutting operation.
stationary cast iron table surface to the right of the saw
blade.
Crosscutting
With the crosscut fence mounted in the forward
position, the sliding panel saw has the capability of
crosscutting full size panels.
Determine which cutting operation will be best suited
for the workpiece to be ripped.
With the crosscut fence mounted in the rear position,
this machine also has the capability of crosscutting
To use the sliding table, read the instructions titled
smaller panels.
“Rip cutting with the sliding panel.”
To use the machine as a traditional table saw, skip
ahead to “Rip cutting using the traditional table saw
technique.”
Rip cutting with the sliding panel:
1. Mount the crosscut table to the sliding panel.
2. Slide and secure the crosscut table to the end of the
sliding table opposite the sliding table handle.
16
Fig 36
Fig 34
Fig 35
Fig 36
Fig 38
Fig 39