
Installation guide


Table Of Contents
- Safeguards
- AXIS P3363-VE/P3364-VE/P3364-LVE Network Camera Installation Guide
- AXIS P3363-VE/P3364-VE/P3364-LVE Guide d’installation de la caméra réseau
- AXIS P3363-VE/P3364-VE/P3364-LVE Installationsanleitung für die Netzwerk-Kamera
- AXIS P3363-VE/P3364-VE/P3364-LVE Guida all'installazione della telecamera di rete
- Guía de instalación de la cámara de red AXIS P3363-VE/P3364-VE/P3364-LVE
AXIS P33-VE Network Cameras Installation Guide Page 9
ENGLISH
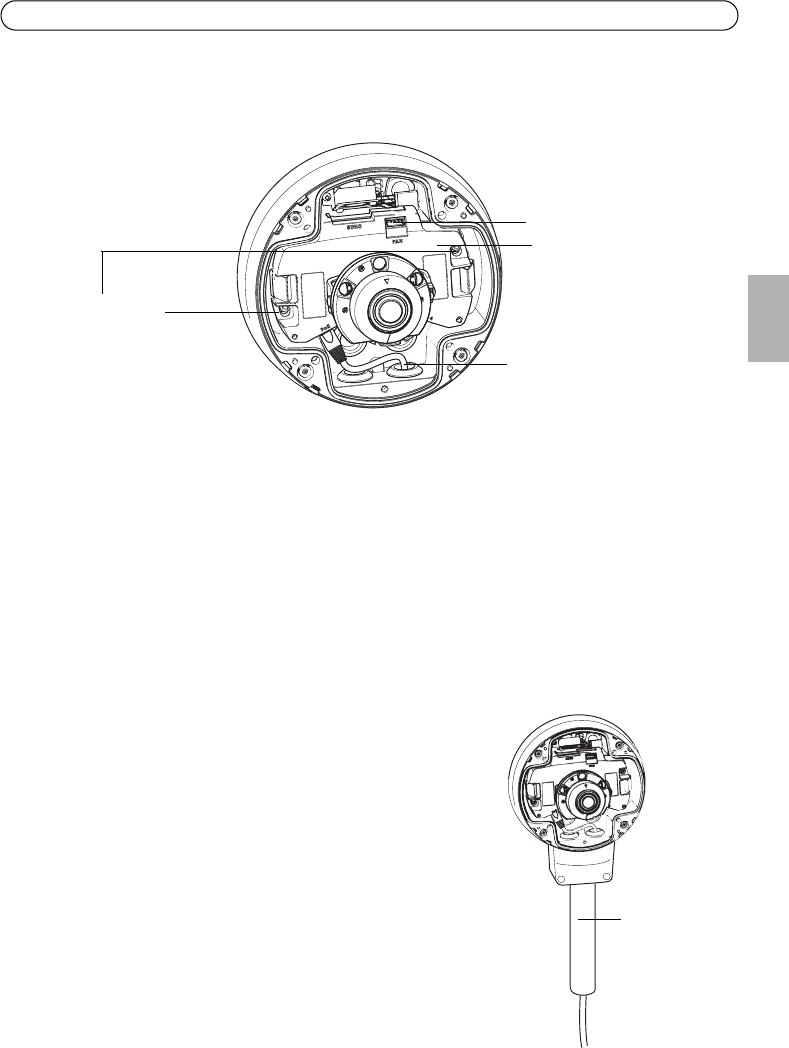
Install the camera unit
1. Attach the network cable to the camera unit; and the cable for audio and I/O if required.
Note:
Be careful not to stretch or bend the network cable too much since this could cause damage to
the network cable.
2. Insert the SD memory card (optional).
3. Pull aside the springs in the unit casing and click the camera unit in place.
4. Attach the fan connector to the connector in the camera unit.
5. Attach the two M4x8 20 screws to the camera for greater stability.
These screws are only necessary to secure against heavy shocks and vibrations.
Note:
The AXIS P3363-VE/P3364-VE/P3364-LVE can also be fit-
ted with a metal conduit for protecting the cabling when
cables are routed along the wall.
Connector for fan
Camera unit
Network cable
Attach
screw to camera
Conduit