ENGLISH FRANÇAIS AXIS Q3505–VE Fixed Dome Network Camera DEUTSCH ITALIANO ESPANÕL ò ¨ ¾ Installation Guide
Legal Considerations Regulatory Information Video and audio surveillance can be regulated by laws that vary from country to country. Check the laws in your local region before using this product for surveillance purposes. This product includes one (1) H.264 decoder license and one (1) AAC decoder license. To purchase further licenses, contact your reseller. Europe Liability Every care has been taken in the preparation of this document.
This product fulfills the requirements for immunity according to EN 61000-6-1 residential, commercial and light-industrial environments. This product fulfills the requirements for immunity according to EN 61000-6-2 industrial environments. This product fulfills the requirements for immunity according to EN 55024 office and commercial environments Australia/New Zealand This digital equipment fulfills the requirements for RF emission according to the Class B limit of AS/NZS CISPR 22.
AXIS Q3505–VE Fixed Dome Network Camera Safety Information Hazard Levels DANGER Indicates a hazardous situation which, if not avoided, will result in death or serious injury. WARNING Indicates a hazardous situation which, if not avoided, could result in death or serious injury. CAUTION Indicates a hazardous situation which, if not avoided, could result in minor or moderate injury. NOTICE TICE NO Indicates a situation which, if not avoided, could result in damage to property.
AXIS Q3505–VE Fixed Dome Network Camera Safety Instructions NOTICE TICE NO • The Axis product shall be used in compliance with local laws and regulations. • Store the Axis product in a dry and ventilated environment. • Avoid exposing the Axis product to shocks or heavy pressure. • Do not install the product on unstable brackets, surfaces or walls. • Use only applicable tools when installing the Axis product. Excessive force could cause damage to the product.
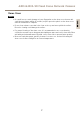
AXIS Q3505–VE Fixed Dome Network Camera Dome Cover • Do not clean a dome cover that looks clean to the eye and never polish the surface. Excessive cleaning could damage the surface. • For general cleaning of the dome cover it is recommended to use a non-abrasive, solvent-free neutral soap or detergent mixed with pure water and a soft, clean cloth. Rinse well with pure lukewarm water. Dry with a soft, clean cloth to prevent water spotting. • Never use harsh detergents, gasoline, benzene or acetone etc.
AXIS Q3505–VE Fixed Dome Network Camera Installation Guide Installation Steps 1. Make sure the package contents, tools and other materials necessary for the installation are in order. See page 9. 2. Study the hardware overview. See page 10. 3. Study the specifications. See page 14. 4. Install the hardware. See page 16. 5. Access the product. See page 19. Package Contents For optional accessories see axis.
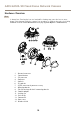
AXIS Q3505–VE Fixed Dome Network Camera Hardware Overview Note 3–9 mm lens: Pressing the lens too hard while cleaning may cause the lens to move down. If this happens while the camera is in operation, re-calibrate the optics by clicking Calibrate from the Server Maintenance web page (System Options > Maintenance). 19 1 2 3 4 5 6 18 16 17 8 9 10 11 12 13 14 15 1. 2. 3. 4. 5. 6. 7. 8. 9. 10. 11. 12. 13. 14. 15.
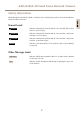
AXIS Q3505–VE Fixed Dome Network Camera 16. 17. 18. 19. ENGLISH Status Led Function button Spring in unit casing Heater Caution! The heater may be hot LED Indicators LED Color Indication Status Unlit Connection and normal operation Amber Steady during startup. Flashes during firmware upgrade. Amber/red Flashes amber/red if network connection is unavailable or lost. Red Flashes red for firmware upgrade failure. Green Shows steady green for 10 seconds for normal operation after restart.
AXIS Q3505–VE Fixed Dome Network Camera Network Connector RJ45 Ethernet connector with Power over Ethernet (PoE). NOTICE TICE NO The product shall be connected using a shielded network cable (STP). All cables connecting the product to the network shall be intended for their specific use. Make sure that the network devices are installed in accordance with the manufacturer’s instructions. For information about regulatory requirements, see Electromagnetic Compatibility (EMC) on page 2.
AXIS Q3505–VE Fixed Dome Network Camera Note For SD card recommendations see www.axis.com ENGLISH Control Button The control button is used for: • • Resetting the product to factory default settings. See page 20. Connecting to an AXIS Video Hosting System service or AXIS Internet Dynamic DNS Service. For more information about these services, see the User Manual. Function Button The function button has multiple functions: • • As Levelling Assistant – This function helps to ensure the image is level.
AXIS Q3505–VE Fixed Dome Network Camera Specifications Product Classification Temperature Humidity AXIS Q3505–VE IEC 60529 IP66 and IP67 NEMA 250 4X-rated – 40 °C to 55 °C (– 40 °F to 131 °F) 10-100% RH (non-condensing) Connectors I/O Connector 4–pin terminal block for: • • • • Auxiliary power (DC output) Digital Input Digital Output 0 V DC (-) 1 2 3 4 Function Pin Notes 0 V DC (-) 1 DC output 2 Can be used to power auxiliary equipment. Note: This pin can only be used as power out.
AXIS Q3505–VE Fixed Dome Network Camera 1 2 ENGLISH 12 V max 50 mA 3 4 3. 4. I/O configured as input I/O configured as output Audio Connector 3.5 mm audio connectors (stereo) 3 2 1 1 Tip 2 Ring 3 Sleeve Audio Input Balanced Microphone Hot (+) In/Unbalance Microphone In/Line In Balanced Microphone Cold (-) In Ground Audio Output Line out (mono) Ground SD Card Slot Supports microSD cards with up to 64 GB of storage.
AXIS Q3505–VE Fixed Dome Network Camera Install the Hardware Route the Cables Note See Hardware Overview on page 10. Depending on whether you want to route the cables through or along the wall, follow the relevant instructions below. To route cables through the wall: 1. Using the drill template drill 4 holes for mounting the bracket, and one or two holes as required for routing the cable or cables in the wall. 2.
AXIS Q3505–VE Fixed Dome Network Camera Attach Mounting Bracket to Wall Connect the Cables and Attach Unit Casing to Mounting Bracket 1. Insert the SD memory card in the camera unit (optional). 2. Push the network cable through the black cable gasket in one of the holes in the unit casing, using the connector guard provided. Pull the network cable back slightly so that the cable gasket adjusts itself on the cable.
AXIS Q3505–VE Fixed Dome Network Camera 3. Tighten the 4 tamper proof screws to attach the unit casing to the mounting bracket using the Resitorx key TR20. 4. Connect the cable to the camera unit. 5. Pull the springs aside in the unit casing and attach camera unit to the unit casing. Adjust Camera Angle 1 4 3 1. 2. 3. 4.
AXIS Q3505–VE Fixed Dome Network Camera Camera unit: AXIS Q3505–V Complete the Installation 1. If required, attach the weather shield to the camera before you attach the dome cover. To do this remove the two screws in the dome cover. 2. Make sure the rubber gasket sits securely on the dome cover, attach the dome cover to the unit casing by tightening the 4 screws. The installation is now complete.
AXIS Q3505–VE Fixed Dome Network Camera 3. Click Perform auto focus to focus the camera automatically. 4. If more adjustments are needed, go to the Advanced tab. Note • Movements in front of the camera should be avoided during automatic focusing. On the Advanced tab, focus can be adjusted manually: 1. Click Open iris to open the iris to its maximum position. This gives the smallest depth of field and provides the best conditions for focusing. 2. Focus is set in the Focus window.
AXIS Q3505–VE Fixed Dome Network Camera Note The installation and management software tools are available on the CD supplied with the product and from the support pages on www.axis.com/techsup 1. Disconnect power from the product. 2. Press and hold the control button and reconnect power. See Hardware Overview on page 10. 3. Keep the control button pressed for about 15–30 seconds until the status LED indicator flashes amber. 4. Release the control button.
AXIS Q3505–VE Fixed Dome Network Camera Informations sur la sécurité Lisez attentivement ce guide d'installation avant d'installer l'appareil. Conservez le guide d'installation pour toute référence ultérieure. Niveaux de risques Indique une situation dangereuse qui, si elle n'est pas évitée, entraînera le décès ou des blessures graves. AVERTISSEMENT Indique une situation dangereuse qui, si elle n'est pas évitée, pourrait entraîner le décès ou des blessures graves.
AXIS Q3505–VE Fixed Dome Network Camera Consignes de sécurité A VIS • Le produit Axis doit être utilisé conformément aux lois et règlementations locales en vigueur. • Conserver le produit Axis dans un environnement sec et ventilé. • Ne pas exposer le produit Axis aux chocs ou aux fortes pressions. • Ne pas installer ce produit sur des supports, surfaces ou murs instables. • Utiliser uniquement des outils recommandés pour l'installation de le produit Axis.
AXIS Q3505–VE Fixed Dome Network Camera AVERTISSEMENT • Risque d'explosion si la batterie est remplacée de façon incorrecte. • Remplacez-la uniquement par une batterie identique ou une batterie recommandée par Axis. • Mettez au rebut les batteries usagées conformément aux réglementations locales ou aux instructions du fabricant de la batterie. Couvercle de dôme • Veillez à ne pas rayer, endommager ou laisser d'empreintes sur le couvercle du dôme car cela pourrait altérer la qualité d'image.
AXIS Q3505–VE Fixed Dome Network Camera Guide d'installation Ce guide d'installation explique comment installer la caméra réseau AXIS Q3505–VE à dôme fixe sur votre réseau. Pour toute autre information relative à l'utilisation du produit, reportez-vous au manuel de l'utilisateur disponible sur le site www.axis.com Procédures d’installation Contenu de l'emballage Pour la liste des accessoires en option, consultez axis.
AXIS Q3505–VE Fixed Dome Network Camera Aperçu du matériel Note Objectif 3–9 mm : Si vous appuyez trop fort sur l'objectif en le nettoyant, il peut s'abaisser. Si cela se produit alors que la caméra est en marche, recalibrez le système optique en cliquant sur Calibrate (Calibrer) dans la page Web Server Maintenance (Maintenance du serveur) (System Options > Maintenance) (Options système > Maintenance). 19 1 2 3 4 5 6 18 16 17 7 8 9 10 11 12 13 14 15 1. 2. 3. 4. 5. 6. 7. 8. 9. 10. 11. 12. 13. 14.
AXIS Q3505–VE Fixed Dome Network Camera 15. 16. 17. 18. 19. Protection étanche Voyant d'état Bouton Fonction Clips de fixation Régulateur de chaleur Attention ! Le régulateur de chaleur peut être chaud. Voyants Couleur Indication État Éteint Branchement et fonctionnement normal Orange Fixe pendant le démarrage. Clignote pendant la mise à niveau du microprogramme. Orange / rouge Clignote en orange / rouge en cas d'indisponibilité ou de perte de la connexion réseau.
AXIS Q3505–VE Fixed Dome Network Camera Connecteurs et boutons Pour les caractéristiques et les conditions d'utilisation, consultez page 32. Connecteur réseau Connecteur Ethernet RJ45 avec l'alimentation par Ethernet (PoE). A VIS Le produit doit être connecté à l'aide d'un câble réseau blindé (STP). Tous les câbles reliant le produit au commutateur réseau doivent être destinés à leur usage spécifique. Assurez-vous que les périphériques réseau sont installés conformément aux instructions du fabricant.
AXIS Q3505–VE Fixed Dome Network Camera A VIS Pour éviter la corruption des enregistrements, la carte SD doit être démontée avant son retrait. Pour ce faire, rendez-vous dans Setup > System Options > Storage > SD Card (Configuration > Options du système > Stockage > Carte SD) et cliquez sur Unmount (Démonter). Note Pour obtenir des conseils sur la carte SD, rendez-vous sur www.axis.
AXIS Q3505–VE Fixed Dome Network Camera Câbles Caractéristiques Rouge + CC ou CA Noir – CC ou CA Caractéristiques techniques Produit Classification Température Humidité AXIS Q3505–VE IEC 60529 IP66 et IP67 NEMA 250 4X De – 40 °C à 55 °C (– 40 °F à 131 °F) Humidité relative de 10 à 100 % (sans condensation) Connecteurs Connecteur d'E/S Bloc terminal à 4 broches pour : • Alimentation auxiliaire (sortie CC) • Entrée numérique • Sortie numérique • 0 V CC (-) Fonction Broche 0 V CC (-) 1 Sortie
AXIS Q3505–VE Fixed Dome Network Camera 3–4 Configurable (entrée ou sortie) 0 à 30 V CC Sortie numérique – Connectée à la broche 1 lorsqu'elle est activée, flotte (déconnectée) lorsqu'elle est désactivée. Si vous l’utilisez avec une charge inductive, par exemple un relais, une diode doit être connectée en parallèle avec la charge, en guise de protection contre les tensions transitoires. 0 à 30 V CC max., drain ouvert, 100 mA 1 12 V max 50 mA 2 3 4 3. 4.
AXIS Q3505–VE Fixed Dome Network Camera Connecteur audio Connecteurs audio 3,5 mm (stéréo) 3 2 1 1 Embout 2 Anneau 3 Manche Entrée audio Entrée positive microphone équilibrée/Entrée déséquilibrée micro/Entrée ligne Entrée microphone équilibrée négative Mise à la terre Sortie audio Sortie ligne (mono) Mise à la terre Emplacement pour carte SD Prise en charge des cartes microSD jusqu'à 64 Go. Pour des performances d'enregistrement optimales, utilisez une carte microSDHC UHS-I ou microSDXC UHS-I.
AXIS Q3505–VE Fixed Dome Network Camera Support de fixation Le support de fixation dispose de 4 configurations de montage. Les configurations de montage suivent la norme des options de montage suivantes : FRANÇAIS • : boîtier carré de 4 po • : boîtier de jonction américain double de taille normale • : boîtier octogonal de 4 po • : boîtier de jonction américain simple de taille normale Fixation du support au mur 1. Fixez le support (cf.
AXIS Q3505–VE Fixed Dome Network Camera Connexion des câbles et fixation du boîtier de l’unité au support de fixation 1. Insérez la carte mémoire SD dans la caméra (en option). 2. Acheminez le câble réseau et le joint du câble noir à travers les trous du boîtier de l'unité à l'aide du connecteur fourni. Tirez légèrement sur le câble réseau pour que le joint s'ajuste. Il est recommandé d'acheminer le câble à travers le trou le plus éloigné du connecteur réseau de la caméra (cf. image ci-dessous.
AXIS Q3505–VE Fixed Dome Network Camera Réglage de l'angle de la caméra 1 4 1. 2. 3. 4. 2 Lignes sur le support optique qui indiquent un incrément de l'angle d'inclinaison de 10° Petites lignes sur la monture optique qui indiquent un incrément sur le plan panoramique de 3° Lignes sur la monture optique qui indiquent un incrément sur le plan panoramique de 15° Lignes sur le couvercle de l’objectif permettant de s'assurer que la caméra est à niveau 1.
AXIS Q3505–VE Fixed Dome Network Camera Caméra : AXIS Q3505–V Fin de l’installation 1. Si nécessaire, fixez la protection étanche à la caméra avant de fixer le couvercle du dôme. Pour cela, retirez les deux vis du couvercle du dôme. 2. Assurez-vous que le joint en caoutchouc est correctement placé sur le couvercle du dôme et fixez le couvercle du dôme au boîtier de l'appareil en serrant les 4 vis. L'installation est maintenant terminée.
AXIS Q3505–VE Fixed Dome Network Camera Note • Les mouvements devant la caméra doivent être évités pendant la mise au point automatique Dans l'onglet Advanced (Avancé), la mise au point peut être réglée manuellement : Définir le zoom et la mise au point - Zoom optique pour la surveillance Pour définir l'option Focus & Zoom (Mise au point et zoom) lorsque vous avez sélectionné Optical zoom for monitoring (Zoom optique pour la surveillance) : Accédez à PTZ > Preset Positions (PTZ > Positions préréglées) et s
AXIS Q3505–VE Fixed Dome Network Camera Réinitialisation aux paramètres d'usine par défaut Important La réinitialisation aux paramètres d'usine par défaut doit être utilisée avec prudence. Cette opération reconfigure tous les paramètres, y compris l'adresse IP, aux valeurs d'usine par défaut. Note Les logiciels d'installation et de gestion sont disponibles sur le CD fourni avec le produit et sur les pages d'assistance du site www.axis.
AXIS Q3505–VE Fixed Dome Network Camera Sicherheitsinformation Lesen Sie das Installationshandbuch sorgfältig durch bevor sie das Produkt installieren. Bewahren Sie das Installationshandbuch für zukünftige Zwecke auf. Gefährdungsstufen GEFAHR Weist auf eine gefährliche Situation hin, welche, falls nicht verhindert, zu Tod oder schweren Verletzungen führt. WARNUNG Weist auf eine gefährliche Situation hin, welche, falls nicht verhindert, zu Tod oder schweren Verletzungen führen kann.
AXIS Q3505–VE Fixed Dome Network Camera Sicherheitsanweisungen HINWEIS • Die Anwendung des Axis Produkts muss unter Beachtung der örtlich geltenden rechtlichen Bestimmungen erfolgen. • Lagern Sie das Axis Produkt in einer trockenen und belüfteten Umgebung. • Achten Sie darauf, dass das Axis Produkt weder Stößen noch starkem Druck ausgesetzt ist. • Installieren Sie das Produkt nicht an instabilen Halterungen, Oberflächen oder Wänden.
AXIS Q3505–VE Fixed Dome Network Camera WARNUNG • Explosionsgefahr bei fehlerhaftem Batteriewechsel. • Die Batterie darf nur durch eine identische Batterie oder eine von Axis empfohlene Batterie ersetzt werden. • Verbrauchte Batterien sind gemäß den örtlichen Vorschriften oder den Anweisungen des Herstellers zu entsorgen.
AXIS Q3505–VE Fixed Dome Network Camera Installationsanleitung In dieser Anleitung wird die Installation der festen Dome-Netzwerk-Kamera AXIS Q3505–VE in Ihrem Netzwerk beschrieben. Weitere Informationen zur Nutzung dieses Produkts finden Sie im Benutzerhandbuch unter www.axis.com. Installationsschritte 1. Stellen Sie sicher, dass die Packungsinhalte, Werkzeuge und andere notwendige Materialien für die Installation in Ordnung sind. Siehe Seite 45. 2. Machen Sie sich mit der Hardware-Übersicht vertraut.
AXIS Q3505–VE Fixed Dome Network Camera Übersicht über die Hardware Beachten 3–9-mm-Objektiv: Zu hoher Druck bei der Reinigung kann dazu führen, dass sich das Objektiv nach unten verstellt. Geschieht dies während sich die Kamera in Betrieb befindet, können Sie die Kamera neu kalibrieren, indem Sie auf der Website Server Maintenance (Serverwartung) unter System Options (Systemoptionen) > Maintenance (Wartung) auf Calibrate (Kalibrieren) klicken. 19 1 2 3 4 5 6 18 16 17 7 8 9 10 11 12 13 14 15 1. 2. 3.
AXIS Q3505–VE Fixed Dome Network Camera 14. 15. 16. 17. 18. 19. Kuppelabdeckung Wetterschutz Status-LED Funktionstaste Feder im Kameragehäuse Heizelement Vorsicht! Das Heizelement ist unter Umständen heiß. LED-Anzeigen Farbe Bedeutung Status Leuchtet nicht Anschluss und Normalbetrieb Gelb Leuchtet beim Start. Blinkt bei der FirmwareAktualisierung. Gelb/rot Blinkt gelb/rot, wenn die Netzwerkverbindung nicht verfügbar ist oder unterbrochen wurde.
AXIS Q3505–VE Fixed Dome Network Camera Anschlüsse und Tasten Für die technischen Daten und Betriebsbedingungen siehe Seite 50. Netzwerkanschluss RJ45-Ethernetanschluss mit Power over Ethernet (PoE). HINWEIS Das Produkt muss mit einem abgeschirmten Netzwerkkabel (STP) angeschlossen werden. Alle Kabel, die das Produkt mit dem Netzwerkswitch verbinden, müssen hierfür ausgelegt sein. Stellen Sie sicher, dass die Netzwerkgeräte gemäß den Anweisungen des Herstellers installiert wurden.
AXIS Q3505–VE Fixed Dome Network Camera SD-Kartensteckplatz Zur lokalen Aufzeichnung mit Wechselmedien kann eine microSD-Speicherkarte (nicht im Lieferumfang enthalten) verwendet werden. Für weitere Informationen siehe Technische Daten auf Seite 50. HINWEIS Um einer Beschädigung der Aufnahmen vorzubeugen, sollte die SD-Karte vor dem mechanischen Auswerfen getrennt (deaktiviert) werden.
AXIS Q3505–VE Fixed Dome Network Camera Netzanschluss - Anschluss für Wechsel- und Gleichstrom für die Verbindung mit den Leitungen des Spannungsumformers AXIS T8051 (Wechsel-/Gleichstrom zu Gleichstrom, nicht im Lieferumfang enthalten).
AXIS Q3505–VE Fixed Dome Network Camera Konfigurierbar (Ein- oder Ausgang) 3–4 Digitaleingang – Zum Aktivieren mit Pin 1 verbinden; zum Deaktivieren nicht anschließen. 0 bis max. 30 V DC Digitalausgang – Bei Aktivierung mit Pin 1 verbunden; wenn deaktiviert: frei (nicht verbunden). Bei Verwendung mit einer induktiven Last, z. B. einem Relais, muss parallel zur Last zum Schutz vor Spannungsspitzen eine Diode zwischengeschaltet werden. 0 bis max. 30 V DC, Open Drain, 100 mA 12 V max 50 mA 2 3 4 3.
AXIS Q3505–VE Fixed Dome Network Camera Audioanschlüsse 3,5-mmAudioanschlüsse (stereo) 3 2 1 1 Spitze 2 Ring 3 Schaft Audioeingang Symmetrischer Mikrofon-Pluseingang (+)/unsymmetrischer Mikrofon-/Leitungseingang Symmetrischer Mikrofon-Minuseingang (–) Masse Audioausgang Leitungsausgang (mono) Masse SD-Kartensteckplatz Unterstützt microSD-Karten mit bis zu 64 GB Speicherplatz. Verwenden Sie eine microSDHC UHS-Ioder microSDXC UHS-I-Karte, um optimale Aufzeichnungsergebnisse zu erzielen.
AXIS Q3505–VE Fixed Dome Network Camera Montagehalterung Die Montagehalterung weist vier Montagemuster auf. Die Montagmuster folgen der Norm für die folgenden Montageoptionen: : Quadratische 4"-Anschlussdose • : Standard-US-Doppelverteilerdose • : Achteckige 4"-Anschlussdose • : Standard-US-Anschlussdose Anbringen der Halterung an der Wand 1. Bringen Sie die Halterung (siehe Montagehalterung auf Seite 53) mit geeigneten Schrauben an der Wand an. 2.
AXIS Q3505–VE Fixed Dome Network Camera Anschließen der Kabel und Anbringen des Kameragehäuses an der Halterung 1. Setzen Sie die SD-Speicherkarte in die Kameraeinheit ein (optional). 2. Führen Sie das Netzwerkkabel mithilfe des mitgelieferten Anschlussstücks durch die schwarze Kabeldichtung in einer der Bohrungen am Kameragehäuse. Ziehen Sie das Netzwerkkabel ein wenig zurück, bis die Kabeldichtung korrekt um das Kabel sitzt.
AXIS Q3505–VE Fixed Dome Network Camera Einstellen des Kamerawinkels 1 4 3 1. 3. 4. Markierungslinien auf der Optikhalterung, die eine Erhöhung des Neigungswinkels um 10° angeben Feine Markierungslinien auf der Optikhalterung, die eine Erhöhung des Schwenkwinkels um 3° angeben Markierungslinien auf der Optikhalterung, die eine Erhöhung des Schwenkwinkels um 15° angeben Hilfslinien für die Ausrichtung der Kamera auf der Objektivabdeckung 1.
AXIS Q3505–VE Fixed Dome Network Camera Kameraeinheit: AXIS Q3505–V Abschluss der Installation 1. Befestigen Sie bei Bedarf den Wetterschutz an der Kamera, bevor Sie die Kuppelabdeckung anbringen. Entfernen Sie dazu die beiden Schrauben in der Kuppelabdeckung. 2. Stellen Sie sicher, dass die Gummidichtung sicher auf der Kuppelabdeckung sitzt, bringen Sie die Kuppelabdeckung am Kameragehäuse an, indem Sie die vier Schrauben festziehen. Die Installation ist damit abgeschlossen.
AXIS Q3505–VE Fixed Dome Network Camera Beachten • Bei automatischer Fokussierung sollten Bewegungen vor der Kamera vermieden werden. Auf der Registerkarte Advanced (Erweitert) kann der Fokus manuell eingestellt werden: 1. Klicken Sie auf Open iris (Blende öffnen), um die Blende in der Maximalstellung zu öffnen. Dadurch wird die geringste Schärfentiefe erreicht, wodurch für die Fokussierung die optimalen Bedingungen gegeben sind. 2. Der Fokus wird im Fenster Focus (Fokus) eingestellt.
AXIS Q3505–VE Fixed Dome Network Camera Zurücksetzen auf Werkseinstellungen Wichtig Das Zurücksetzen auf die Werkseinstellungen sollte mit Vorsicht verwendet werden. Beim Zurücksetzen auf die Werkseinstellungen werden alle Einstellungen einschließlich der IP-Adresse auf die Werkseinstellungen zurückgesetzt. Beachten Die Software-Tools für Installation und Verwaltung sind auf der mit dem Produkt ausgelieferten CD-ROM und über die Supportseiten unter www.axis.com/techsup verfügbar.
AXIS Q3505–VE Fixed Dome Network Camera Informazioni di Sicurezza Leggere questa Guida all'Installazione prima di installare il prodotto. Conservare la Guida all'Installazione per usi futuri. Livelli di pericolo PERICOLO Indica una situazione pericolosa che, se non evitata, provoca morte o lesioni gravi. AVVERTENZA Indica una situazione pericolosa che, se non evitata, può provocare la morte o lesioni gravi.
AXIS Q3505–VE Fixed Dome Network Camera Istruzioni di sicurezza A VVISO • Il prodotto Axis deve essere utilizzato in conformità alle leggi e alle disposizioni locali. • Conservare il prodotto Axis in un ambiente asciutto e ventilato. • Evitare di esporre il prodotto Axis a urti o pressioni eccessive. • Non installare il prodotto su supporti, superfici o pareti instabili. • Utilizzare solo strumenti applicabili quando si installa il prodotto Axis. Una forza eccessiva può causare danni al prodotto.
AXIS Q3505–VE Fixed Dome Network Camera AVVERTENZA • Rischio di esplosione se la batteria viene sostituita in modo errato. • Sostituire solo con una batteria identica o una batteria consigliata da Axis. • Smaltire le batterie usate in base alle normative locali o alle istruzioni del produttore della batteria. Coperchio della cupola A VVISO • Fare attenzione a non graffiare, danneggiare o lasciare impronte sul coperchio della cupola, perché potrebbe diminuire la qualità dell'immagine.
AXIS Q3505–VE Fixed Dome Network Camera Guida all'installazione La presente Guida all'installazione fornisce le istruzioni necessarie per installare la telecamera di rete a cupola fissa AXIS Q3505–VE nella rete in uso. Per ulteriori informazioni sull’utilizzo del prodotto, consultare la Guida per l'utente disponibile all'indirizzo www.axis.com Procedure di installazione 1. Assicurarsi che il contenuto della confezione, gli strumenti e altri materiali necessari per l'installazione siano in ordine.
AXIS Q3505–VE Fixed Dome Network Camera Panoramica dell'hardware Nota Obiettivo da 3–9 mm: se durante la pulizia si esercita una pressione eccessiva sull'obiettivo, è possibile che questo si sposti verso il basso. Se tale evento si verifica durante il funzionamento della telecamera, calibrare nuovamente l'ottica facendo clic su Calibrate (Calibra) nella pagina Web Server Maintenance (Manutenzione server): selezionare System Options > Maintenance (Opzioni di sistema > Manutenzione).
AXIS Q3505–VE Fixed Dome Network Camera 14. 15. 16. 17. 18. 19. Coperchio della cupola Schermo di protezione dagli agenti atmosferici Led di stato Tasto Funzione Molla nel casing dell’unità Riscaldatore Attenzione! Il riscaldatore potrebbe essere caldo Indicatori LED LED Colore Indicazione LED di stato Spento Connessione e operazione normale Giallo Costante durante l'avvio. Lampeggia durante l'aggiornamento del firmware.
AXIS Q3505–VE Fixed Dome Network Camera Colore Segnale acustico Posizione telecamera Luce lampeggiante arancione Intervallo medio Non orizzontale Luce lampeggiante rossa Intervallo lento Assolutamente non orizzontale Connettori e pulsanti Per le specifiche e le condizioni di funzionamento, consultare pagina 68. Connettore di rete Connettore Ethernet RJ45 con Power over Ethernet (PoE+). A VVISO Collegare il prodotto con un cavo di rete schermato (STP).
AXIS Q3505–VE Fixed Dome Network Camera • • Ingresso audio (rosa) – Ingresso audio da 3,5 mm per microfono in mono o segnale mono line-in. Uscita audio (verde) – Uscita audio da 3,5 mm (livello di linea) che può essere connessa a un sistema di indirizzo pubblico (PA) o a un altoparlante con amplificatore integrato. Per l'uscita audio è necessario usare un connettore stereo.
AXIS Q3505–VE Fixed Dome Network Camera Multicable (venduto separatamente) È possibile acquistare il Multicable presso il proprio rivenditore Axis per collegare un apparecchio esterno al prodotto Axis.
AXIS Q3505–VE Fixed Dome Network Camera Uscita CC 2 Può essere utilizzato anche per alimentare una periferica ausiliaria. Nota: questo pin può essere usato solo come uscita alimentazione. 12 V CC Carico massimo = 50 mA Configurabile (ingresso o uscita) 3–4 Ingresso digitale – Collegare al pin 1 per attivarlo oppure lasciarlo isolato (scollegato) per disattivarlo. Da 0 a max 30 V CC Uscita digitale – Collegata al pin 1 quando attiva, isolata (scollegata) quando inattiva.
AXIS Q3505–VE Fixed Dome Network Camera Connettore audio Connettori audio da 3,5 mm (stereo) 3 2 1 1 Punta 2 Anello 3 Guaina Ingresso audio Ingresso microfono bilanciato caldo (+)/Ingresso microfono non bilanciato/Ingresso linea Ingresso microfono bilanciato freddo (-) Terra Uscita audio Uscita linea (mono) Terra Slot per scheda SD Supporta schede microSD con un massimo di 64 GB di archiviazione.
AXIS Q3505–VE Fixed Dome Network Camera Staffa di montaggio La staffa di montaggio ha 4 diversi schemi di montaggio. La disposizione è standard per ciascuna delle seguenti opzioni di montaggio: • : scatola quadrata da 4" • : scatola di giunzione per unità doppia, a dimensioni standard USA • : scatola ottagonale da 4" : scatola di giunzione per unità singola, a dimensioni standard USA Fissaggio della staffa di montaggio a muro 1.
AXIS Q3505–VE Fixed Dome Network Camera Collegamento dei cavi e fissaggio dell'alloggiamento dell'unità alla staffa di montaggio 1. Inserire la scheda di memoria SD nell'unità telecamera (opzionale). 2. Spingere il cavo di rete attraverso la relativa guarnizione nera in uno dei fori dell'alloggiamento dell'unità, utilizzando la protezione fornita. Tirare il cavo di rete delicatamente in modo da adattare la guarnizione al cavo stesso.
AXIS Q3505–VE Fixed Dome Network Camera Regolazione dell'angolazione della telecamera 1 4 3 1. 2. 3. 4. 2 Linee sul supporto dell'ottica che indicano un incremento dell'angolo di inclinazione di 10° Linee piccole sul montaggio dell'ottica che indicano un incremento della rotazione di 3° Linee sul montaggio dell'ottica che indicano un incremento della rotazione di 15° Linee sul coperchio dell'obiettivo che consentono di garantire che la telecamera sia in posizione orizzontale.
AXIS Q3505–VE Fixed Dome Network Camera Unità telecamera: AXIS Q3505–V Completamento dell’installazione 1. Se necessario, fissare alla telecamera lo schermo di protezione dagli agenti atmosferici, prima di montare la copertura della cupola. Per effettuare questa operazione, è necessario rimuovere le due viti sulla copertura della cupola. 2. Assicurarsi che la guarnizione in gomma sia ben salda sulla copertura della cupola, fissare la copertura della cupola all'alloggiamento dell'unità, serrando le 4 viti.
AXIS Q3505–VE Fixed Dome Network Camera Nota • Evitare i movimenti davanti alla telecamera durante la messa a fuoco automatica. Nella scheda Advanced (Avanzate) la messa a fuoco può essere regolata manualmente: 1. Fare clic su Open iris (Apri diaframma) per aprire il diaframma fino alla sua posizione massima. In questo modo, viene utilizzata la minima profondità di campo, offrendo le condizioni migliori per una corretta messa a fuoco. 2. La messa a fuoco viene impostata nella finestra Focus (Messa a fuoco).
AXIS Q3505–VE Fixed Dome Network Camera Ripristino dei valori predefiniti di fabbrica Importante Il ripristino delle impostazioni di fabbrica deve essere usato con cautela. Un ripristino delle impostazioni di fabbrica consentirà di ripristinare le impostazioni di fabbrica per tutti i parametri, incluso l'indirizzo IP. Nota Gli strumenti software per la gestione e l'installazione del prodotto sono disponibili sul CD fornito con il prodotto e sulle pagine dedicate all'assistenza sul sito Web www.axis.
AXIS Q3505–VE Fixed Dome Network Camera Información de seguridad Lea esta Guía de instalación con atención antes de instalar el producto. Guarde la Guía de instalación para poder consultarla en otro momento. Niveles de peligro PELIGRO Indica una situación peligrosa que, si no se evita, provocará lesiones graves o la muerte. ADVERTENCIA Indica una situación peligrosa que, si no se evita, puede provocar lesiones graves o la muerte.
AXIS Q3505–VE Fixed Dome Network Camera Instrucciones de seguridad A VISO • El producto de Axis debe utilizarse de acuerdo con las leyes y normas locales. • Almacene el producto de Axis en un entorno seco y ventilado. • Evite la exposición del producto de Axis a choques o a una fuerte presión. • No instale el producto en soportes, superficies o paredes inestables. • Utilice solo las herramientas correspondientes cuando instale el producto de Axis.
AXIS Q3505–VE Fixed Dome Network Camera ADVERTENCIA • La sustitución incorrecta de la batería implica riesgo de explosión. • Sustituya la batería con una batería idéntica u otra batería recomendada por Axis. • Deseche las baterías usadas de conformidad con la normativa local o las instrucciones del fabricante. Cubierta del domo A VISO • Preste atención a no arañar, dañar o dejar las huellas en la cubierta del domo, puesto que esto puede provocar una disminución de la calidad de imagen.
AXIS Q3505–VE Fixed Dome Network Camera Guía de instalación Esta Guía de instalación incluye las instrucciones necesarias para instalar la cámara de red domo fija AXIS Q3505–VE en su red. Para conocer otros aspectos de uso del producto, consulte el Manual del usuario disponible en www.axis.com Pasos de la instalación 1. Asegúrese de que dispone del contenido del paquete, las herramientas y los demás materiales necesarios para la instalación. Vea página 81. 2. Estudie la información general del hardware.
AXIS Q3505–VE Fixed Dome Network Camera Información general del hardware Nota Objetivo de 3–9 mm: Si se presiona el objetivo con demasiada fuerza al limpiarlo, este podría bajarse. Si esto sucede mientras la cámara está funcionando, vuelva a calibrar el sistema óptico haciendo clic en Calibrate (Calibrar) en la página web Server Maintenance (Mantenimiento del servidor) (System Options > Maintenance [Opciones del sistema > Mantenimiento]). 19 1 2 3 4 5 6 18 16 17 7 8 9 10 11 12 13 14 15 1. 2. 3. 4. 5.
AXIS Q3505–VE Fixed Dome Network Camera 14. 15. 16. 17. 18. 19. Cubierta del domo Parasol LED de estado Botón de función Muelle en carcasa de unidad Calentador ¡Cuidado! El calentador puede estar caliente. Indicadores LED LED Color Indicación Estado Apagado Conexión y funcionamiento normal Ámbar Fijo durante el inicio. Parpadea durante la actualización del firmware. Ámbar/rojo Parpadea en ámbar/rojo si la conexión a la red no está disponible o se ha perdido.
AXIS Q3505–VE Fixed Dome Network Camera Conectores y botones Para conocer las especificaciones y las condiciones de funcionamiento, vea página 86. Conector de red Conector Ethernet RJ45 con alimentación a través de Ethernet (PoE). A VISO El producto se conectará mediante un cable de red blindado (STP). Todos los cables que conecten el producto a la red deberán estar blindados para su uso específico.
AXIS Q3505–VE Fixed Dome Network Camera A VISO Antes de retirar la tarjeta SD, hay que desinstalarla para evitar que las grabaciones resulten dañadas. Para desinstalarla, vaya a Setup > System Options > Storage > SD Card (Configuración > Opciones del sistema > Almacenamiento > Tarjeta SD) y haga clic en Unmount (Desinstalar). Nota Para conocer las recomendaciones de tarjeta SD, vea www.axis.com.
AXIS Q3505–VE Fixed Dome Network Camera Cables Especificaciones Rojo + CC o CA Negro –CC o CA Especificaciones Producto Clasificación Temperatura Humedad AXIS Q3505–VE IEC 60529 IP66 e IP67 Clasificación NEMA 250 4X – 40 °C a 55 °C Humedad relativa del 10 al 100 % (sin condensación) Conectores Conector de E/S Bloque de terminales de 4 pines para: • Alimentación auxiliar (salida de CC) • Entrada digital • Salida digital • 0 V CC (-) 1 2 3 4 Función Pin Notas 0 V CC (-) 1 Salida de CC
AXIS Q3505–VE Fixed Dome Network Camera 1 12 V max 50 mA 2 3 4 3. 4.
AXIS Q3505–VE Fixed Dome Network Camera Ranura para tarjetas SD Admite tarjetas microSD de hasta 64 GB de capacidad de almacenamiento. Para obtener un rendimiento de grabación óptimo, utilice una tarjeta microSDHC UHS-I o microSDXC UHS-I. Cuando la temperatura sea inferior a –25° C, utilice una tarjeta SD industrial. Instalación del hardware Guía de los cables Nota Vea Información general del hardware en la página 82.
AXIS Q3505–VE Fixed Dome Network Camera • : caja de conexiones de salida doble de tamaño estándar para EE. UU. • : caja octogonal de 10,16 cm • : caja de conexiones de salida única de tamaño estándar para EE. UU. Fijación del soporte de montaje a la pared 1. Fije el soporte de montaje (vea Soporte de montaje en la página 88) a la pared con los tornillos adecuados. 2. Para guiar los cables, vea Guía de los cables en la página 88. 3.
AXIS Q3505–VE Fixed Dome Network Camera A VISO Si no se tira del cable hacia atrás, podría filtrarse agua y dañar el producto. 3. Apriete los cuatro tornillos a prueba de manipulaciones para fijar la carcasa de la unidad al soporte de montaje utilizando la llave Resitorx TR20. 4. Conecte el cable a la unidad de cámara. 5. Retire los muelles de la carcasa de la unidad y fije la cámara a la carcasa de la unidad.
AXIS Q3505–VE Fixed Dome Network Camera Ajuste de ángulo de la cámara 1 4 3 1. 2. 3. 4. 2 Las líneas en el soporte del sistema óptico indican un incremento en el ángulo vertical de 10° Las líneas pequeñas en el montaje del sistema óptico indican un incremento en horizontal de 3° Las líneas en el montaje del sistema óptico indican un incremento horizontal de 15° Las líneas en la cubierta del objetivo ayudan a garantizar que la cámara esté nivelada 1.
AXIS Q3505–VE Fixed Dome Network Camera Unidad de cámara: AXIS Q3505–V Finalización de la instalación 1. Si es necesario, coloque el parasol en la cámara antes de fijar la cubierta del domo. Para hacerlo, retire los dos tornillos de la cubierta del domo. 2. Asegúrese de que la junta de goma se ajuste correctamente a la cubierta del domo y apriete los cuatro tornillos para ajustar la cubierta del domo a la carcasa de la unidad. La instalación se ha completado.
AXIS Q3505–VE Fixed Dome Network Camera Nota • Deben evitarse los movimientos delante de la cámara durante el enfoque automático. En la pestaña Advanced (Configuración avanzada), se puede ajustar el enfoque manualmente: 1. Haga clic en Open iris (Abrir iris) para abrir el iris hasta su máxima posición. Con esto se consigue la menor profundidad de campo posible y, por tanto, las condiciones óptimas de enfoque. 2. El enfoque se establece en la Focus window (Ventana de enfoque).
AXIS Q3505–VE Fixed Dome Network Camera Restablecimiento a la configuración predeterminada de fábrica Importante Hay que tener cuidado al restablecer la configuración predeterminada de fábrica. Todos los valores, incluida la dirección IP, se restablecerán a la configuración predeterminada de fábrica. Nota Las herramientas del software de instalación y gestión están disponibles en el CD suministrado con el producto, así como en las páginas de asistencia técnica en www.axis.com/techsup.
AXIS Q3505–VE Fixed Dome Network Camera Información de la garantía Para obtener más información acerca de la garantía del producto Axis e información relacionada, visite www.axis.
AXIS Q3505–VE Fixed Dome Network Camera 安全情報 本製品を設置する前に、このインストールガイドをよくお読みください。インストー ルガイドは、後で参照できるように保管しておいてください。 危険レベル 危険 回避しない場合、死亡または重傷につながる危険な状 態を示します。 警告 回避しない場合、死亡または重傷につながるおそれのあ る危険な状態を示します。 注意 回避しない場合、軽傷または中程度の怪我につながるお それのある危険な状態を示します。 注記 回避しない場合、器物の破損につながるおそれのある状 態を示します。 その他のメッセージレベル 重要 製品を正しく機能させるために不可欠な重要情報を示 します。 注意 製品を最大限に活用するために役立つ有用な情報を示 します。 ò ¨ ¾ 97
AXIS Q3505–VE Fixed Dome Network Camera 安全手順 注記 • 本製品は、お使いになる地域の法律や規制に準拠して使用してください。 • 本製品は乾燥した換気のよい環境に保管してください。 • 本製品に衝撃または強い圧力を加えないでください。 • 本製品を不安定なブラケット、表面、または壁に設置しないでください。 • 本製品を設置する際には、適切な工具のみを使用してください。過剰な力 がかかると、製品が損傷することがあります。 • 化学薬品、腐食剤、噴霧式クリーナーは使用しないでください。清掃には、 きれいな水に浸した清潔な布を使用してください。 • 製品の技術仕様に準拠したアクセサリーのみを使用してください。これらの アクセサリーは、Axisまたはサードパーティから入手できます。 • Axisが提供または推奨する交換部品のみを使用してください。 • 製品を自分で修理しないでください。修理については、Axisサポートまたは 販売代理店にお問い合わせください。 輸送 注記 • 本製品を運搬する際は、製品が損傷しないよう、元の梱包か同等の梱包を 使用してください。 バッテリー
AXIS Q3505–VE Fixed Dome Network Camera 警告 • バッテリーは、正しく交換しないと爆発する危険があります。 • 交換用バッテリーとしては、同一品またはAxisが推奨するバッテリーのみを 使用してください。 • 使用済みバッテリーは、地域の規制またはバッテリーメーカーの指示に 従って廃棄してください。 ドームカバー 注記 • 画質低下の原因となるので、ドームカバーに傷や指紋を付けたり、損傷しな いように注意してください。可能であれば、設置が完了するまでドームカ バーに保護プラスチックを付けたままにしてください。 • 肉眼で見て汚れがない場合は、ドームカバーを掃除しないでください。ま た、絶対に表面を磨かないでください。過度な清掃により、表面が破損す ることがあります。 • ドームカバーの通常のクリーニングには、磨耗防止タイプの無溶媒の中性石 鹸またはきれいな水で薄めた洗剤と、柔らかい清潔な布を使用することをお 勧めします。洗浄後、きれいなぬるま湯でよくすすいでください。水滴の跡 が付かないよう、清潔な柔らかい布で拭いて乾かしてください。 • 強力な洗剤、ガソリン、ベンジ
AXIS Q3505–VE Fixed Dome Network Camera インストールガイド このインストールガイドでは、AXIS Q3505–VE固定ドームネットワークカメラを、お 使いのネットワークにインストールする手順について説明します。製品の使用法につ いては、 www.axis.com で入手出来るユーザーズマニュアルを参照してください。 設置手順 1. パッケージの内容、ツールなど、設置に必要な物がそろっているかを確認 します。101ページ を参照してください。 2. 「ハードウェアの概要」をよく読みます。102ページ を参照してください。 3. 「仕様」をよく読みます。106ページ を参照してください。 4. ハードウェアの設置。108ページ を参照してください。 5. 製品にアクセスします。112ページ を参照してください。 パッケージの内容 オプションアクセサリーについては、www.axis.
AXIS Q3505–VE Fixed Dome Network Camera ハードウェアの概要 注意 3~9 mmのレンズ: クリーニング時にレンズを強く押しすぎると、レンズが後 退する場合があります。カメラの稼働中にこの状況になった場合は、光学 [Server Maintenance] ( サ ー バ ー の 保 部品の再較正を行う必要があります。[Server [System Options ‑ Maintenance] ( シ ス テ ム オ プ シ ョ ン ‑ 保 守 ) Webページ ([System [Calibrate] ( 較 正 ) をクリックします。 守 )) から、[Calibrate] 19 1 2 3 4 5 6 18 16 17 8 9 10 11 12 13 14 15 1. 2. 3. 4. 5. 6. 7. 8. 9. 10. 11. 12.
AXIS Q3505–VE Fixed Dome Network Camera 13. 14. 15. 16. 17. 18. 19.
AXIS Q3505–VE Fixed Dome Network Camera 色 ブザー カメラの位置 橙色: 点滅 中程度の間隔 水平ではない 赤: 点滅 長い間隔 かなり傾いている コネクターとボタン 仕様と動作条件については、106ページ を参照してください。 ネットワークコネクタ RJ45イーサネットコネクタ、Power over Ethernet (PoE) 対応 注記 本製品は、シールドネットワークケーブル (STP) を使用して接続してくださ い。本製品は、用途に合ったケーブルを使用してネットワークに接続してく ださい。ネットワーク装置がメーカーの指示どおりに設置されていることを 確認してください。法的要件については、を参照してください。 I/O コ ネ ク タ 外部装置を接続し、カメラに対するいたずらの警報、動体検知、イベントトリガー、 低速度撮影、アラーム通知などを使用することができます。I/Oコネクタは、0 V DC基 準点と電力 (DC出力) に加えて、以下のインターフェースを提供します。 • • デ ジ タ ル 出 力 – リレーやLEDなどの外部デバイスを接
AXIS Q3505–VE Fixed Dome Network Camera • 音 声 出 力 ( 緑 ) – パブリックアドレス (PA) システムまたはアンプ内蔵アク ティブスピーカーに接続できる3.5 mm音声出力 (ラインレベル)。音声出力 には、ステレオコネクタを使用する必要があります。 SDカ カー ド ス ロ ッ ト SD microSDカード (非付属品) を使用すると、カメラでローカルに録画を行えます。 詳細 については、106ページの、インストールガイド を参照してください。 注記 録画データが破損しないように、SDカードはマウント解除してから取り外 [Setup ‑ System す必要があります。SDカードをマウント解除するには、[Setup Options ‑ Storage ‑ SD Card] ( 設 定 ‑ シ ス テ ム オ プ シ ョ ン ‑ ス ト レ ー ジ ‑ SD [Unmount] ( マ ウ ン ト 解 除 ) を ク リ ッ ク し ま す 。 . カ ー ド ) を選択し、[Unmount] 注意 推奨するSDカードについては、 www.axis.
AXIS Q3505–VE Fixed Dome Network Camera I/Oコ コ ネ ク タ ‑ 106ページの、インストールガイド を参照してください。 I/O 電 源 コ ネ ク タ ‑ ACおよびDC電源のコネクタ。AXIS T8051電力コンバータAC/DCを DCワイヤー (非付属品) に接続します。 ワイヤー 仕様 赤 + DCまたはAC 黒 – DCまたはAC 仕様 製品 等級 温度 湿度 AXIS Q3505–VE IEC 60529 IP6 6およびIP67 NEMA 250 4X 規格対応 – 40 °C~55 °C 10~100% RH (結露不可) コネクター I/O コ ネ ク タ 4ピンターミナルブロック • • • • 補助電源 (DC出力) デジタル入力 デジタル出力 0 V DC (‑) 機能 ピ ン 0 V DC (‑) 1 DC出力 2 1 2 3 4 備考 仕様 0 V DC 補助装置の電源供給に使用できます。 注: このピンは、電源出力としてのみ 使用できます。 106 12 V D C 最大負荷
AXIS Q3505–VE Fixed Dome Network Camera 3– 4 入力または 出力として 設定 デジタル入力 – 動作させるにはピン1 に接続し、動作させない場合はフロー ト状態 (未接続) のままにします。 0~30 V DC (最大) デジタル出力 – 動作させるにはピン 1に接続し、動作させない場合はフ ロート状態 (未接続) にします。誘導負 荷 (例: リレー) とともに使用する場合 は、過渡電圧から保護するため、ダイ オードを負荷と並列に接続する必要 があります。 0~30 V DC (最大)、 オープンドレイ ン、100 mA 1 12 V max 50 mA 2 3 4 ò ¨ ¾ 3. 4.
AXIS Q3505–VE Fixed Dome Network Camera 音声コネクタ 3.5 mm音声コネク タ (ステレオ) 3 2 1 1 先端部 2 リング 3 スリーブ 音声入 力 バランス型マイクロ フォンホット (+) 入力/ アンバランス型マイク ロフォン入力/ライン 入力 バランス型マイクロ フォンコールド (‑) 入 力 グランド 音声出 力 ライン出力 (モノラル) グランド SDカ カー ド ス ロ ッ ト SD 最大64 GBのmicroSDカードを使用することができます。最高の録画性能を得るに は、microSDHC UHS‑IまたはmicroSDXC UHS‑Iカードを使用してください。気温が – 25° Cを下回る場合は、産業グレードのSDカードを使用してください。 ハードウェアの設置 ケーブルの配線 注意 102ページの、インストールガイド を参照してください。 ケーブルを、壁の中を通すか、壁に沿って配線します。以下の該当する手順に従って ください。壁の中を通して配線する場合は、以下の手順を実行します。 1.
AXIS Q3505–VE Fixed Dome Network Camera 取り付けブラケット 取り付けブラケットは、4種類のパターンで取り付けることができます。取り付けパ ターンは、以下の取り付けオプションの基準に従って設定されています。 • : 4インチの正方形ボックス • : 標準サイズの米国ダブルギャングジャンクションボックス • : 4インチの八角形ボックス • : 標準サイズの米国シングルギャングジャンクションボックス 取り付けブラケットの壁面への取り付け 1. 適切なネジを使用して、取り付けブラケット (109ページの、インストール ガイド を参照) を壁面に取り付けます。 2. ケーブル配線については、108ページの、インストールガイド を参照して ください。 3.
AXIS Q3505–VE Fixed Dome Network Camera ケーブルの接続とユニットケーシングの取り付けブラケットへ の取り付け 1. SDメモリーカードをカメラユニットに挿入します (省略可)。 2.
AXIS Q3505–VE Fixed Dome Network Camera 3. いじり止めヘックスローブレンチTR20を使用して4本のいたずら防止ネジを 締め、ユニットケーシングを取り付けブラケットに取り付けます。 4. ケーブルをカメラユニットに接続します。 5. ユニットケーシング内のスプリングを横に引き、カメラユニットをユニッ トケーシングに取り付けます。 カメラアングルの調整 1 4 3 1. 2. 光学部品ホルダー上のライン。チルト角度 (10°ずつ) を示します。 光学部品マウント上の短いライン。パンの角度 (3°ずつ) を示し ます。 光学部品マウント上のライン。パンの角度 (15°ずつ) を示します。 レンズカバー上のライン。カメラを水平にするのに役立ちます。 1. カメラのパン、チルト、回転を行い、監視領域をもれなく監視できるかを 確認します。パンは360°、チルトは90°まで可能です。 2.
AXIS Q3505–VE Fixed Dome Network Camera ドームカバーの取り付け 1. ドームカバーのガスケットが汚れておらず、しっかりと固定されている ことを確認します。 2. 黒いシールド内のみぞを、カメラの光学部品ホルダーの片側にあるネジに はめ込みます。ドームカバー内のネジをユニットケーシングの孔に合わせ、 いじり止めヘックスローブレンチTR20を使用して堅く締めます。 3. ドームカバーから保護フィルムを取り除きます。 カメラユニット: AXIS Q3505–V 設置の完了 1. 必要に応じて、ウェザーシールドをカメラに装着してから、ドームカバー を取り付けます。ウェザーシールドを装着するには、ドームカバーから2 本のネジを取り外します。 2.
AXIS Q3505–VE Fixed Dome Network Camera フォーカスとズームは、以下の手順で設定します。 1. [Video & Audio ‑ Focus & Zoom] ( ビ デ オ と 音 声 ‑ フ ォ ー カ ス と ズ ー ム ) に移動します。 ズ ー ム レベルを設定し 2. [Basic] ( 基 本 設 定 ) タブで、スライダーを使用してズ ます。< または > のボタンで、ズーム位置がどちらかの方向に1段階移動 します。<< または >> のボタンで、ズーム位置がどちらかの方向に何 段階か移動します。 3. [Perform auto focus] ( オ ー ト フ ォ ー カ ス を 実 行 す る ) をクリックして、カメ ラの焦点を自動的に合わせます。 [Advanced] ( 高 度 な 設 定 ) タブに移動します。 4.
AXIS Q3505–VE Fixed Dome Network Camera [Video & Audio ‑ Focus & Zoom] ( ビ デ オ と 音 声 ‑ フ ォ ー カ ス と ズ ー ム ) に移動 します。 [Zoom tele limit] ( 望 遠 側 リ ミ ッ ト ) 値を選択して、カメラの最大ズーム倍率を指 定します。デジタルズームレベルにはDという文字が付きます。最大ズーム倍率 [Go to] ( 移 動 ) をクリックします。 を確認するには、[Go [Focus near limit] ( 近 距 離 側 リ 近すぎる被写体に焦点が合わないようにするには、[Focus ミ ッ ト ) を設定します。 このページではフォーカスとズームを設定できますが、カメラを再起動すると、設定 したフォーカスは失われます。 工場出荷時の設定にリセットする 重要 工場出荷時の設定へのリセットは慎重に行ってください。工場出荷時の 設定へのリセットを行うと、IPアドレスを含むすべての設定が工場出荷時 の値にリセットされます。 注意 インストール・管理ソフトウェアツールは、製品に付属のCDに
AXIS Q3505–VE Fixed Dome Network Camera 関連情報 ユーザーズマニュアルは、 www.axis.com で入手できます。 www.axis.com/techsup にアクセスして、ご使用のネットワーク製品の新しいファー ムウェアがリリースされていないかを確認してください。現在インストールされてい [Setup ‑ About] ( 設 定 ‑ バ ー ジ ョ るファームウェアのバージョンを確認するには、[Setup ン 情 報 ) を参照してください。 Axisラーニングセンター (www.axis.com/academy) にアクセスしてください。役に立 つトレーニング、ウェブセミナー、チュートリアル、ガイドをご用意しています。 保証 Axisの製品保証と関連情報については、 www.axis.
Installation Guide AXIS Q3505–VE Fixed Dome Network Camera © Axis Communications AB, 2014 Ver. M1.3 Date: July 2014 Part No.