
- Axis User's Manual Network Camera 207/207W


41
AXIS 207/207W - Troubleshooting
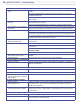
Symptoms, Possible Causes and Remedial Actions
Problems setting the IP address
When using ARP/Ping Try the installation again. The IP address must be set within two minutes after power has
been applied to the camera. Ensure the Ping length is set to 408. See the Installation
Guide.
The camera is located on a different
subnet
If the IP address intended for the camera and the IP address of your computer are located
on different subnets, you will not be able to set the IP address. Contact your network
administrator to obtain an appropriate IP address.
The IP address is being used by
another device
Disconnect the camera from the network. Run the Ping command. (In a Command/DOS
window, type ping and the IP address of the unit).
If you receive: Reply from <IP address>: bytes = 32; time = 10 ms..... - this means that
the IP address may already be in use by another device on your network. You must obtain a
new IP address and reinstall the unit.
If you see: Request timed out - this means that the IP address is available for use with
your camera. In this case, check all cabling and reinstall the unit.
Possible IP address conflict with
another device on the same subnet
The static IP address in the camera is used before the DHCP server sets a a dynamic
address. This means that if the same default static IP address is also used by another
device, there may be problems accessing the camera. To avoid this, set the static IP address
to 0.0.0.0.
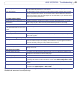
The camera cannot be accessed from a browser
The IP address has been changed by
DHCP
1) Move the camera to an isolated network or to one with no DHCP or BOOTP server. Set
the IP address again, using the AXIS IP Utility (see the Installation Guide) or the ARP/Ping
commands.
2) Access the unit and disable DHCP in the TCP/IP settings. Return the unit to the main
network. The unit now has a fixed IP address that will not change.
3) As an alternative to 2), if dynamic IP address via DHCP or BOOTP is required, select the
required service and then configure IP address change notification from the network set
-
tings. Return the unit to the main network. The unit will now have a dynamic IP address,
but will notify you if the address changes.
Other networking problems Test the network cable by connecting it to another network device, then Ping that device
from your workstation. See the instructions above.
The AXIS 207W cannot be accessed on the wireless network from a browser
The wireless settings in the AXIS 207W
do not match those in the wireless
access point.
Connect the network cable and check that the SSID and security settings are identical in
the camera and in the access point.
Support for 802.11g disabled or missing. Check that the wireless access point supports the 802.11g standard and that this is
enabled.
Wireless access point requires MAC
address registration.
Check if the AXIS 207W’s MAC address (this is the same as the product’s serial number)
needs to be registered in the wireless access point, before being allowed to access the
wireless network. Check the access point’s settings and/or documentation.
Camera is accessible locally, but not externally
Broadband router configuration To configure your broadband router to allow incoming data traffic to the camera: Enable
the NAT-traversal feature which will attempt to automatically configure the router to
allow access to the camera.
This is enabled from Setup > System Options > Network > TCP/IP Advanced.
Firewall protection Check the Internet firewall with your system administrator.
Default routers required Check if you need to configure the default router settings.