
User Manual
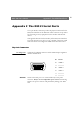
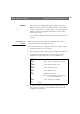
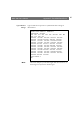
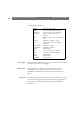
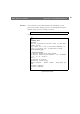
Table Of Contents
- Cover
- Section 1 Introduction
- Section 2 Installing the AXIS 240
- Section 3 Assigning an IP Address
- Section 4 Configuring the AXIS 240
- Section 5 Using the AXIS 240
- Appendix A Troubleshooting
- Appendix B The Parameter List
- Appendix C Updating the Software
- Appendix D Technical Specifications
- Appendix E The Auxiliary IO Port
- Appendix F The RS232 Serial Ports
- Appendix G Camera Applications
- Appendix H CRON Script Command Reference

AXIS 240 Users Manual Appendix F: The RS232 Serial Ports
97
FTP
1. Log in to the AXIS 240 with the command
ftp camserv where
camserv is the AXIS 240 host name or IP address.
2. You will be prompted for user name and password. Use the user
id
root, which has the default password pass.
3. Issue the command
get config
to copy the AXIS 240 config file
to a directory on your workstation
.
4. Log out using any of the commands
quit,bye
or
exit
depending on your FTP version.
5. Edit the AXIS 240 config file by setting the SERIAL_MODE
parameter to FULL_SUPPORT.
6. Start a new FTP session.
7. When you are logged in, issue the command
put config to
download the edited file to the AXIS 240.
8. Log out again.
Dialing the Server
You will reach the AXIS 240 modem server by dialing
ATDTnnnnnn,
where
nnnnnn is the modem phone number, e.g.
ATDT555-1212
. The
AXIS 240 will then answer the call, and establish the connection.
Once the connection has been established, the AXIS 240 welcome
banner is displayed:
Help Menu
Type the following to view the help menu:
Welcome!
You are connected to the host shell of your AXIS
Camera Server.
Try 'help' for a list of available commands, or
just ‘sz fullsize.jpg’ to download an image.
$ he