
User Manual
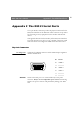
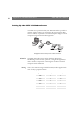
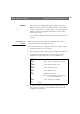
Table Of Contents
- Cover
- Section 1 Introduction
- Section 2 Installing the AXIS 240
- Section 3 Assigning an IP Address
- Section 4 Configuring the AXIS 240
- Section 5 Using the AXIS 240
- Appendix A Troubleshooting
- Appendix B The Parameter List
- Appendix C Updating the Software
- Appendix D Technical Specifications
- Appendix E The Auxiliary IO Port
- Appendix F The RS232 Serial Ports
- Appendix G Camera Applications
- Appendix H CRON Script Command Reference

Appendix F: The RS232 Serial Ports AXIS 240 Users Manual
96
Configuring
the AXIS 240
Once you have set up your modems, you need to configure your AXIS
240 for modem control. You can use any of these methods:
Web browser
Control button
FTP
Web Browser
1. On the Configuration - Modem page, enable serial mode by
setting the Serial mode parameter to Full Support.
2. Connect the modem to the AXIS 240.
3. Turn the modem on.
4. Wait a few seconds and then power up the AXIS 240.
The new settings will now take effect.
Control Button
For remote installations that are not directly connected to a LAN, you
can alternatively configure the AXIS 240 for serial mode operation as
follows:
1. Restart the AXIS 240 by removing and then re-inserting the
power connector.
2. Wait 10 seconds.
3. Press and hold the Control button until the Active indicator
flashes.
4. Release the Control button.
5. Double click the Control button while the Active indicator
continues to flash.
6. Wait until the Active indicator stops flashing.
7. Restart the AXIS 240 by removing and then re-inserting the
power connector.