
User Manual


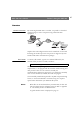

Table Of Contents
- Cover
- Section 1 Introduction
- Section 2 Installing the AXIS 240
- Section 3 Assigning an IP Address
- Section 4 Configuring the AXIS 240
- Section 5 Using the AXIS 240
- Appendix A Troubleshooting
- Appendix B The Parameter List
- Appendix C Updating the Software
- Appendix D Technical Specifications
- Appendix E The Auxiliary IO Port
- Appendix F The RS232 Serial Ports
- Appendix G Camera Applications
- Appendix H CRON Script Command Reference

AXIS 240 Users Manual Section 5: Using the AXIS 240
65
6. Enter the relevant phone number information for the remote
modem connected to your AXIS 240. Click Next.
7. Click Finish. The system then proceeds to build the Driver
information database and your connection dialog will then
subsequently appear in the Dial-Up Networking dialog.
Accessing the Remote
AXIS 240
Follow this procedure to dial out to a remote AXIS 240:
1. Double click on the newly created icon to establish a modem
connection for your remote AXIS 240.
2. Enter your user name and password and then click Connect. The
status dialogs "Dialing" and "Logging onto the network" are
presented prior to the display of a Connected to
<name> dialog that
will confirm a successful connection.
You can now access the AXIS 240 by entering the IP address (URL) of
your camera into the location field of your Web browser. Please ensure
that you are not using a proxy server (Netscape: Options menu\Select
Network\Proxies).
PPP Setup for Linux
Follow these instructions to connect a Linux host to the AXIS 240 to
your network using PPP:
1. Create a file using the following commands:
2. Save the file as
.DIAL_240
within root home directory. This script
dials out to <phone number> and then waits for a connection before
proceeding to the PPP negotiation phase.
ABORT BUSY ABORT 'NO CARRIER' '' ATDT<phone
number> CONNECT