
User Manual


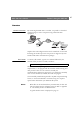

Table Of Contents
- Cover
- Section 1 Introduction
- Section 2 Installing the AXIS 240
- Section 3 Assigning an IP Address
- Section 4 Configuring the AXIS 240
- Section 5 Using the AXIS 240
- Appendix A Troubleshooting
- Appendix B The Parameter List
- Appendix C Updating the Software
- Appendix D Technical Specifications
- Appendix E The Auxiliary IO Port
- Appendix F The RS232 Serial Ports
- Appendix G Camera Applications
- Appendix H CRON Script Command Reference

Section 5: Using the AXIS 240 AXIS 240 Users Manual
64
Point to Point Protocol (PPP)
The AXIS 240 supports the Point to Point Protocol (PPP) which is a
mechanism for creating and running the Internet Protocol and other
network protocols over a serial link. This can be either:
A direct serial connection that uses a null-modem cable, or
A connection established using modems and telephone lines
(including digital lines such as ISDN).
PPP can transport any IP based protocol and allows the AXIS 240 to
be remotely accessed almost as if it were directly connected to the
network. However, the major difference between PPP and an Ethernet
connection is of course speed. A standard Ethernet connection
operates at 10 Mbps (maximum theoretical throughput), whereas an
analog modem only operates at speeds up to 56 kbps.
PPP Setup for
Windows 95/98
Follow these instructions to configure PPP from a Windows 95/98
host:
1. Connect the remote modem to the serial port of the AXIS 240
(US Robotics modem recommended).
2. From the Windows desktop, double click on the My Computer icon
and then open Dial-Up Networking.
3. Double-click Make New Connection. From within this dialog,
define a name that describes the connection you are creating in the
Type name for the computer you are using field. Select a local
modem from the displayed modem list.
4. Click Configure... to enter the modem Properties page. Accept all
default settings but ensure that modem speed is compatible with
your modem and does not exceed 38,400 bps, which is the
maximum serial port speed for the AXIS 240.
5. Click the Connection tab and then click the Advanced button.
Check Use flow control and select Hardware (RTS/CTS). Click
OK to return to the Make new connection dialog.