
User Manual

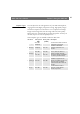
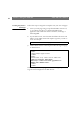
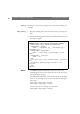

Table Of Contents
- Cover
- Section 1 Introduction
- Section 2 Installing the AXIS 240
- Section 3 Assigning an IP Address
- Section 4 Configuring the AXIS 240
- Section 5 Using the AXIS 240
- Appendix A Troubleshooting
- Appendix B The Parameter List
- Appendix C Updating the Software
- Appendix D Technical Specifications
- Appendix E The Auxiliary IO Port
- Appendix F The RS232 Serial Ports
- Appendix G Camera Applications
- Appendix H CRON Script Command Reference

Section 5: Using the AXIS 240 AXIS 240 Users Manual
46
CamImg
CamImg is an easy-to-use Java applet that continuously displays a set
of images.
Using CamImg
1. Place the CamImg.class on the same server where your images are
kept.
2. Insert the following piece of code in your HTML file where you want
the images to appear
Notes:
❏ CODEBASE specifies the full URL where your copy of the
CamImg applet is located. The applet must be on the same server
where your images are kept.
❏ The WIDTH and HEIGHT values specifies the size of the applet
frame. To fit the images exactly in the frame without resizing, use
these values:
frame width = image width + 10 pixels
frame height = image height + 10 pixels
To add a status bar to the image, use these values:
frame height = image height + 40 pixels
<APPLET
CODEBASE="http://www.yoursite.com/classes/CamImg"
CODE="CamImg.class" WIDTH=362 HEIGHT=328>
<PARAM NAME = "Image"
VALUE = "/img/image1.jpg | /img/image2.jpg |
/img/image3.jpg">
<PARAM NAME = "ImageLabel"
VALUE = "First image | Second image | Third
image">
<PARAM NAME = "Interval"
VALUE = "5">
<HR>
If you were using a Java-enabled browser, you would
see a
continuously updating image instead of this
paragraph.
<HR>
</APPLET>