
User Manual


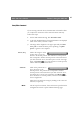
Table Of Contents
- Cover
- Section 1 Introduction
- Section 2 Installing the AXIS 240
- Section 3 Assigning an IP Address
- Section 4 Configuring the AXIS 240
- Section 5 Using the AXIS 240
- Appendix A Troubleshooting
- Appendix B The Parameter List
- Appendix C Updating the Software
- Appendix D Technical Specifications
- Appendix E The Auxiliary IO Port
- Appendix F The RS232 Serial Ports
- Appendix G Camera Applications
- Appendix H CRON Script Command Reference

Section 5: Using the AXIS 240 AXIS 240 Users Manual
42
Snapshots
Taking snapshots
For each snapshot taken, the AXIS 240 creates a JPEG file and stores
it within its internal memory.
Home Page
Snapshots
To produce a snapshot that is presented within the AXIS 240 Home
Page, you simply enter the name or IP address of your AXIS 240 into
the URL of your Web browser.
Example
This causes the AXIS 240 to generate a fullsize JPEG image. Each time
you reload the page, a new snapshot will be displayed within the AXIS
240 Home Page.
Clean Snapshots
To generate clean snapshots that are not embedded within the AXIS
240 Home Page, you must specify the preferred snapshot type for the
target JPEG file within the URL of your Web browser. You can create
snapshots in different file sizes, e.g. fullsize, halfsize etc.
Examples
Camera Specified
Snapshots
From the Snapshots page it is possible to specify with which camera
you want to take a snapshot. Select the camera you want to use from
the Camera drop down list. Define the file size for the snapshot, e.g.
fullsize, halfsize etc. by clicking on the corresponding button.
ht
tp://172.16.253.80/
http://
172.16.253.80
/fullsize.jpg
http://
172.16.253.80
/halfsize.jpg