
User Manual
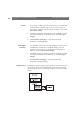

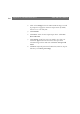


Table Of Contents
- Cover
- Section 1 Introduction
- Section 2 Installing the AXIS 240
- Section 3 Assigning an IP Address
- Section 4 Configuring the AXIS 240
- Section 5 Using the AXIS 240
- Appendix A Troubleshooting
- Appendix B The Parameter List
- Appendix C Updating the Software
- Appendix D Technical Specifications
- Appendix E The Auxiliary IO Port
- Appendix F The RS232 Serial Ports
- Appendix G Camera Applications
- Appendix H CRON Script Command Reference

Appendix F: The RS232 Serial Ports AXIS 240 Users Manual
104
2. Click on the Settings link on the AXIS 240 Home Page. You will
be prompted to supply the username and password. By default,
these are set to
root and pass.
3. Click Pan/Tilt.
4. Click Driver. Select the TCP input/output driver. Click Store
driver and restart.
5. Click Settings. Specify the TCP port number. Note that your
TCP client application must also use this TCP port when
communicating with the AXIS 240. Click Store TCP port and
restart.
6. Click Port. Adjust the parameters for Baud rate, Data bit, Stop bit
and Parity. Click Store port settings.