
User`s guide


4: Setup and Conguration • 23
©2014 Axia Audio - Rev.1.3.8
DSP Engine based web page
The Intercom stations associated with an Axia con-
sole have a single html interface resident in the DSP En-
gine of that console. The single page is a composition of
the items above.
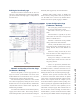
Figure 4-17
Network and Quality of Service Page
(rackmount + Desktop)
Network and Quality of service page provides set-
tings for Livewire synchronization. The clock mode
should maintain the “Livewire IP low rate” as the other
options are legacy options and are deprecated.
The clock master priority denes if a device should
have a lower or high priority to being the source of clock.
If all devices are set to an equal value they will automati-
cally determine a device as master source. Typically the
default setting is suitable.
Live Audio/ Clock Streams section dene the priority
tagging on Live Stereo audio. These settings should re-
main unchanged unless your network has been designed
differently than suggested by Axia documentation.
Standard Audio streams section is suitable and
doesn’t need any changes unless there is a specic rea-
son. The buffer size is used for any Standard Stereo
streams received. The priority tagging is disabled.
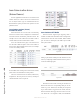
System Conguration Page
(rackmount + Desktop)
The system page provides the network op-
tions, password, and software control.
Host name is used to give the device a
name.
Network address is typically set by other
means, but if the need came to change the IP
address it could be done so.
Netmask is standard IP setting. Default
settings will work for most customers.
Gateway would be dened if the network
had a router in place and interactivity was oc-
curring between devices from different net-
works.
NTP server setting is used only in cases
where the device has been congured to syn-
chronize from an NTP source.
Syslog server settings is to dene where
and what degree of items are sent to a PC run-
ning syslog software.
There is no password by default. If there
is a need to include a password for accessing
the HTML interface, it would be entered into the two
text elds. Setting it back to no password would require
deleting the values in the two eld and pressing Apply.
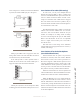
Firmware version provides two banks where code
is stored. The active bank will be selected. To upload
a new version, you must download the version from the
internet onto a computer. From the computer you can
use the browse button to pick the software package, once
selected, pressing the Apply button will upload the new
code into Bank 1. Once the code is uploaded, you can
select Bank 1 and press apply. This will reboot the sta-
tion into the new version. If running on software that is
loaded to Bank 1, you must commit the software to Bank
0 by selecting the available checkbox and pressing apply.