
User's Manual
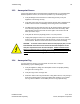
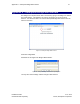
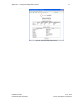
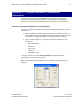

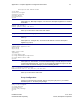
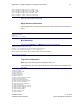
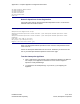
Table Of Contents
- 1 Introduction
- 2 Installation Steps
- 3 Step #1 – Configure Regions
- 4 Step #2 – Preparing for Installation
- 5 Step #3 – Installing the Appliance
- 6 Step #4 – Installing the Bridge
- 7 Step #5 – Installing the Sensors
- 8 Step #6 – Installing the Tags
- 9 Step #7 – Associating the Tags with Assets
- 10 Step #8 – System Testing and Quality Control
- 11 Adding Additional Assets After Installation
- 12 Troubleshooting

Appendix B – Complete Appliance Configuration Instructions 76
Installation Guide v2.3 – 5/10
Confidential and Proprietary ©2010, Awarepoint Corporation
20) America/North_Dakota/Center
21) America/Phoenix
22) America/Shiprock
23) America/Yakutat
24) Pacific/Honolulu
Enter ID:
Network Operations Center Registration
Step 6 will register with the Awarepoint Network Operations Center. You must have
sufficient access to be able to do this.
step 6 register with the Awarepoint Network Operations Center
Awarepoint Site Registration Script
Awarepoint Network Operations Center Username: <your Awarepoint Network Operations Center
username>
Awarepoint Network Operations Center Password: <your Awarepoint Network Operations Center
password>
Site Name: <the name of the site>
URL (https://aps.awarepoint.com/):
Register site with these values (y/n)
Enter your Awarepoint Network Operations Center username and password and the
name of the site.
Contact an Awarepoint Administrator for Site access. Otherwise you will not see this
site on your Awarepoint Network Operations Center home page
Test the Awarepoint Appliance
1. Open a web browser and navigate to http://<Awarepoint Appliance IP address>
For example, if the Appliance’s IP address is 10.0.2.31 then navigate to
http://10.0.2.31/SystemManager
2. You should see the Awarepoint logo. If you do not, try reconfiguring the
Appliance.