
User's Manual
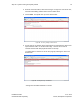

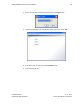
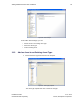
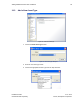
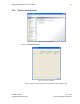
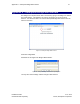
Table Of Contents
- 1 Introduction
- 2 Installation Steps
- 3 Step #1 – Configure Regions
- 4 Step #2 – Preparing for Installation
- 5 Step #3 – Installing the Appliance
- 6 Step #4 – Installing the Bridge
- 7 Step #5 – Installing the Sensors
- 8 Step #6 – Installing the Tags
- 9 Step #7 – Associating the Tags with Assets
- 10 Step #8 – System Testing and Quality Control
- 11 Adding Additional Assets After Installation
- 12 Troubleshooting

Step #8 – System Testing and Quality Control 61
Installation Guide v2.3 – 5/10
Confidential and Proprietary ©2010, Awarepoint Corporation
3. Enter the Test Point Name, select the asset type of Tags to be used for the test,
and select the building and floor where the test will be taken.
4. Choose Next. A map will come up of the selected floor.
Figure 82 - Accuracy Testing in Status Server
5. Set the Tags in any location, about waist-high on the selected floor, about a foot
apart from each other. Do not bunch the Tags. Let them sit for 15 to 20
seconds and then click their physical location on the map.
You will be able to view the test on the next page by choosing the “View Test
Results” link.
Figure 83 - Viewing Accuracy Test Results
Average error should be between 1-3 meters.