
User's Manual


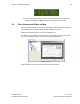
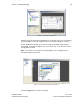
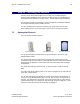
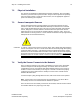
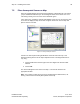


Table Of Contents
- 1 Introduction
- 2 Installation Steps
- 3 Step #1 – Configure Regions
- 4 Step #2 – Preparing for Installation
- 5 Step #3 – Installing the Appliance
- 6 Step #4 – Installing the Bridge
- 7 Step #5 – Installing the Sensors
- 8 Step #6 – Installing the Tags
- 9 Step #7 – Associating the Tags with Assets
- 10 Step #8 – System Testing and Quality Control
- 11 Adding Additional Assets After Installation
- 12 Troubleshooting

Step #5 – Installing the Sensors 39
Installation Guide v2.3 – 5/10
Confidential and Proprietary ©2010, Awarepoint Corporation
Figure 55 - Placing Awarepoint Sensors using S button
Choose the Apply button.
7.5.1 Adding a Comment to Sensor Location
Once Sensor is on the map, double click the icon of the Sensor to add a comment on
the location. The more descriptive the comment (i.e. “3rd Floor - PACU Nurse Station,
back wall, under cabinets”), the easier it will be for a technician to find the Sensor at a
later date.
Figure 56 - Adding Comments to Sensors
Continue to place all Sensors. As they are placed, they will join the network. Some
routing lines will be displayed as shown below.