
User's Manual
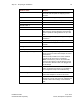
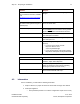
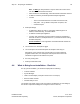

Table Of Contents
- 1 Introduction
- 2 Installation Steps
- 3 Step #1 – Configure Regions
- 4 Step #2 – Preparing for Installation
- 5 Step #3 – Installing the Appliance
- 6 Step #4 – Installing the Bridge
- 7 Step #5 – Installing the Sensors
- 8 Step #6 – Installing the Tags
- 9 Step #7 – Associating the Tags with Assets
- 10 Step #8 – System Testing and Quality Control
- 11 Adding Additional Assets After Installation
- 12 Troubleshooting
Step #2 – Preparing for Installation 19
Installation Guide v2.3 – 5/10
Confidential and Proprietary ©2010, Awarepoint Corporation
To install an Awarepoint Appliance you will need the following:
▪ The Awarepoint Appliance
▪ Power cable
▪ Ethernet Cable
▪ Rack Rails
▪ Phillips-Head screwdriver for installing the rails
▪ Serial Cable (if keyboard and monitor are not available)
▪ Null Modem Adapter (if keyboard and monitor are not available)
▪ Gender Changer (F-F) - (if keyboard and monitor are not available)
To install an Awarepoint Bridge you will need the following:
▪ The Bridge
▪ Power Supply if not using POE (B2 only)
▪ Ethernet Cable
▪ Network Analyzer
▪ Double-Sided Tape
▪ Wire anchors
▪ Plastic zip ties
▪ Wire Clippers
▪ Cable Locks (optional)
▪ Serial Cable (for B1 only)
▪ Laptop with Teraterm Software (for B1 only)
To install an Awarepoint Sensor you will need the following:
▪ The Sensor
▪ Double-Sided Tape strips
▪ Insulated Screwdriver (for removing faceplate)
▪ Stainless steel zip ties and tool
▪ Extra faceplates (in case it requires replacement)
To install an Awarepoint Tag you will need the following:
▪ The Awarepoint Tag
▪ Double-Sided Tape squares
▪ Nylon zip-ties
▪ Wire cutters
▪ Aluminum stickers (for Tags that will be used with Tag removal alert)