
Manual

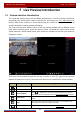
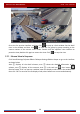
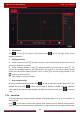
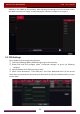
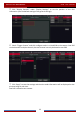
Table Of Contents
- Contents
- 1 Introduction
- 2 Basic Operation Guide
- 3 Wizard & Main Interface
- 4 Camera Management
- 5 Live Preview Introduction
- 6 PTZ
- 7 Record & Disk Management
- 8 Playback & Backup
- 9 Alarm Management
- 10 Account & Permission Management
- 11 Device Management
- 12 Remote Surveillance
- Appendix A FAQ
- Appendix B Calculate Recording Capacity
- Appendix C Compatible Device List

Live Preview Introduction
DVR User Manual
29
Add Display Mode
Method One:
① Click “Customize Display Modes” in the above interface and then set the screen mode.
② Add the cameras and adjust the cameras’ display sequence as needed.
③ Click under the display mode list and then enter the display mode name in the
popup window, click the “OK” button to save the current display mode.
Method Two:
① Click StartSettingsSystemBasicOutput SettingsMain Output to go to the
interface and then set the screen mode.
② Double click the camera or camera group in the list to add them to the selected window.
③ Click to save the current display mode (refer to 5.2.3 Scheme View In Sequence for
detail configurations). The display mode will be saved and displayed in the display mode list in
the live preview interface.
Edit Display Mode
Click the “Customize Display Modes” tab in the live preview interface and then select one
display mode in the list. Click
to edit the display mode name; click to delete the
display mode.
5.2.2 Quick Sequence View
You can start quick sequence view if the scheme has not been created. If the scheme has been
created, please refer to 5.2.3 Scheme View in Sequence
for details.