
User Manual
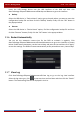
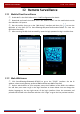
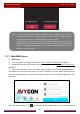
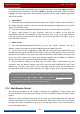
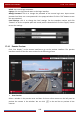
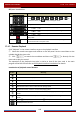

Table Of Contents
- Contents
- 1 Introduction
- 2 Basic Operation Guide
- 3 Wizard & Main Interface
- 4 Camera Management
- 5 Live Preview Introduction
- 6 PTZ
- 7 Record & Disk Management
- 8 Playback & Backup
- 9 Alarm Management
- 10 Account & Permission Management
- 11 Device Management
- 12 Remote Surveillance
- Appendix A FAQ
- Appendix B Calculate Recording Capacity
- Appendix C Compatible Device List

Remote Surveillance
DVR User Manual
100
admin: the current login username.
Logout: click it to log out and return to the login interface.
Modify Password: click it to change the password of the current login user. Input current
password and then set a new password in the popup window. Click the “OK” button to save
the new password.
Local Settings: click it to change the local settings. Set the snapshot number and click
“Browse” to set the snapshot path and record path as shown below. Click the “Apply” button
to save the settings.
12.4.1 Remote Preview
Click “Live Display” in the remote interface to go to the preview interface. The preview
interface consists of the four areas marked in the following picture.
Start Preview
Select a window in the preview area and then click one online camera on the left panel to
preview the camera in the window. You can click
in the tool bar to preview all the
cameras.