
User Manual

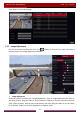


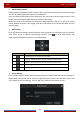
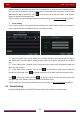
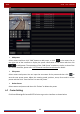
Table Of Contents
- Contents
- 1 Introduction
- 2 Basic Operation Guide
- 3 Wizard & Main Interface
- 4 Camera Management
- 5 Live Preview Introduction
- 6 PTZ
- 7 Record & Disk Management
- 8 Playback & Backup
- 9 Alarm Management
- 10 Account & Permission Management
- 11 Device Management
- 12 Remote Surveillance
- Appendix A FAQ
- Appendix B Calculate Recording Capacity
- Appendix C Compatible Device List

Live Preview Introduction
DVR User Manual
35
to change the camera name), enable or disable the name and time OSDs (if enabled, drag the
red name and time OSDs directly in the image view area to change the OSDs’ display position)
and select the date and time formats. Click “Apply” to save the settings.
5.4.2 Image Settings
Click StartSettingsCameraImageImage Settings to go to the following interface.
Select the camera and then set the brightness, contrast, saturation and hue of the camera.
Click “Advanced” button or
in the camera list on the right side of the interface to pop up
“Image Adjust” interface and then set the relevant setting items. Please refer to
5.3.5 Image
Adjustment for detailed introductions of these items.
You can click “Default” button to restore the image settings to the default factory settings.