
User Manual
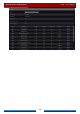

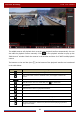
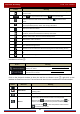
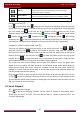


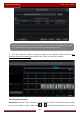
Table Of Contents
- Contents
- 1 Introduction
- 2 Basic Operation Guide
- 3 Wizard & Main Interface
- 4 Camera Management
- 5 Live Preview Introduction
- 6 PTZ
- 7 Record & Disk Management
- 8 Playback & Backup
- 9 Alarm Management
- 10 Account & Permission Management
- 11 Device Management
- 12 Remote Surveillance
- Appendix A FAQ
- Appendix B Calculate Recording Capacity
- Appendix C Compatible Device List

Playback & Backup
DVR User Manual
63
8.4.1 Search, Playback & Backup by Time-sliced Image
① Click StartSearch and BackupBy Time-sliced Image to go to “By Time-sliced Image”
tab. There are two view modes: by time and by camera. In the time view mode, a maximum of
64 camera thumbnails can be showed. If the camera thumbnail number is more than 64, the
cameras will be listed directly by their camera name, not the thumbnail. A maximum of 196
camera names can be listed. If the camera name number is more than 196, the time view
mode will be disabled and the camera view mode will be available only.
② Select one camera in the interface and then click the “Open” button.
③ Click the image box to play the record in the small playback box on the left side of the
interface (the box which has image inside indicates that the record data exist).
④ Refer to the picture below. Drag the color blocks on the time scale to select the record
data and then click the “Backup” button to pop up the “Record Backup” window as shown
below. Select the device name, backup format and path and then click the “Backup” button to
start the backup.