
User Manual
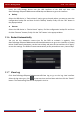
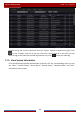
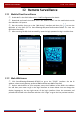
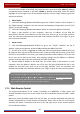
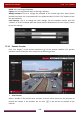
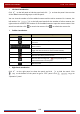
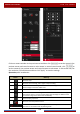
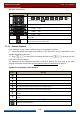
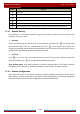
Table Of Contents
- Contents
- 1 Introduction
- 2 Basic Operation Guide
- 3 Wizard & Main Interface
- 4 Camera Management
- 5 Live Preview Introduction
- 6 PTZ
- 7 Record & Disk Management
- 8 Playback & Backup
- 9 Alarm Management
- 10 Account & Permission Management
- 11 Device Management
- 12 Remote Surveillance
- Appendix A FAQ
- Appendix B Calculate Recording Capacity
- Appendix C Compatible Device List

Remote Surveillance
DVR User Manual
101
Left Panel Introduction
Click
on the left panel to hide the panel and click to show the panel. You can view
all the added cameras and groups on the left panel.
You can view the number of all the added cameras and the online cameras. For instance, the
left number 3 in
on the left panel stands for the number of online cameras; the
right number 4 stands for the number of all the added cameras. Input the camera name in the
search box and then click
to search the camera. Click to refresh the camera list.
Tool Bar Introduction
Button Meaning
Screen mode button.
Click it to show full screen. Right click on the full screen to exit
full screen.
Click “All Main Stream” or “All Sub Stream” to set the stream of
all the cameras.
Manual alarm button. Click it to pop up a window and then
trigger and clear the alarm-out in the window manually.
Click it to preview all the cameras.
Click it to close all the preview cameras.
Click it to start recording. Click
to stop recording. The
video will be stored in the computer.
Click it to start remote recording. The video will be stored on the
HDD of the DVR
Right Panel Introduction
Click
on the right panel to show the panel and click to hide the panel. Click
at the bottom of the panel to go to “PTZ” panel. Click to go to
“Operation” panel.