
User Manual
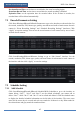
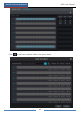
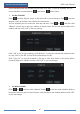
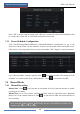


Table Of Contents
- Contents
- 1 Introduction
- 2 Basic Operation Guide
- 3 Wizard & Main Interface
- 4 Camera Management
- 5 Live Preview Introduction
- 6 PTZ
- 7 Record & Disk Management
- 8 Playback & Backup
- 9 Alarm Management
- 10 Account & Permission Management
- 11 Device Management
- 12 Remote Surveillance
- Appendix A FAQ
- Appendix B Calculate Recording Capacity
- Appendix C Compatible Device List

Record & Disk Management
DVR User Manual
48
Click “All” to set all week recording; click “Reverse” to swap the selected and unselected time
in a week; click “Clear All” to clear all the selected area in a week.
7.3.2 Record Schedule Configuration
Click StartSettingsRecordRecord ScheduleSchedule Configuration to go to the
interface as shown below. Set the schedule of sensor record, motion record and timed record.
Click “None” in the drop-down menu to clear the schedule. Click “Apply” to save the settings.
Go to “Edit Schedules” interface and then click to edit the schedule. The settings of “Edit
Schedule” are similar to that of the “Add Schedule”. Click to delete the schedule.
7.4 Record Mode
7.4.1 Manual Recording
Method One: Click on the tool bar at the bottom of the live preview interface to enable
recording of the camera.
Method Two: Go to live preview interface and then click the right-click menu “Manually
Record On” in the camera window or click on the tool bar under the camera window to
start recording.
Note: Click Start
Settings
Record
Mode Settings and then set the manual record time in the
interface. Click “Apply” to save the settings.