
Operation Manual

CAMIP21
V. 02 – 01/07/2015 5
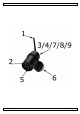
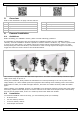
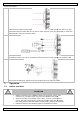
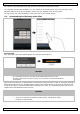
Proceed as follows:
1
Take the
hole
measurements
based on the camera stand.
Pre
-
d
rill
a hole with the 5
bit and drill the final hole with the 15 mm bit. Next, place a nylon plug
(included)
Also provide a hole for the power cable.
2
Secure the camera stand on the surface using the
included screws and a #2 Phillips
screwdriver. Make sure not to overtighten
the screws as this may damage the camera stand.
3
Loosen the thumbscrew. Adjust the proper angle and secure with the T-
bolt
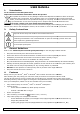
7. Operation
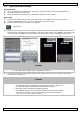
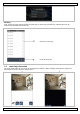
7.1 Before You Start
ATTENTION
•
Before connecting your CAMIP21 camera to the power source, first
connect it to your Wifi router using the included
Ethernet cable.
•
After the camera is connected to the router, connect it to the power
source
and wait until both the red and green LEDs flash. Do not begin
the setup process until both LEDs become steady (roughly 45
seconds).
•
Follow the steps in the following pages to complete the setup.
©Velleman nv
a hole with the 5
mm drill
(included)
in each hole.
included screws and a #2 Phillips
the screws as this may damage the camera stand.
bolt
.
Before connecting your CAMIP21 camera to the power source, first
Ethernet cable.
After the camera is connected to the router, connect it to the power
and wait until both the red and green LEDs flash. Do not begin
seconds).