
Quick Start Guide
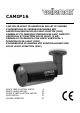

CAMIP16
V. 02 – 10/12/2014 6 ©Velleman nv
DO NOT use this product to violate privacy laws or perform other illegal
activities.
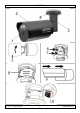
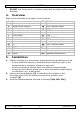
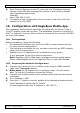
4. Overview
Refer to the illustrations on page 2 of this manual.
1
lens
16
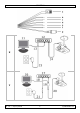
PC
2
sun shield
17
non-PoE router/hub
3
vandal-proof bracket
18
8P8C network cable
4
bracket screw holes
19
PoE injector
5
camera front cover
20
8P8C network cable
6
focal length screw
21
power
7
focus screw
22
NVR
8
desiccant
23
LAN SWITCH connector
9
sun shield installation
24
8P8C network cable
10
microSD card
25
router/hub
11
PC
26
8P8C network cable
12
PoE router/hub
27
cameras
13
8P8C network cable
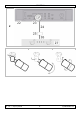
28a
horizontal adjustment
14
8P8C network cable
28b
vertical adjustment
15
power
28c
rotational adjustment
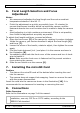
5. Installation
1. Choose a location for the camera, keeping following guidelines in mind:
o Do not install the camera in locations where extremely high or low
temperatures or excessive vibrations may occur.
o Avoid mounting the camera near high electro-magnetic fields.
o Do not aim the camera at the sun or other extremely bright objects
or reflections (e.g. metal doors).
2. Use the mounting bracket [3] to determine the location of the
mounting holes. Drill the holes and secure the bracket using
3 screws [4].
3. Point the camera towards the field of interest [28a, 28b, 28c].