
Quick Start Guide

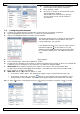


CAMIP14n
V. 02 – 31/03/2014 3 ©Velleman nv
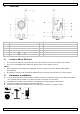
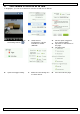
4. Overview
front
back
1
white LED light
8
WPS button (Wi-Fi Protected Setup)
2
speaker
9
micro SD card slot
3
microphone
10
ethernet connection
4
camera lens
11
power jack
5
antenna
12
external I/O port
6
status LEDs: = lan, = internet
13
bracket
7
PIR sensor
14
reset button
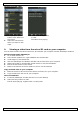
5. Insert a Micro SD Card
• You can record video to a micro SD card. The micro SD card slot is on the side of the camera.
• For a list of compatible micro SD cards, please refer to user guide on the cd.
Notes
• The camera does not support hot-swapping. Insert or remove the micro SD card with power
disconnected.
• Any data on the micro SD card will be deleted when you insert the card and turn on the camera.
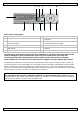
6. Hardware Installation
1. Fasten the round base of the bracket to where you want to install the camera. The distance between
your camera and the location you want to monitor should be 3 to 4 metres.
2. Assemble the bracket and the camera, and adjust the viewing angle of the camera.
3. Fasten the antenna for wireless network connection.
4. Plug the included power adapter into the camera and connect it to a power socket.