
Operation Manual


3 Installing the FRITZ!Card USB
16
3INSTALLING THE FRITZ!CARD USB
Be sure to perform the installation steps in the exact order given.
Otherwise the FRITZ!Card USB may not function correctly!
The
FF
FF
F
RR
RR
R
ITZ!CarITZ!Car
ITZ!CarITZ!Car
ITZ!Car
d Ud U
d Ud U
d U
SBSB
SBSB
SB installation is performed in two parts:
1.1.
1.1.
1. Connecting the
FF
FF
F
RR
RR
R
ITZ!CarITZ!Car
ITZ!CarITZ!Car
ITZ!Car
d Ud U
d Ud U
d U
SB SB
SB SB
SB to
• the ISDN line and
• the computer or hub;
2.2.
2.2.
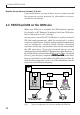
2. Setting up a new hardware component in the operating sys-
tem and installing the driver software for the
FF
FF
F
RR
RR
R
ITZ!CarITZ!Car
ITZ!CarITZ!Car
ITZ!Car
d Ud U
d Ud U
d U
SBSB
SBSB
SB.
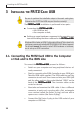
Windows 98 includes an ISDN Configuration Wizard. This wizard only
configures a previously installed AVM NDIS WAN CAPI driver, however.
The wizard cannot be used to install ISDN hardware or software,
nor to set up an ISDN connection.
3.1. Connecting the FRITZ!Card USB to the Computer
or Hub and to the ISDN Line
To connect the
FF
FF
F
RR
RR
R
ITZ!CarITZ!Car
ITZ!CarITZ!Car
ITZ!Car
d Ud U
d Ud U
d U
SBSB
SBSB
SB, proceed as follows:
• Switch on your computer and any peripheral devices al-
ready connected.
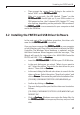
• Start by connecting the ISDN-Controller to your ISDN jack.
Take the ISDN cable supplied. The ISDN cable has an RJ45
connector at each end. Insert one end into your ISDN jack
and the other end into the socket labeled “ISDN” on the
back of the
FF
FF
F
RR
RR
R
ITZ!CarITZ!Car
ITZ!CarITZ!Car
ITZ!Car
d Ud U
d Ud U
d U
SBSB
SBSB
SB. The six-meter cable can be
routed as desired.
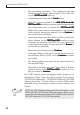
• Now take and examine the USB cable. It has a different
connector at each end, one plug with a flat, rectangular
cross-section (called the Series A plug) and one with a
square cross-section (the Series B plug).
• Connect the flat Series A plug to the USB socket of your
computer or USB hub.