
User`s manual


E-16
Procedure Up to Projection
1
Considerationofplacementlocationandscreensize
Determine the screen and projector setup location.
Set the projector on a strong and stable, level platform.
2
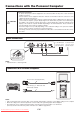
Connectionswithinputequipment
Connect your personal computer/video equipment.
Connections with the Personal Computer → See Page E-18
Connections with the Video Equipment → See Page E-22
3
Connectthepowercableandswitchonthepower
Switch On the Power → See Page E-23
Switch Off the Power → See Page E-23
4
Switchonthepowerofthepersonalcomputerorvideoequipment
5
Properly adjust the projection image
tothescreen
→ See Page E-17
6
Selecttheinputequipment
→ See Page E-25
7
Adjusttheimageorvideo
Adjust the image to provide the optimum condition, as required.
→ See Page E-42 - E-43
See Page E-17 for information about the projection distance and screen size.
Performthetiltadjustmentoftheprojectortoprovidethedesiredprojectionheight.
The tilt adjustment allows the position of the projection image to be raised and lowered. The adjustment angle is from 0 de-
grees to 7 degrees.
Tilt adjustment → See Page E-24
0–7°
NOTE
While AVIO conducts strict quality inspections, with DLP
®
type projectors, in some rare cases there may be black spots or bright
spots within the pixels. Please note that this is not a malfunction.
Downloaded From projector-manual.com Avio Manuals