
Manual


Identity Enrollment and Credentialing User Guide
32
Adding Pictures
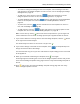
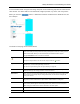
When you click , an element entitled Photo is added to the Attributes list, like the following
example:
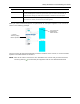
NOTE: None of the values entered here are reflected on the canvas until you have saved the
screen by clicking . Once saved, the preview pane displays the relevant image.
Adding Database Fields
Database fields are essentially placeholders for information that is supplied by the Identities
database. These fields are populated by data supplied for the specific badge holder. For example,
if you place a database field on this badge template that calls the Last Name data field, a badge
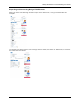
Photo Toggle this word to hide or reveal the fields in the attribute section below.
Click this icon to delete the photo data and hide the fields associated with this for this
object.
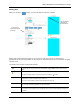
The picture object remains on the canvas until you click the button.
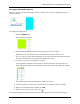
Layer Order Enter the number indicating the layer this graphic occupies on the badge, where 1 is
the bottom layer, 2 is the next higher layer, and so on.
For more on layer ordering, refer to “Layer Ordering” on page 37.
Location Enter values to move the photo frame around on the canvas. As you change values,
the photo rectangle will change positions on the work board.
Dimensions Enter values to resize the photo frame, where the first value is the width and the
second value is the height. As you change the values, the size of the rectangle will
change to reflect it.
Rotation Enter the value, in degrees, to rotate this object. The higher the number of degrees
the farther clockwise the object will be rotated. Default is 0 degrees.
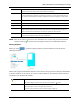
Maintain Aspect Check this box to maintain the aspect ratio of the picture that appears in this frame. If
this feature is left unchecked, the picture will simply fill the available frame space and
skew the photo to match.