Identity Enrollment and Credentialing User Manual Version 5.
Identity Enrollment and Credentialing User Manual AV01-1213, December, 2013 Version 5.0 Copyright© 2013 Avigilon Corporation Avigilon Inc. Box 378 #101-1001 West Broadway Vancouver, British Columbia V6H 4E4 Canada Phone:888.281.5182 Web:www.avigilon.
Identity Enrollment and Credentialing User Manual Getting Help If you encounter a problem that is not discussed in available Access Control Manager user guides or on-line help files, and need technical support, please contact your local Value Added Reseller (VAR) or Access Control Manager provider. When contacting your VAR, please be sure to have your software version number available. For future reference, record these numbers here.
Identity Enrollment and Credentialing User Guide Table of Contents Getting Help . . . . . . . . . . . . . . . . . . . . . . . . . . . . . . . . . . . . . . . . . . . . iii Identity Enrollment and Credentialing . . . . . . . . . . . . . . . . . . . . . . 1 Opening the Identities Feature . . . . . . . . . . . . . . . . . . . . . . . . . . . . . . . . . . . . . 1 Identities . . . . . . . . . . . . . . . . . . . . . . . . . . . . . . . . . . . . . . . . . . . . . . . . . . . . . . . 2 Adding Identities . . . .
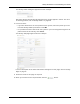
Identity Enrollment and Credentialing User Guide Identity Enrollment and Credentialing This short guide provides the necessary information you need to enroll users and issue credentials using this Access Control Manager. This feature enables you, the operator, to enroll users and issue credentials to all employees and other qualified individuals requiring access to the facility controlled by this Access Control Manager Appliance.
Identity Enrollment and Credentialing User Guide If a more advanced search is required, click the additional section list this example appears: sub-option and an Once you have clicked a relevant alphabetic tab, or specified a search term and clicked list of applicable identities appears like this example: Identities The Identities feature is used to enroll employees and all other workers and service personnel who require access to a facility or location maintained and overseen by the Access Control Mana
Identity Enrollment and Credentialing User Guide The Identity Profile dialog box appears like this example: Only those identity profiles already defined for this system appear in this list. For more on defining profiles, refer to Identity Profiles on page 39. 3. Do one of these: • If you have defined one or more profiles for this system, select the profile you want from the 'Identity Profile' pick list then click OK.
Identity Enrollment and Credentialing User Guide The Identities tab appears with the Roles page displayed like this example: 6. Select the roles to which this person is a member. For a full description of the fields and buttons that appear on this page, refer to Roles Page on page 20. 7. Click the Tokens tab. The Tokens page appears like this example: The fields on this page are explained in Tokens Page on page 21. 8. Customize tokens for this identity as required. 9. Click the Groups tab.
Identity Enrollment and Credentialing User Guide 12. Review the roles that this person can currently access and the doors that these roles support. If necessary, you can return to the Roles page and redefine the roles this person is assigned. For a full description of the fields and buttons that appear on this page, refer to Access Page on page 23. 13. Click the Capture tab.
Identity Enrollment and Credentialing User Guide The Photos page appears like this example: 16. Upload required photos of this person. For a full description of the fields and buttons that appear on this page, refer to Photos Page on page 24. 17. Click the Badge tab. The Badge page appears like this example: 18. Enter the required fields. For a full description of the fields and buttons that appear on this page, refer to Badge Page on page 26. 19. To print a badge, click the button.
Identity Enrollment and Credentialing User Guide Searching for Identities Often there are far too many people in a Access Control Manager database to allow for quick identification. To aid in finding a particular individual in the database, this application includes a robust search feature. There are two types of identity database searches you can perform: • • Quick search Advanced search Quick Search To perform a quick search for an existing identity: 1.
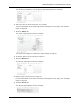
Identity Enrollment and Credentialing User Guide The page expands to include the search criteria fields like this example: 2. In the 'Search Field' pick list, select one of the existing fields whose value you want to specify. Only those fields that appear on the Identities Edit Properties screen are included in this list. 3. In the 'Search Value' text box, enter a value or select a valid option for the selected search field. Only those values specific to the selected field appear in this list.
Identity Enrollment and Credentialing User Guide The search engine processes the request and displays all people in the database who fit the entered information and the results appear like this example: 7. To clear the results on the screen, click . Assigning Badge Templates Many users require a badge of some sort. To assign a badge template to a user: 1. At the Identities Listing page, click to select the user name to whom you want to assign a badge. The Identities Edit page appears. 2.
Identity Enrollment and Credentialing User Guide Only those tokens previously defined for this user appear in this list. 5. At the 'Badge Template' pick list, select the badge template you want to assign to this user. Only those badge templates previously defined for this user appear in this list. For more on creating badge templates, refer to Identities on page 2. 6. Click to save this badge. 7. Print the badge at the designated badge printer.
Identity Enrollment and Credentialing User Guide The Available window is populated with the roles fitting the search criterion. 3. Click to highlight one or more roles that you want in the Available window then click the button to move roles to the Members window. 4. When you're finished, click . For definitions on the fields and buttons appearing on this page, refer to Roles Page on page 20.
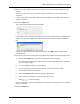
Identity Enrollment and Credentialing User Guide 5. Select the Capture tab to view the Identity Capture page like this example: 6. Click to select the image you want to use for the person. To capture a new image, click the CAPTURE link. The image of the person in front of the connected camera is captured. 7. Click to save this image.
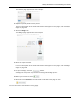
Identity Enrollment and Credentialing User Guide Uploading an Existing Image Photos can be placed in a user's Identities database in one of two ways: • • An existing photo can be uploaded. A user's photo can be taken (captured). Before you download a photo, make sure it is an appropriate size and definition. Most badge photos are no more than 2 x 3 inches. Standard photos should be decreased in size in order to fit in the standard format. To upload an image for a badge or identity record: 1.
Identity Enrollment and Credentialing User Guide 1. From the Identities Listing page, click the name of the user to whom you want to assign tokens. The Identity property sheet for that user appears. 2. Click the Tokens tab. The Tokens page appears. 3. Click . The Add Token page appears. 4. Fill out the fields as required. 5. When you're finished, click . The new token is added to the user's identity properties. The button appears. 6. Click the doors.
Identity Enrollment and Credentialing User Guide 6. From the browser menu bar, select File > Print (or press Ctrl + P) and specify the connected badge printer. The Badge is printed. For definitions on the fields and buttons appearing on this page, refer to Badge Page on page 26. Editing Existing Identities To edit an existing Identity: 1. From the main menu, click Identities. If the name does not appear, search for the identity as described in Searching for Identities on page 7.
Identity Enrollment and Credentialing User Guide 5. To print a badge, click the button. A badge for this person is printed to the designated badge printer. 6. Click either the Identities > linked bread crumb above the page or click . You are returned to the Identities Listing page. Deleting One or More Identities To delete an existing identity: 1. From the Identities Listing page, click to the right of the person you want to delete. A message appears asking you to confirm your selection. 2.
Identity Enrollment and Credentialing User Guide Identity Pages Field Descriptions This section defines the fields and buttons that appear on each Identity page. These pages include: • • • • • • • • • • Identity Roles Tokens Groups Access Capture Photos Transactions Badge Audit In addition to these tabbed pages, a qualified operator can also create additional pages through the User Defined option.
Identity Enrollment and Credentialing User Guide This page contains the following fields and buttons: Identity Information Photo If you have either imported an image or captured an image for this identity, the photograph appears to the left of the Identity Information fields. Last Name Enter the last name of the user. This field is required. First Name Enter the first name of the user. This field is required. Middle Name Enter the middle initial.
Identity Enrollment and Credentialing User Guide Zip Code Enter the zip code where the user lives. Site Location From the drop-down list, select the location where this user works. To define more options, refer to “User-Defined Lists - Adding Items” in Access Control Manager online help. Building From the drop-down list, select the building where this user works. To define more options, refer to “User-Defined Lists - Adding Items” in Access Control Manager online help.
Identity Enrollment and Credentialing User Guide Click this button to exit this page and return to the higher level screen. Click this button to open the Identity Add page and add a new person to the database. Click this button to generate a quick PDF report on this specific identity. Click this button to generate a quick spreadsheet report on this specific identity.
Identity Enrollment and Credentialing User Guide Tokens Page When you click the Tokens tab initially, a page like this example appears: Once you have defined and saved a token, the page changes to include the buttons in this example: The fields and buttons on this page include: Embossed Number Enter the number embossed on the card that will be issued to this user. This is only required if a physical card is being issued. Internal Number Enter the actual number encoded on the ID card.
Identity Enrollment and Credentialing User Guide Trace Check this box to enable tracing when this token is used. Download Check this box to enable downloading of this token. This feature is checked and enabled by default. Never Expire Check this box to indicate that this token never expires. Extended door times Check this box to indicate that this token can use extended door times. This is particularly useful for token holders with special needs.
Identity Enrollment and Credentialing User Guide This page is used to assign various security system components, such as doors and identities, to a specific group. The fields on this page include: Available This window contains the available policy groups defined by the system. If you have used the search text, this window contains all the policies that fit the search criterion. To move terms from this window to the Members window, click to highlight a term then click the Members button.
Identity Enrollment and Credentialing User Guide Capture Page When you click the Capture tab on the Identities screen, a page like this example appears: If the capture device has been secured by a user name and password, this page will not appear until you have supplied the required values to the authentication prompt like this: Supply a user name and password, then click OK, and the capture page should appear. To capture a picture for this identity, click the CAPTURE link.
Identity Enrollment and Credentialing User Guide Once a photograph is uploaded, the page changes to look like this example: This page includes these fields and buttons: Primary File Check this box to indicate that the currently displayed photograph is the photo that will appear in the badge template photo box assigned to the primary photo. Only the primary photo appears on the Identity page. Click this button to delete the currently displayed photograph.
Identity Enrollment and Credentialing User Guide Source Location Displays the location where this event or alarm occurred. Card No If this token was assigned to a card, this displays the card number. Message This displays the message associated with the event. Messages are assigned through the Events Add page.
Identity Enrollment and Credentialing User Guide Click this button once you've selected all of the groups you want to save your selections. Click this button to ignore changes made during the present session and return to the previous page. If no badge template has yet been created, a message like this appears: “No badge template found”. To create a new badge, simply click the Badge Designer link and the Badge Template Listing page appears. Then create a badge template as required.
Identity Enrollment and Credentialing User Guide Badge Designer The Badge Designer enables the qualified operator to design badge templates for inclusion in badge holder credentials. The Designer consists of these features: • • • • • • User-defined field definitions Background color selection for both badge and components Photo frame placement Text placement Logo and insignia placement Double-sided badge support To create a badge template: 1.
Identity Enrollment and Credentialing User Guide • To create or change the background for this template, select a background color and opacity for this badge template. For more on this, refer to Changing the Badge Background on page 31. • To add one or more pictures, click the button and add pictures to this badge template. For more on this, refer to Adding Pictures on page 32. • To place database fields, click the button and place the required database fields on this template.
Identity Enrollment and Credentialing User Guide Expanding and Contracting Design Field Elements When you have several design elements open at the same time, it can get crowded like this example: To simplify your design space, click a design element word, like ‘Photo’ or ‘Data Field’, to contract the fields as shown below: 30
Identity Enrollment and Credentialing User Guide Changing the Badge Background When you open a new badge template or edit an existing one, the canvas background like this example appears: To change the background: 1. Click the BG Color box. The color palette appears. 2. From the HSV or RGB color fields, enter the general color you require. All possible tints and variations of this color appear to the left in the tint area.
Identity Enrollment and Credentialing User Guide Adding Pictures When you click example: Photo , an element entitled Photo is added to the Attributes list, like the following Toggle this word to hide or reveal the fields in the attribute section below. Click this icon to delete the photo data and hide the fields associated with this for this object. The picture object remains on the canvas until you click the Layer Order button.
Identity Enrollment and Credentialing User Guide issued to William Smith assigned this badge template will automatically populate this field with the value 'Smith'. The same holds true for birth date, badge expiration, eye color, and many others. When you click the this example: button, a 'Data Field:' attribute is added to the Attributes list, like The fields on this page are described below: Data Field Select from a drop-down list the data field you want to include on this template.
Identity Enrollment and Credentialing User Guide Alignment Select the alignment you require for this data field. Text Color Enter the color you require for the text used in this DB field. When you click on this field, a color palette appears. Select the general color, then fine tune it with the slider as required. Each change you make to the text color is reflected on the work space. Opacity In the text box, enter the percentage of opacity you want for the selected text color.
Identity Enrollment and Credentialing User Guide Adding Text When you click the button, a Text field appears, like this example: You can drag this placeholder to another location... ... or use the Text field and associated properties. Notice that a text placeholder appears on the canvas. Use your mouse to drag this text placeholder to the required position on the canvas, or alternatively fine-tune the position using the Location field.
Identity Enrollment and Credentialing User Guide Rotation Enter the value, in degrees, to rotate this object. The higher the number of degrees the farther clockwise the object will be rotated. Default is 0 degrees. BG Color Enter the color you require for the background of this text field. When you click on this field, a color palette appears. Select the general color, then fine tune it as required.
Identity Enrollment and Credentialing User Guide Either enter the path and file name for the image you want to appear here, or click the Image button to locate and identify the image file you want to use. The image you need must be copied to an accessible directory before you can browse for it. Location Enter values to move the image around on the work board. As you change values, the placeholder will change positions on the canvas.
Identity Enrollment and Credentialing User Guide The resulting template will look something like this example: Notice that the canvas shows the objects as they were added, while the preview window shows the objects as assigned in the Layer Order field.
Identity Enrollment and Credentialing User Guide Identity Profiles Defining an identity can take a long time. The identity page alone contains more than 25 fields. Assigning attributes to that identity, such as roles, groups, tokens, and badge templates adds still more time. Identity profiles provide a shortcut that can speed up the process. Identity profiles are pre-defined templates that can be assigned to an individual identity.
Identity Enrollment and Credentialing User Guide 1. From the icon task bar on the home page, click Identities. The Identities Listing page appears. 2. From the sub-menu, select . The Identity Profiles Listing page appears. All existing profiles appear in the list. 3. Click the name of the profile you want to edit. The Identity Profile properties screen for that profile appears. 4. Fill out the required fields on the Identity page. 5. Make changes to the pages as required.
Identity Enrollment and Credentialing User Guide Identity Profiles Property Screen When you click the name of an existing profile from the profile listing page, a screen like this appears: This screen contains the following pages: • • • • • Identity Page Roles Page Tokens Page Groups Page Access Page For a full description of these pages refer to Identity Profiles Pages Field Descriptions on page 43. Identity Profiles - Assigning Groups To assign one group at a time to a specific identity profile: 1.
Identity Enrollment and Credentialing User Guide 3. Click OK. The specified group is assigned to the designated identity profile and all fields and values associated with the profile are assigned to every member of the group. 4. Repeat Steps 1 - 3 to assign more groups to this identity profile. All members of the selected group are updated to include the fields and values specified in this profile. To assign more than one group and set up limits: 1.
Identity Enrollment and Credentialing User Guide • Add: Use these windows to assign the specified roles to any identity that is a member of this profile and require specific values that cannot be customized. • Remove: Use these windows to remove the specified roles from any identity that is a member of this profile. 4. When you're finished, click . Identity Profiles Pages Field Descriptions This section defines the fields and buttons that appear on each Identity page.
Identity Enrollment and Credentialing User Guide Title From the drop-down list, select the title of this profile. To define more options, refer to “User-Defined Lists - Adding Items” in the on-line help or the Workflow User Guide. Department From the drop-down list, select the department to which this profile is affiliated. To define more options, refer to “User-Defined Lists - Adding Items” in the on-line help or the Workflow User Guide.
Identity Enrollment and Credentialing User Guide Allow Remote Access? Check this box to allow a specific identity remote access to the Postgres (transaction) database. Inactivity Timer From the drop-down list, enter the number of minutes this user's activities can remain unrecorded before the user is logged out of the application. Partitions Select one or more partitions from the list. Only those selected partitions can access this page.
Identity Enrollment and Credentialing User Guide Identity Profiles - Roles Page When you click the Roles tab from the properties screen, a page like this appears: This page includes the following fields: Assign Equal Use these windows to assign the specified roles to any identity that is a member of this profile and enable the operator to assign a value in order to customize the role for each identity. Available This window contains the available roles defined by the system.
Identity Enrollment and Credentialing User Guide Members This window contains all roles that are associated with this identity. To add a role to this window, select to highlight one or more terms from the Available window then click the button. To remove a term from this window, select to highlight the term then click the button. Remove Use these windows to remove the specified roles from any identity that is a member of this profile.
Identity Enrollment and Credentialing User Guide Trace Select , TRUE, or FALSE to enable the trace event feature for this token. When checked, the trace enabled token will generate a special trace event each time it is presented at a card reader. The event can then be sent to monitoring, reported separately, and used in global I/O configurations. Download Select , TRUE, or FALSE to enable downloading of this token. This feature is checked and enabled by default.
Identity Enrollment and Credentialing User Guide The fields and buttons on this page include: Assign Equal: Use these windows to assign the specified groups to any identity that is a member of this profile and enable the operator to assign a value to that group in order to customize the role for each identity. Available This window contains the available policy groups defined by the system. If you have used the search text, this window contains all the policies that fit the search criterion.
Identity Enrollment and Credentialing User Guide Identity Profiles - Access Page When you click the Access tab from the Identity Profiles properties screen, a page like this example appears: The fields on this page are: Identity Profile The name of the currently selected profile. Roles A list of all roles with which this profile is currently associated. Access Groups A list of all access groups with which this profile is currently associated.
Identity Enrollment and Credentialing User Guide External Surveillance Cameras Access Control Manager enables the qualified operator to configure several types of external surveillance systems for use by Access Control Manager. These systems includes cameras and video equipment, as well as various types of servers to manage these devices and sensors.
Identity Enrollment and Credentialing User Guide To add an image capture or video recording device to this system: 1. At the Setup links section of the home page, mouse-over Settings. A pull-down option list appears. 2. From the available sub-options, select External Systems. The Cameras listing page appears like this example: 3. Select one of the currently available device types: • • • • For an IP-based camera, go to step 4.
Identity Enrollment and Credentialing User Guide Type From the pick list, select the type of image device this is. You can select from: Web Camera - This is a network-attached camera. RTSP - The Real Time Streaming Protocol is a network control protocol designed for use in entertainment and communications systems. Device IP Enter the IP address for this device.
Identity Enrollment and Credentialing User Guide Alt Name The alternative name for this video server. Appliance From the drop-down list, select the appliance to which this server is connected or with which it is configured. Only those servers previously defined for this system can appear in this list. Address Enter the URL or IP address of this Pelco server. All Pelco servers have a fixed address (assigned when this server was configured) that must be entered here.
Identity Enrollment and Credentialing User Guide Port The Avigilon server port through which the Access Control Manager appliance is communicating. Remote Username The name the user enters in order to gain access to the remote server. Remote Password The password the user enters in order to gain access to the remote server. Local Username The name the user enters in order to gain access to the local server. Local Password The password the user enters in order to gain access to the local server.
Identity Enrollment and Credentialing User Guide Appliance From the pick list, select the appliance this server is connected to. Address The web address defined for this video recording device. Click on this address to bring up the Milestone Server Edit page for this device. Port Enter the Milestone server port through which the Access Control Manager appliance is communicating. Username The name the user enters in order to gain access to this server.